All posts by Axel

http://www.geekdot.com/about-me/

PiTRAM ahead…

So many projects, so little time 😉

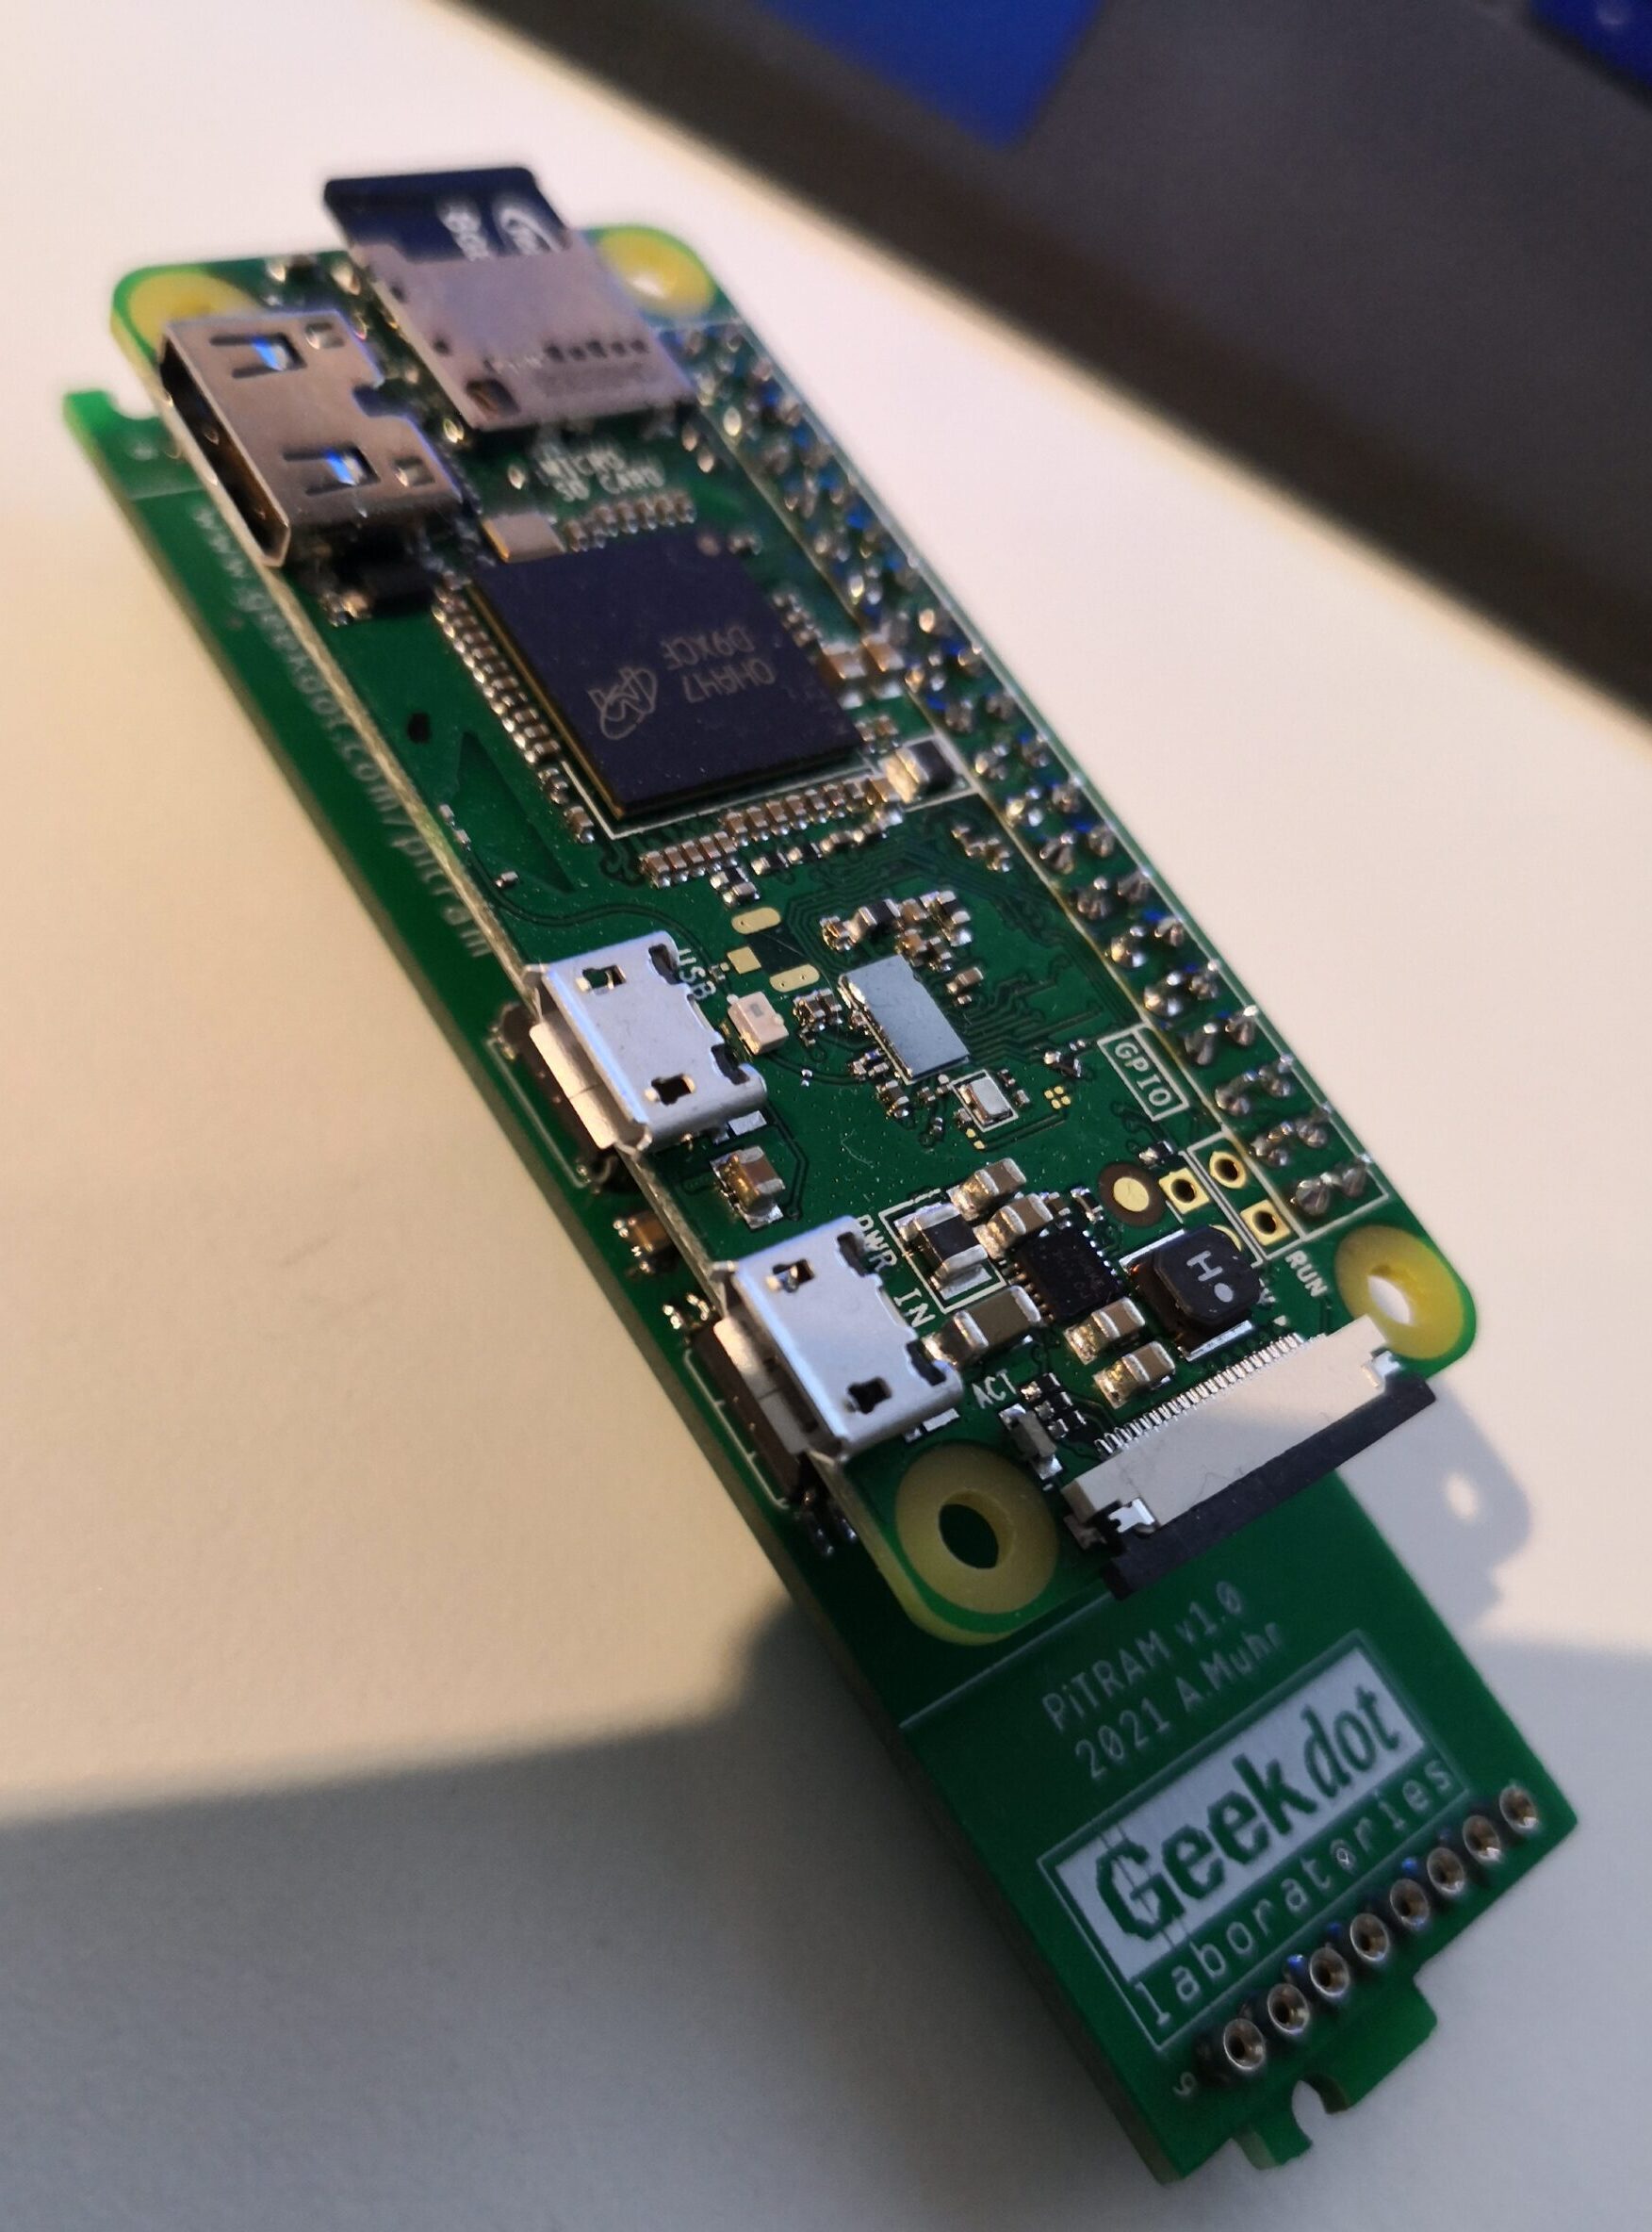
After the Raspberry Pi Zero is used for nearly everything in the retro computing scene (ACORN tube processor, AMIGA CPU and/or video-controller replacement etc.) I thought it’s about time to bring it into the Transputer world, too. Say hello to the PiTRAM!

It’s basically a C011 link-adapter and some level-converting. That way the RasPi can talk to an existing Transputer network and vice versa.

So the hardware is done… as usual, the software is the problem. Anyone volunteering for a Transputer core? A SCSI to SD-Card driver? Video controller? Wifi? 😉

NumberCruncher Reloaded

The NumberCruncher Reloaded is a peripheral card for the Apple II series that features a math co-processor, often also called a Floating Point Unit (FPU) which is specialized on, well, floating point calculations. Doing so, it is much, much faster than any 6502 or 65c816 CPU ever will be.

That said, the NumberCruncher Reloaded will not automatically speed-up your programs as CPU accelerators like the Transwarp GS, ZIP CHIP or AppleSqueezer would do. Programs will have to be either specifically written to use the NumberCruncher Reloaded or use a floating-point library like the SANE interface which then needs to be patched to itself use the NumberCruncher Reloaded for calculations instead of the main CPU.

TLDR; In a hurry? Here are some shortcuts for this page:

In the beginning…

The “Reloaded” in its name hints towards the fact that this is a reboot of an already existing card. To make writing/reading easier, NumberCruncher Reloaded might be shortened to ‘NC-R’ further down this page…
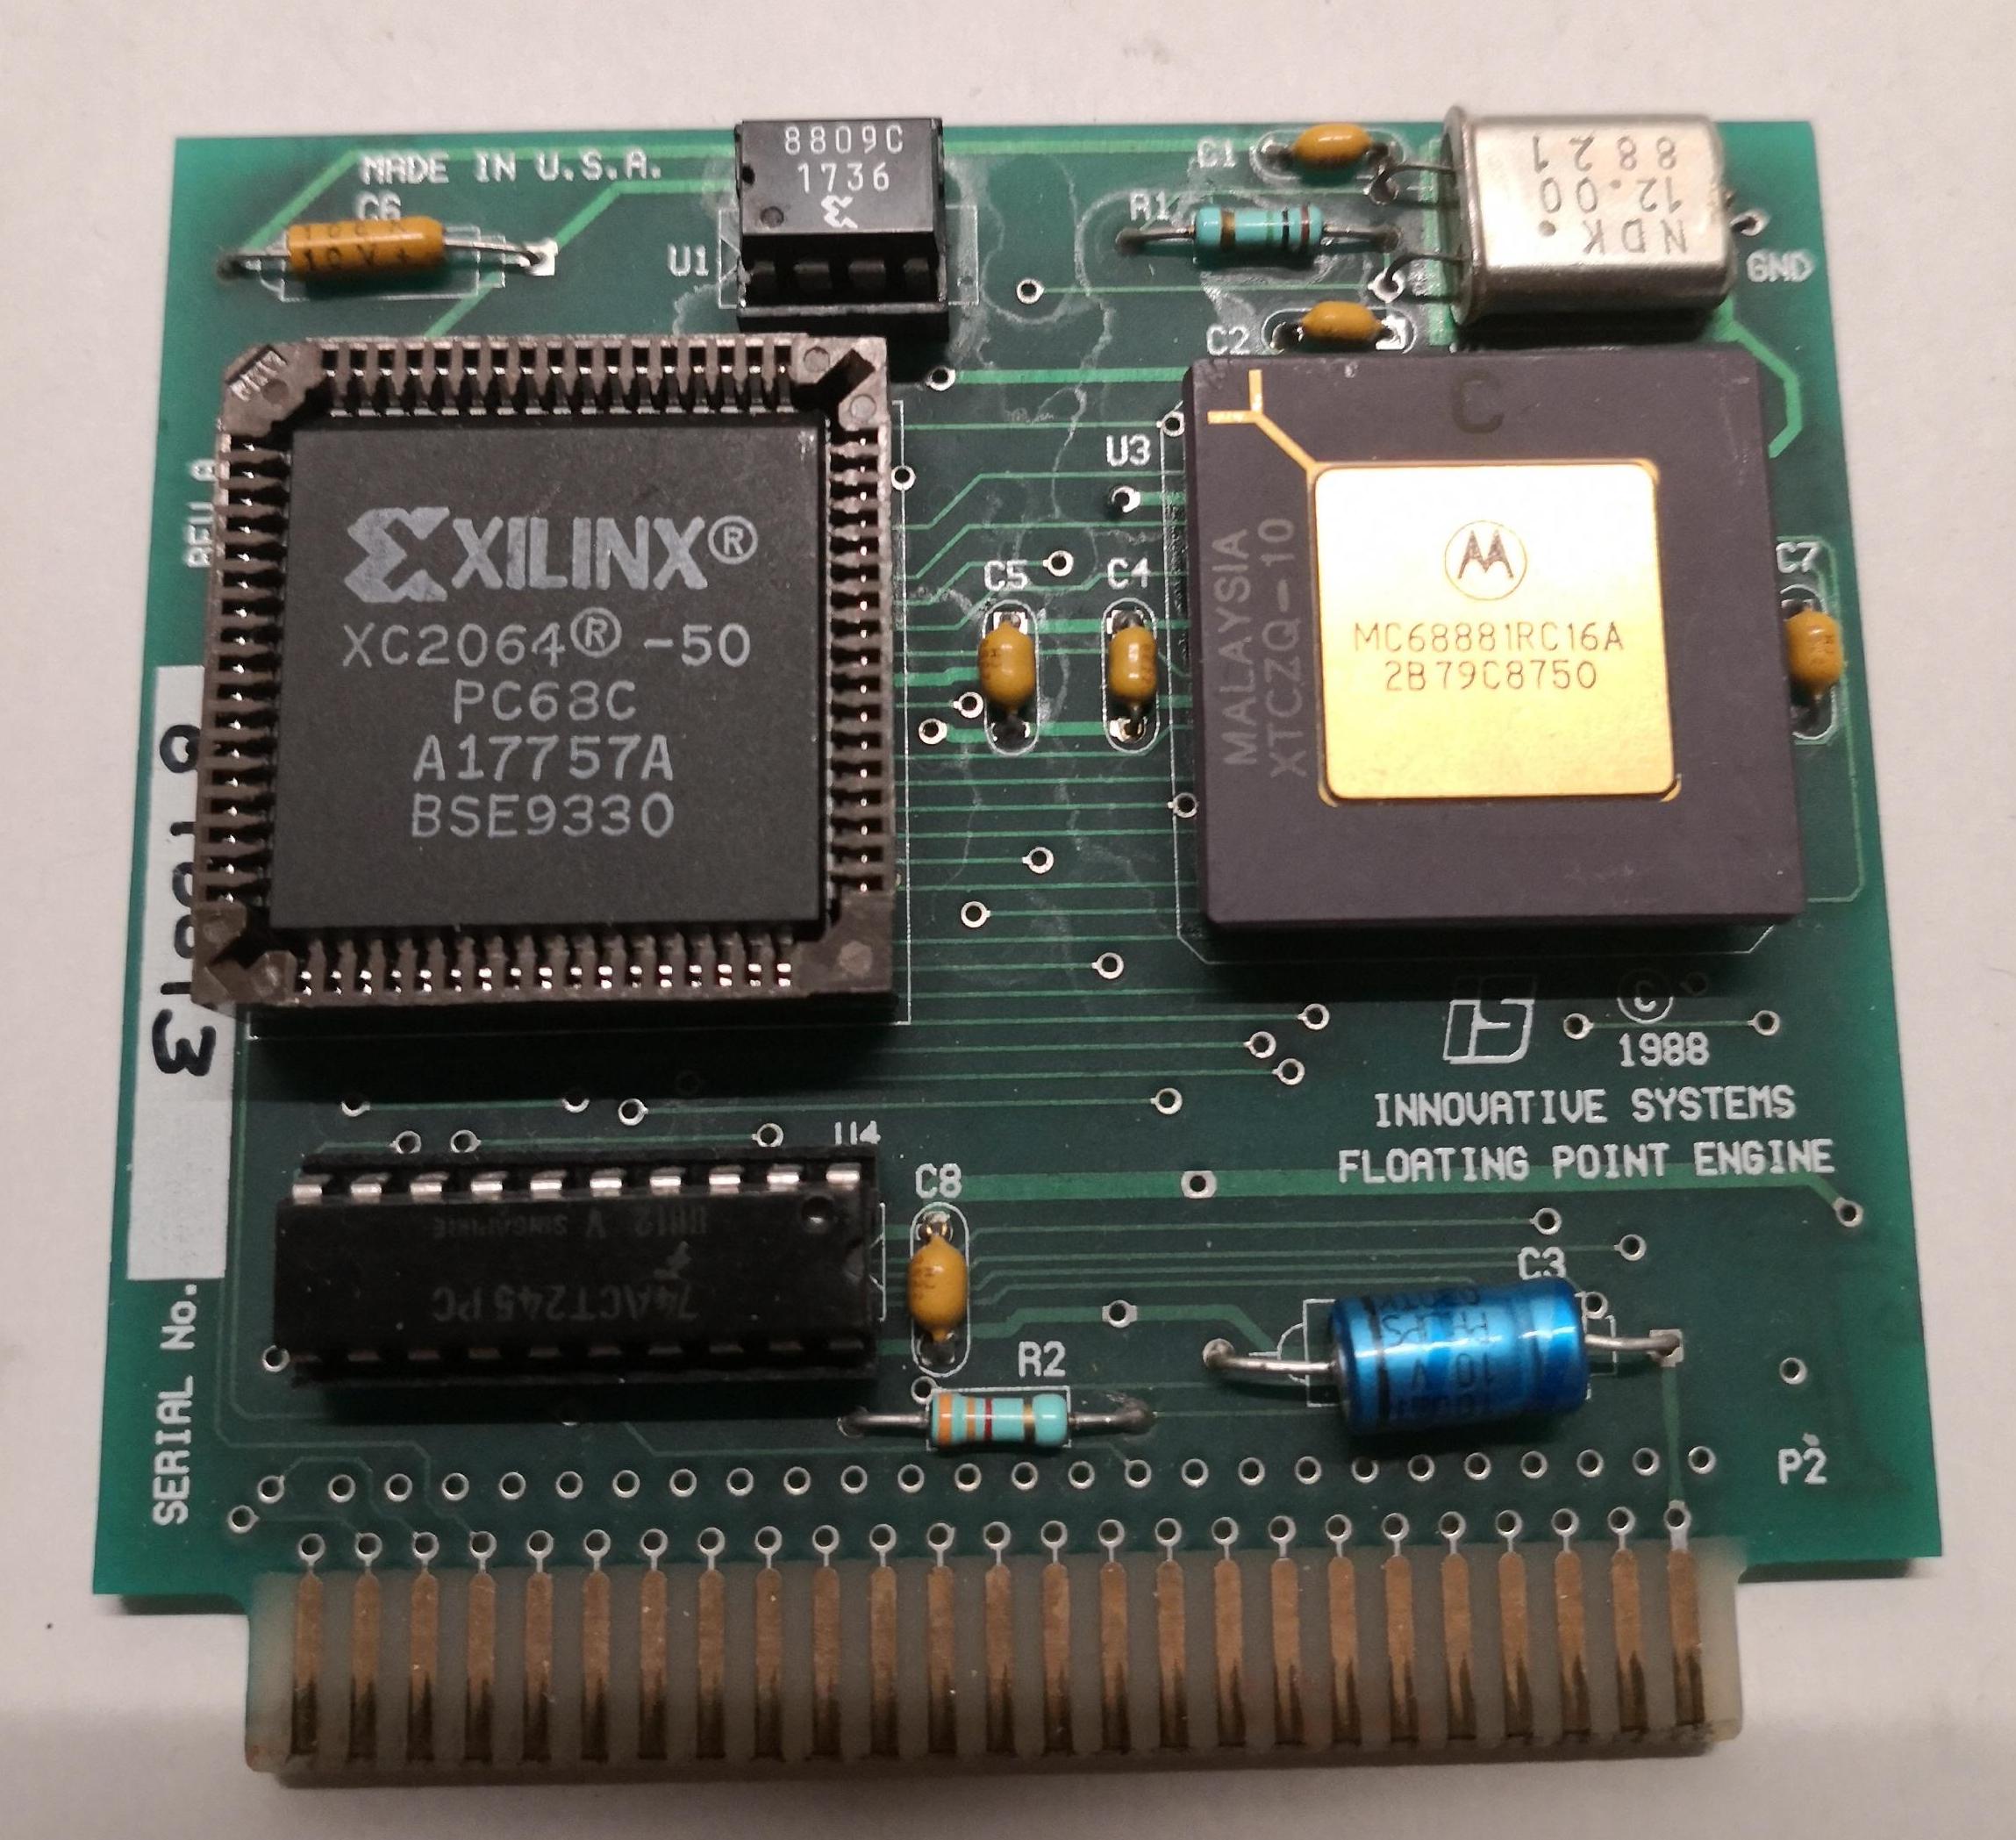
In 1988, there was the Floating Point Engine (FPE) created by Innovative Systems (‘iS’ for short).
Read more about those in my separate post over here.

While it was a great idea, it wasn’t the most stable design – but it laid the foundation especially and most importantly for the software we’re still using today.
Due to the FPE’s issues there was quite some displeasure in the user-ship and in 1990 a German company called Alternative Systems announced the Number Cruncher, an ‘overhaul’ of the original design – here’s their newsgroup announcement:

“The FPE is suffering from a major problem, namely the coproc is crashing internally and has to be reset in software. This happens in a non-deterministic way, and software written for that engineering junk must be adapted to that.
The Number Cruncher is compatible with the FPE but is actually what the FPE was supposed to be – a math coproc that works. It performs very well.”

Over the years the FPE as well as the NC faded in unobtanium. Because they were cool, and I love processors of all kinds it was time to revive the Number Cruncher.

Revival!

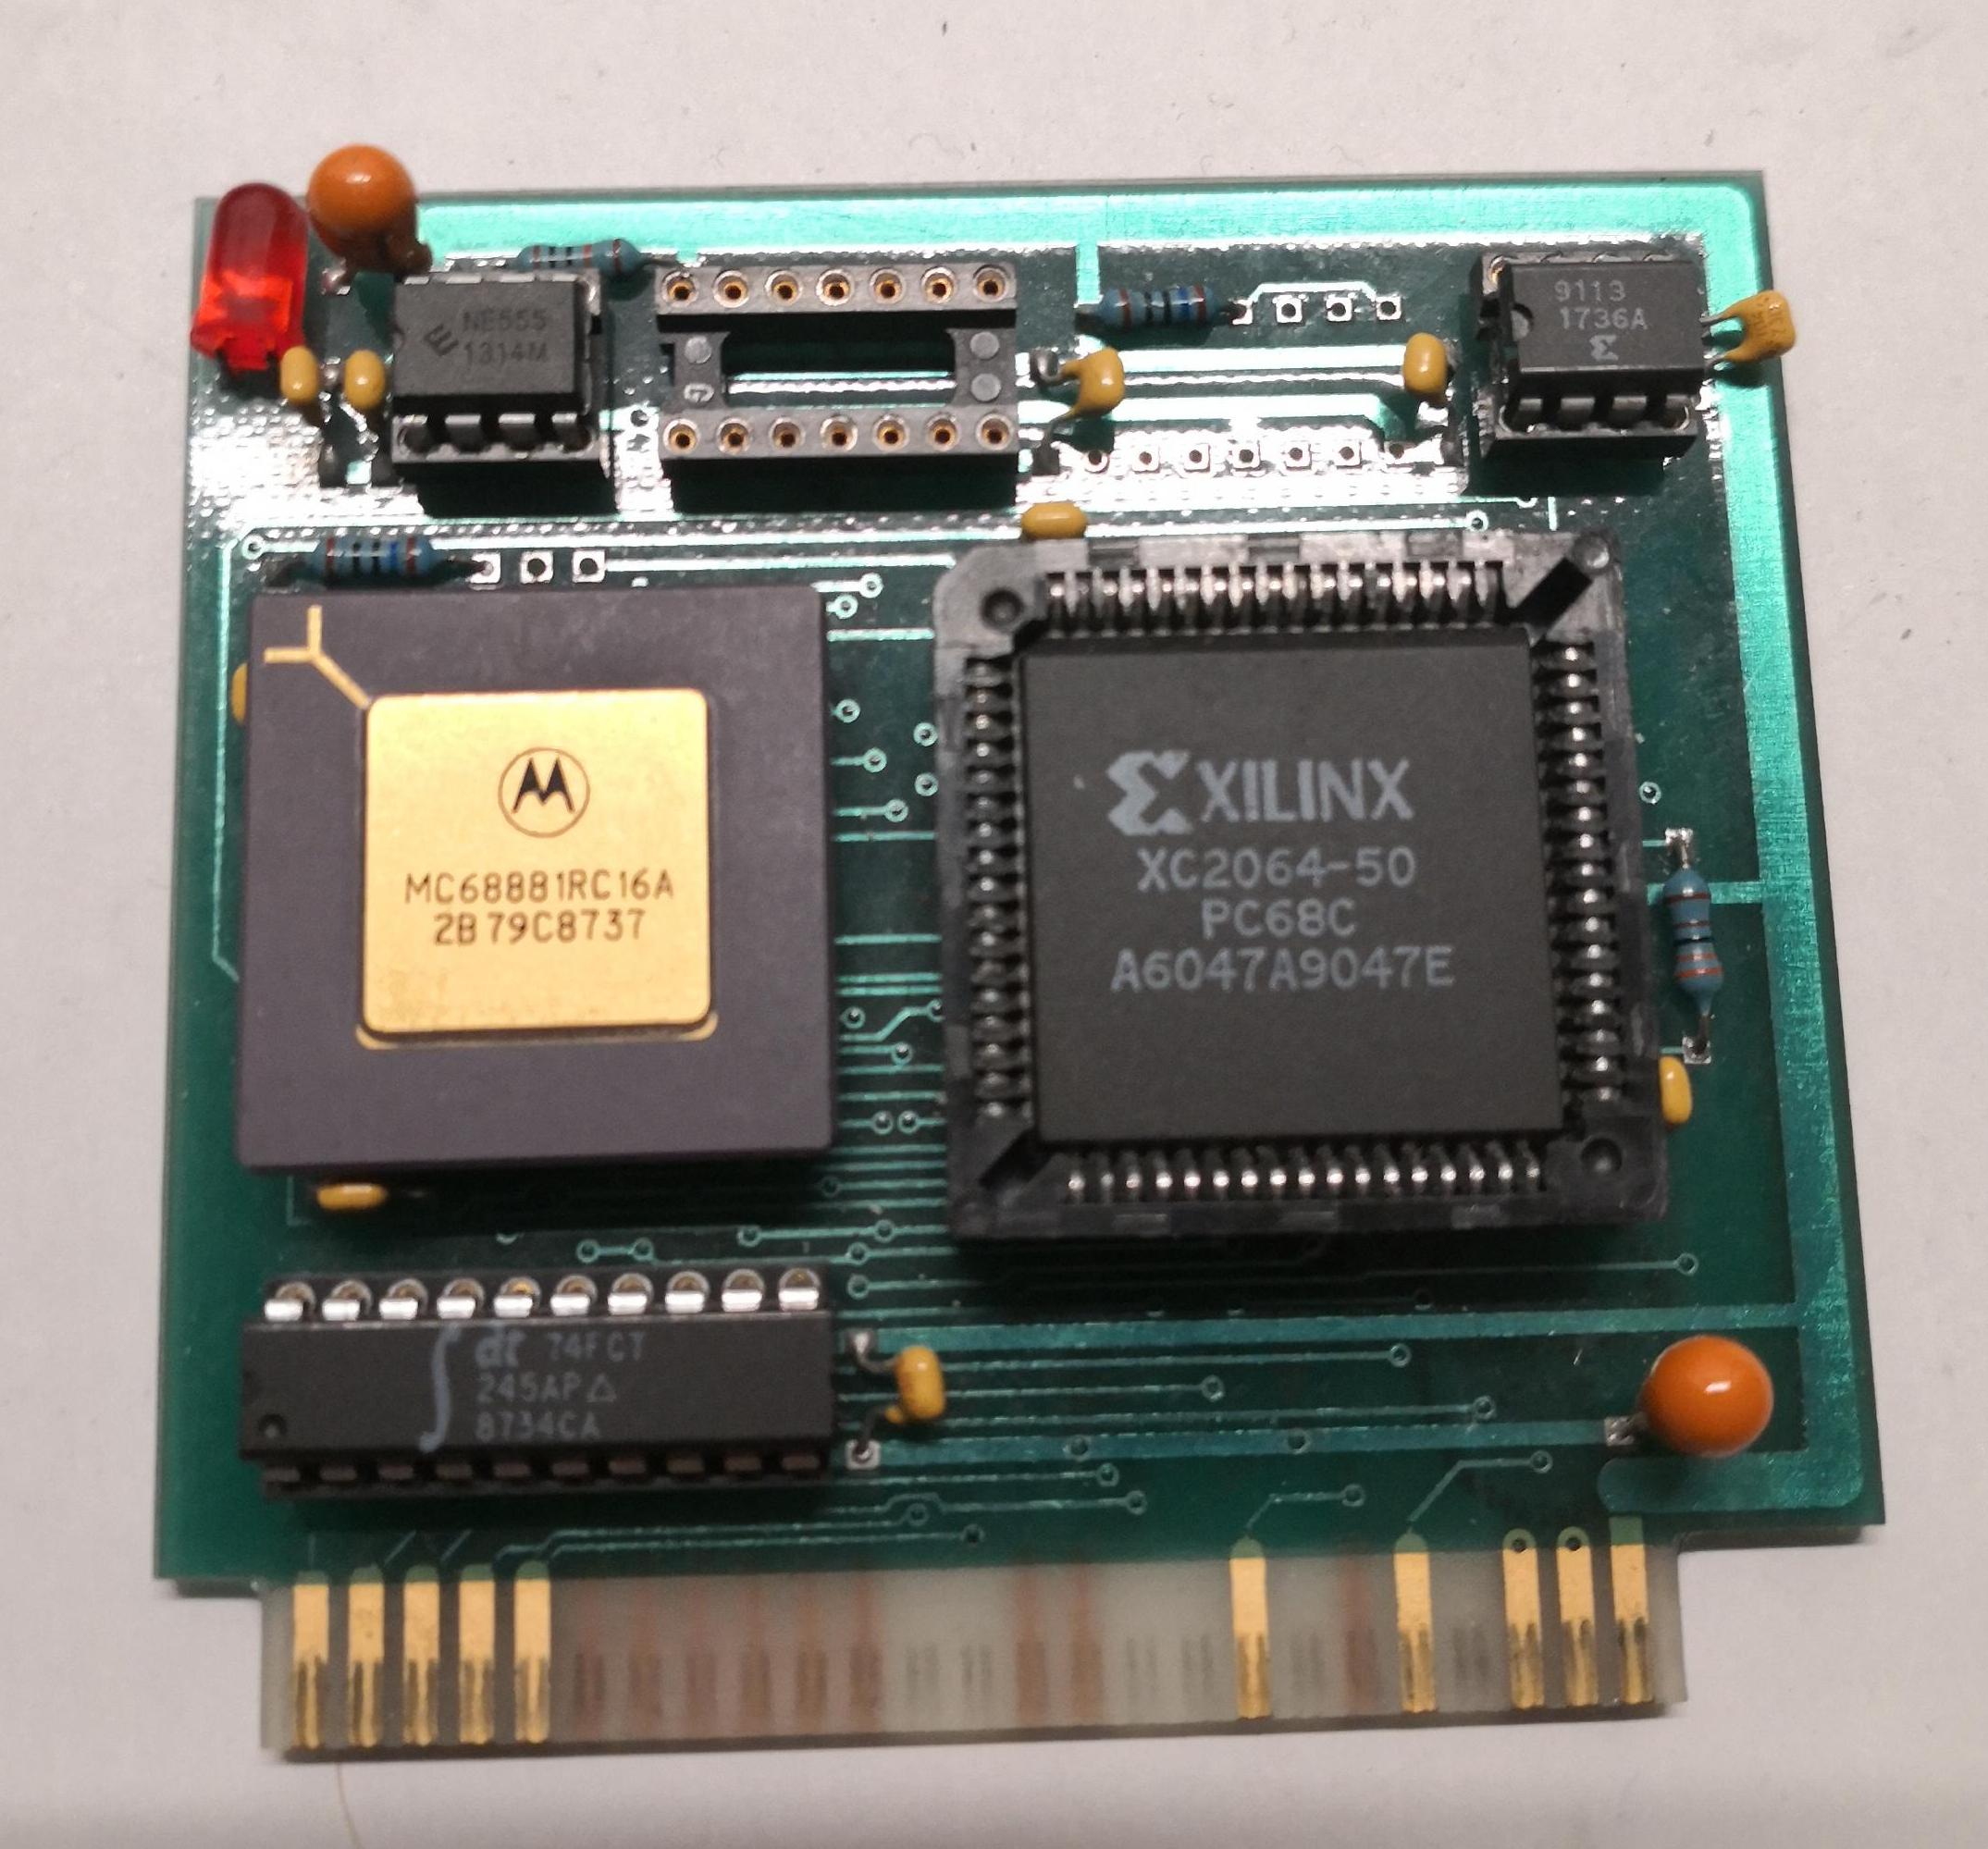
If you have read the above mentioned post about the the FPE you learned that the predecessors were built around the first, very obsolete and proprietary FPGA, a 555 timer and the 68881 FPU. All these parts would have a Facebook status of ‘#complicated’ today and needed to be replaced.

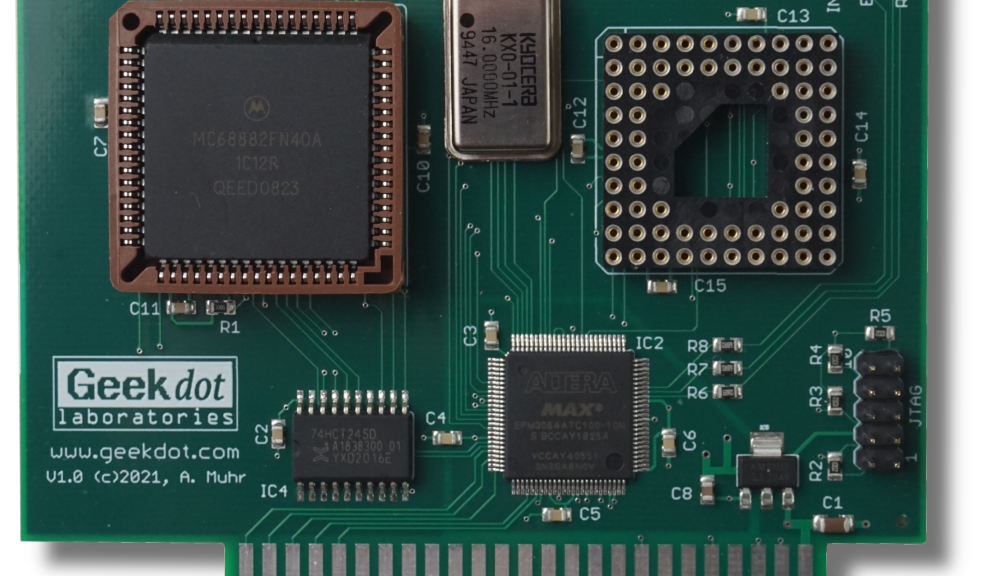
Logic: The Xilinx XC2064 FPGA was replaced by something more recent like my universal 5V-tolerant weapon of choice, the Altera EPM3064 (aka MAX3000). That little fellow has enough logical gates and using the 100-pin version sufficient I/O-pins are available even when using ISP. The timer for blinking the busy-LED went into this, too.

FPU: There are still some 68881 around, but the 68882 is much easier to find  and both are cheaper in PLCC packaging than ceramic PGAs as of today. But as future NC-R owners might already own one or the other, so we’ll go with… both. Yes – to offer maximum flexibility, you can use either Pin-Grid-Array or PLCC packages.
Physical differences aside, the original FPE/NC did not work with the 68882 – the NumberCruncher Reloaded does.

To sum it up the NumberCruncher Reloaded was improved in many aspects to make it much more usable in the 21st century:

  • it also supports the enhanced and the easier to find MC68882
  • FPU’s can be used either in pin-grid-array or PLCC package thanks to the two sockets provided. Again, the latter being much more common these days
  • Further increased stability by using low-power SMD parts and a 4-layer PCB with dedicated supply layers
  • Speed optimized FPU protocol handling
  • 2 more LEDs, which I consider very important.
  • Updatable firmware (ALTERA ByteBlaster required)

Provided Software

In contrast to my T2A2 Transputer Link-Adapter, there is already some software available for the NC-R.

The Tools Disk

This is a good start but was mainly intended for that warm fuzzy feeling of unboxing a real product 😉

Download: 2MG image or ShrinkIt image

  • Up to Sept.23rd 2021 there was an error in the 2MG image – One INIT was corrupted
  • On Nov. 3rd 2021 the image was updated with the new SANE patch INIT
  • May 27th 2022 – added some low-level benchmarks by Dirk Fröhling

Still, based on the original Innovative Systems disk (updated to the latest releases),  it provides everything you need to start:

  • All Apple IIGS-related software is located in the FPE.IIGS folder.
  • All Apple II/II+/IIe-related software is located in the FPE.6502 folder.
  • The Appleworks 2.x modification software is located in the APPPLEWORKS.FPE8 folder.
  • The EXAMPLES folder has some code snippets to show you how to talk to the NC(-R)
  • The BENCHMARKS folder contains the executables of the different benchmarks by Dirk Fröhling used in his blog entry.
    The archive on his page contains the sources, too.

In the FPE.IIGS folder you will find:

  • The folder called NCR.INIT containing the new SANE patch init which is highly recommended to be used with your Apple IIgs.
  • In the FPETOOLS.INIT folder you’ll find an archive containing the FPE tool set named FPE.INIT.Sx . These were developed by/for iS and are now deprecated and left on the disk for completeness.
  • The EXAMPLE folder contains an assembly language file which demonstrates the use of NC-R register-to-register operations to significantly improve floating point operations speed.
  • The BENCHMARK folder contains an ORCA/PASCAL version of the SAVAGE benchmark and an APW C version of the Byte Magazine floating point co-processor benchmark. (The program in example is an assembly language adaptation of the co-processor benchmark).
  • The APW.ORCA.FPE16 , MERLIN.FPEand LISA816 folders contain macros and equates files for use in assembly language programming.
👉 There’s an updated INIT (V1.15) available here, written by Vincent Hemeury . 
This fixes an issue when running the NC-R with other tools using the SANE API (e.g. Twighlight II 2.0 screensaver module “Ripple”)

The NCR.INIT requires some extra explanation because it is a very elegant solution to put the NC-R to use:

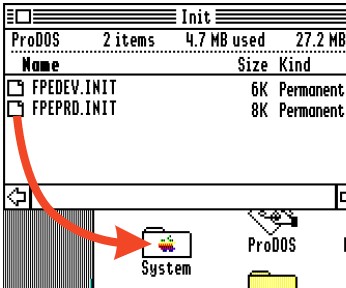
This init redirects every Standard Apple Numerics Environment™ (SANE) floating-point call to the NumberCruncher Reloaded – so as long an application using the SANE library calls it will be accelerated. All you need is to copy the INIT from the NCR.INIT/Init folder into your SYSTEM folder.
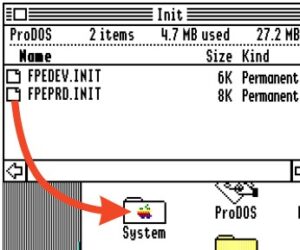
 

…and you’re done!

The INIT will automatically detect your NC-R in any slot (if installed) and will nicely show so during boot-up like so:

Apple II

Compared to the IIgs, the support of an FPU is generally limited.
Michael J. Mahon wrote a very good explanation how to still use the FPE/NumberCruncher Reloaded with an 8bit Apple II(e) and why it’s not as efficient as being used in a 16bit IIgs.
Still, he wrote a patch for FPBASIC as well as some example code how to make use of the 68882.

As mentioned before in the FPE.6502 folder you will find all tools for the Apple II.
That also has a SANE patch which can be found in TOOLSET:FPE8.TOOLSET.  This toolset uses the following calls:

jsr $2100 ; to call the fp6502 routines 
jsr $2104 ; to call the ELEMS6502 routines

It loads into locations beginning at $(00)2100 and has a length of less than $1000 bytes.

I have included the APW.ORCA.FPE8 and MERLIN8.FPE macro folders.

The APPLEWORKS.FPE8 folder contains the Appleworks 2.x modification. To modify your copy of Appleworks, just run FPE.SYSTEM from the root folder and answer the questions. The modified code will automatically access the FPE whenever a floating point operation is required.

Mandelbrot!

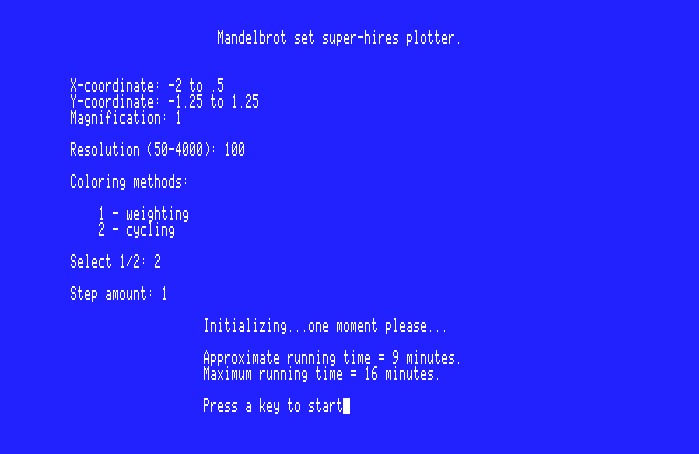
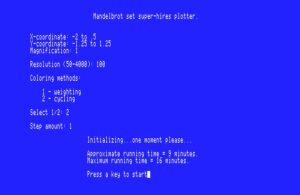
In the FPEfractal folder you will find Zoombaya (and other fractal programs, all by Glen Brendon).
This is my currently favorite tool for benchmarking and testing.
It’s written in Applesoft BASIC(!) and uses Glens cool so-called ProCMD module which sets up an interface between Applesoft programs. The downside is, that it uses some 65816/65802 specific commands. So running it on a 6502 CPU will lead to a crash.
“Real” Applications

Yes, there actually were some applications making use of an FPU accelerator, eg. function plotter, math tools like a poor man’s Mathematica etc. – all written for GS/OS. Sorry Apple II users… hopefully other A2 enthusiasts start writing programs using the NC-R, too.
I prepared an dedicated post about them to make this one as short as possible:
So if you’ looking for some ‘food’ for your NC-R head over to the NumberCruncher Reloaded Software post.

FAQ

The ever growing FAQ and programming details were put into a post of its own. So you’re kindly invited to follow this link if you have more specific questions…

Benchmark

Still, we’re all hackers of some sort, so you might ask yourself “What’s the fastest option?” or “Can I make it even faster?”.
Well, while the 68882 is up to 30% faster than the 68881 due to its capability to execute commands in parallel this mostly doesn’t matter in the case of the NumberCruncher Reloaded.

As mentioned in the feature-list, thanks to protocol optimizations the NumberCruncher Reloaded is already a tiny bit (~4%) faster than the original at the same clock-speed, but more important is that it “saturates” later.
This means while with the FPE/NC you don’t see any improvements beyond 12MHz the NumberCruncher Reloaded still benefits from a faster clock up to 16MHz.

From there it does not make much sense as the Apple II bus, clocked at 1MHz, is the limiting factor here.

Using the ‘Zoombaya Mandelbrot’ program included on the Tools floppy disk on a TransWarp GS @ 10MHz gives these calculation times:

MHz Original NC NC-R 68882 NC-R 68881 Faster than NC
11 3:59 3:55 3:55 ~1.5%
12 3:55 3:45 3:45 ~4%
16 3:55 3:12 3:12 ~20%
20 N/A 3:12 N/A N/A

The speed of your Apple computer very much plays into the equation, too. It handles all the writing/reading and of course the endian conversion.
Here’s an NC-R clocked at the default 16MHz installed in an Apple IIgs running the same Mandelbrot at different clocking:

‘normal’  1MHz ‘fast’ 2.8MHz TWGS @ 10MHz TWGS @ 12 MHz
8:35 4:39 3:12 3:10

The TransWarp GS seems to saturate pretty early. Most likely because it’s running the code completely out of its cache.

❗👉 Dirk Fröhling, one of the original creators of the original Number Cruncher got a NC-R and did some very detailed benchmarks.
He also provides the sources to his benchmarks as well as the believed to be lost sources for Albert Chin-A-Young’s original SANE INIT!
Read more about those in Dirks blog article over here.
InSANEly savage!

Vincent Hemeury (the author of the new INIT) found an article in the famous BYTE magazine (from July 1987) where they compared the performances of a Mac SE with or without 68020/68881 accelerators and a PC AT or a Compaq Deskpro 386 with an 80287 numerical coprocessor.

The version of his InSANE in the archive sometimes uses direct access to the 68882 of the NC-R. In this case, a IIGS with an AppleSqueezer accelerator and the NC-R is 5.6 times faster than the Compaq Deskpro and 30% faster than the fastest machine (for the Savage test) of this benchmark, the 68020 HyperCharger.

As an outstanding example of the speed’s improvement of a coprocessor for some operations, the same machine is still faster than a 700 MHz IIGS (KEGS with a Mac Pro) for financial operations. And one limiting factor is the 8-bit bus at 1 MHz of the IIGS – imagine having this clocked faster…

Also, Vincent wrote a little benchmark (included in the INITs archive) called “inSANE” which tests the financial functions.
The speed gain is spectacular :

  • IIGS AppleSqueezer / NC-R disabled : 70 sec to complete the first test
  • IIGS AppleSqueezer / NC-R Init v1.03+ : A bit more than a Second(!) for the same test

A vanilla IIGS roughly needs more than 4.5 minutes to complete this test.

Purchase

Of course you want one now 😉 The first batch of 35 cards is sold out. That said…
The 2nd run of cards is available now. Output is slow as I have to hand-solder the 100pin TQFP CPLD (due to chip-shortage when I had them produced). On the plus-side, the PCB is ENIG gold plated now.
I’m building & testing them on-demand – just mail me if you’re interested in one.
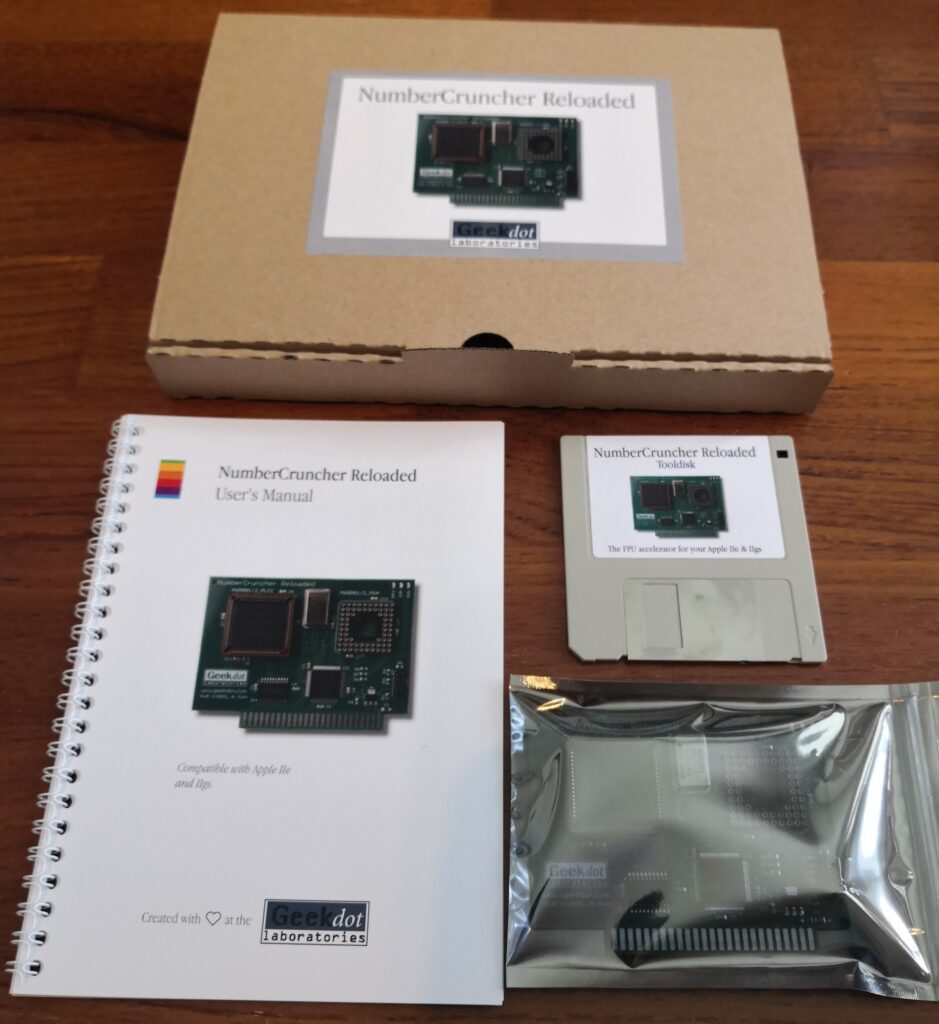

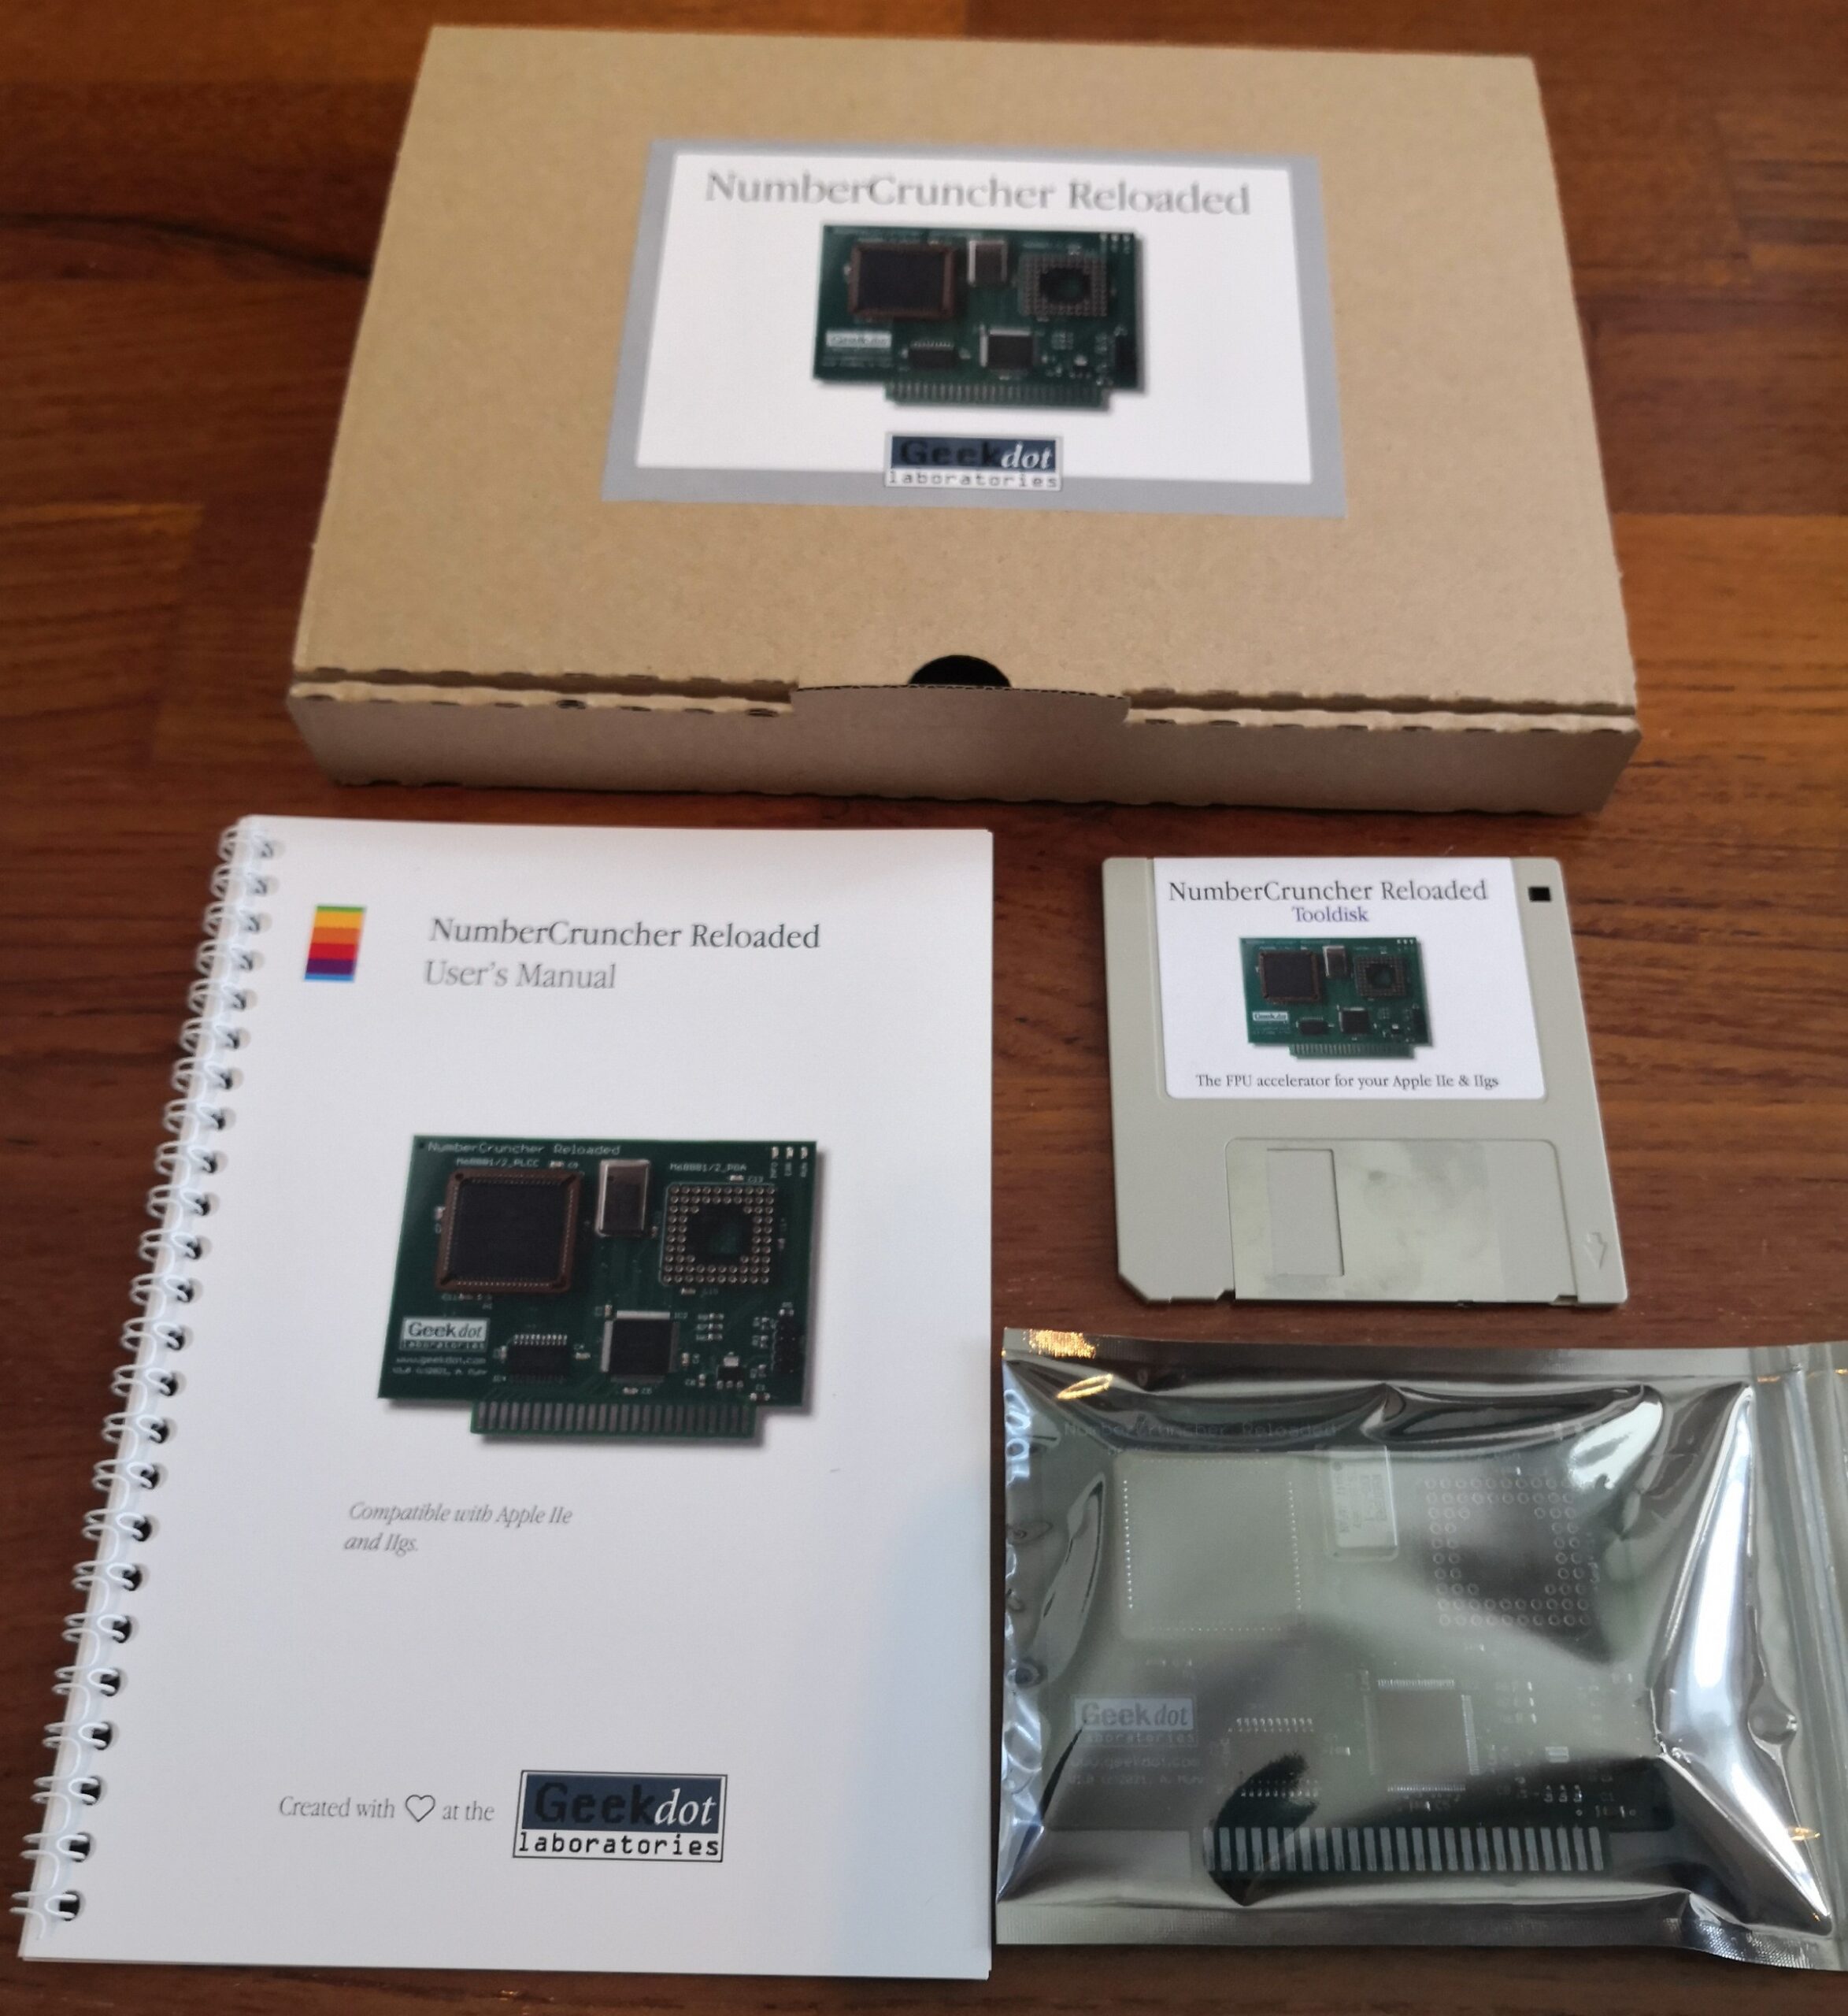
Ahhh, look at those beauties!The NumberCruncher Reloaded comes in a nice, eco-friendly box with a high quality, glossy spiral-bound manual and an 800k ProDos floppy.

You can choose from 3 different configurations:

Config 1 “Plug’n’Play”:
NC-R with just the PLCC socket, a 68882 FPU is already installed. Plug the card into your Apple and you’re ready to go:  €88.82

Config 2A “I have a PLCC FPU”:
NC-R with just the PLCC socket – you provide and install a PLCC 68881 or 68882 yourself: €80.82

Config 2B “I have a PGA FPU”:
NC-R with PLCC plus a Pin-Grid-Array (PGA) socket – you provide and install a PLCC or PGA 68881 or 68882 yourself €84.82
(There’s no PGA-only option because the PLCC slot is used for the  final function-test)

Shipping

It’s 2021 and the world is  suffering from the COVID19 pandemic. Shipping services are still providing very limited services.
I am shipping from Germany as trackable package only. Also I chose the box dimensions that way, that it snugly fits into DHLs shipping categories.
I ship the box in an extra box for better protection against “Crazy delivery men”.

 Shipping into the European Union was just recently increased to 15€
(Just in case, for Germany it’ll be 7,70€ as “Paket”)

  UK and Switzerland will be 20€ then.

 The US, Canada and Australia will be 27€

*) I had shipping times from 10 (USA) to a hefty 60 days (Australia). Totally random, no idea what influenced the one or the other.

Ordering

Because of bad experiences in the past, this is pre-paid only.
Again: This is a hobby project made for fun & the community, I’m not a business.
I accept PayPal (for friends) and bank-transfer.
To order, send a mail to ncr@geekdot.com stating

  • your Address
  • the NC-R version(s) you like
  • the preferred shipping method
    • wrapped
    • box-in-box standard
    • box-in-box priority

I will then send you all the details for paying & shipping. As soon I received the money, I will ship and send you the tracking information.
If you want to arrange a group-buy I can reserve a certain amount of NC-Rs for a max of 5 days. After that they will be sold on-demand.

The Number Cruncher – FPU for the Apple II

This is a post I’d like to write since 2006… so 15 years after I’ve put all the Transputer, MIPS, i860 and-what-not stuff aside and made some room for my other (late) love: The Apple IIgs

You might have stumbled about my post/project connecting a Transputer to the Apple II called the T2A2… well, what I did not mention was, that the inspiration to this came from another card built in 1988, called the FPE made by Innovative Systems. That’s a small card featuring just a buffer, an old XILINX FPGA (actually the first of its kind) and the Motorola 68881 floating point co-processor.

Co-pro-ces-sor! I was hooked!  😯

After more research I learned that the FPE was actually a diva like this newsgroup post says:

“The FPE is suffering from a major problem, namely the coproc is crashing internally and has to be reset in software. This happens in a non deterministic way, and software written for that engineering junk must be adapted to that. “

But a bit later there was something better available: The Number Cruncher (NC for short). Fine German engineering  😉 And the newsgroup post was quite nice to it:
“The Number Cruncher is compatible with the FPE but is actually what the FPE was supposed to be – a math coproc that works. It perfoms very well.”

This is the “marketing blurb” from back then

  • totally compatible with the FPE from Innovative Systems
  • much less sensible to heat, voltage problems etc.
  • supports the FPE SANE patch for speeding up any program that does floating point calculations
  • you can compile ORCA/Pascal and C programs to use it directly with the special floatlib for the FPE provided by The Byte Works
  • works in any slot (slot 3 & 4 without need for setting it to “Your Card”)
  • works with TransWarp GS and Zip GS accelerators and RamFAST SCSI card
  • comes with lots of mathematical software and an enhanced SANE patch by Albert Chin-A-Young

I directly contacted the creators of the NC, Dirk and Andreas, but both of them hadn’t had a tiny bit of the NC left. No schematic, no HDL, no nothing 🙁

During looooong and wild eBay raids I managed to get my hands onto an FPE as well as on an NumberCruncher. Woohoo! They both work with the same driver and yes, the NC is much more robust than the FPE.
But it seems that there are only a handful of them survived, if anymore at all. So I thought it might be interesting for me and others to make a re-release…

Let’s re-animate the Number Cruncher!

So, again, it’s up to me to save the world… reverse-engineering time again!
This job consists of two parts – dissect the hardware and to get a better understanding of this, the software/driver, too.

Hardware

Well, you could simply rebuild the card, copy the bitstream from the serial PROM for the FPGA and you’re done.
But it’s not so easy, as the FPGA which has been used, the XILINX XC2064 is long time EOL’ed and if you buy old stock, they’re more expensive than a comparably recent CPLD – if they’re not Chinese fakes and/or broken… not mentioning that a simple copy-paste job is not really manly 😉

The XC2064 is a 5V FPGA (the first of its kind actually), has 600-1000 logical gates and 58 user IO pins of which 32 are used. It is getting its bitstream fed by an external 12K serial PROM. I’ve pulled the bitstream in a file available here, but because XILINX never documented that format, it’s pretty much useless.
The rest is all standard stuff. A ‘245 transceiver, an oscillator (~12MHz)  and some chicken feed.

Revving it up

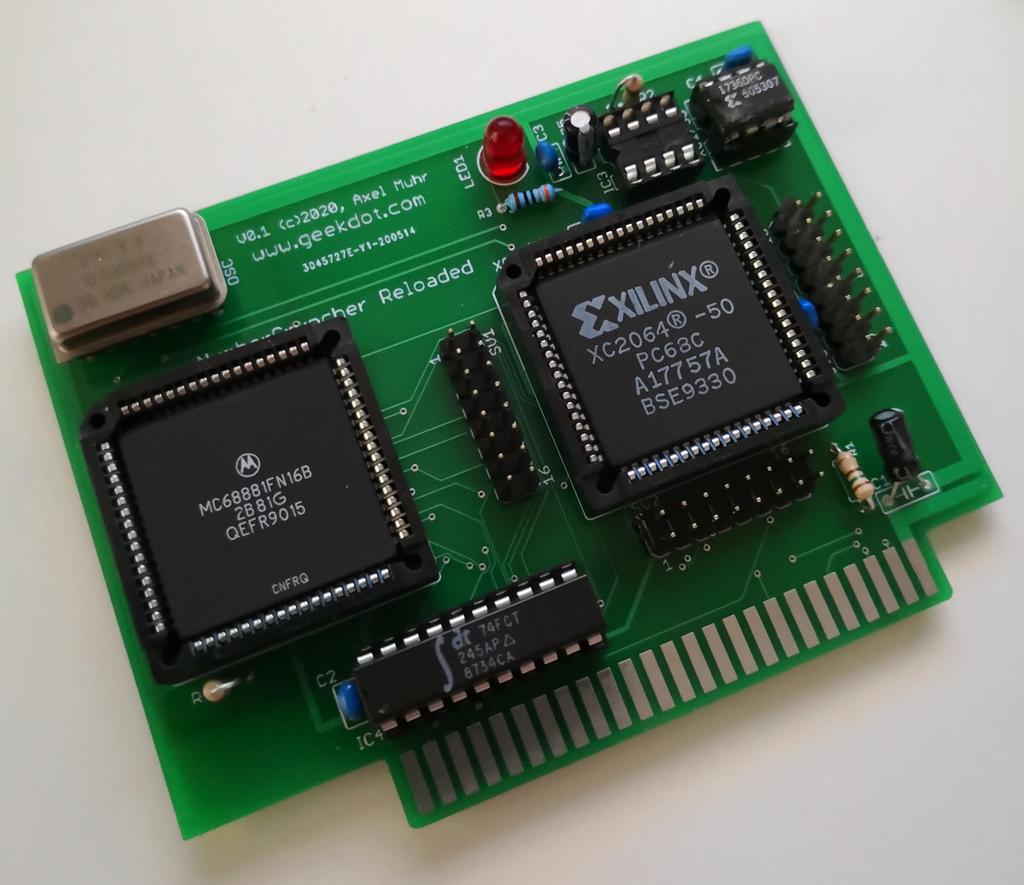
To prove that I got everything right and having a better attack analysis vector I designed the “NumberCruncher Reloaded v0.1“… more or less a 1:1 clone but bringing out all FPGA signals to pin-headers to have a convenient access for my logic analyzer.
Also I used a PLCC version of the 68881, because I have more of those.

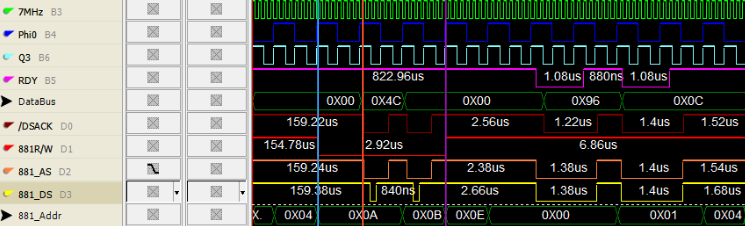
Then, out went the logic analyzer and weeks and weeks of looking/listening to the the FPGAs conversation to the the FPU and Apple bus while having the 68881 manual on my lap, I got an idea of what’s going on.

Software

Later I found the original floppy which came with the NumberCruncher containing  just the init-files for GS/OS patching SANE to use the FPU instead of the 65c816  (download the ShrinkIt archive here) – well, at least something!

Next came my ol’ buddy Mr. disassembler… a lot. About a year on-and-off… and here’s my initial, slightly commented disassembly of the SANE patch.

Again, some years down the road I found the floppies which were delivered with the FPE and those are quite helpful with code examples, assembler macros and libs etc. – that would have been quite helpful during the disassembly  😕 Anyhow, it’s good to see that most of my interpretations were correct.
Also, the FPE came with quite a nice manual – which actually was more valuable than the card 😉
It very well describes the basic functionality, the FPU registers used and the programming side of things – even the most important parts from the 68881 manual are cited. Very good job on that Innovative Systems!

Having all this at my hands I was prepared to start and after some huffing and puffing the NumberCruncher Reloaded v.1.0 was born.

Update 18, 19, 20…

Oh boy… I really neglected the news…  there are quite some updates on Geekdot, but they just happen 😉

Mainly there were lots of Apple Mac (68k) things going on – repairing, recapping, brighting and hacking… but there always was a major theme: I worked with other nerds specialists on their projects. Be it the Carrera 040 in an SE/30 effort or a very special PC not working anymore. It’s fun to dip your toe into different waters every now and then.

That said, I moved the sidebar around a bit. The recent posts went onto the top and this news section was moved down as I feel it’s a bit redundant.


Olivetti LSX 5010

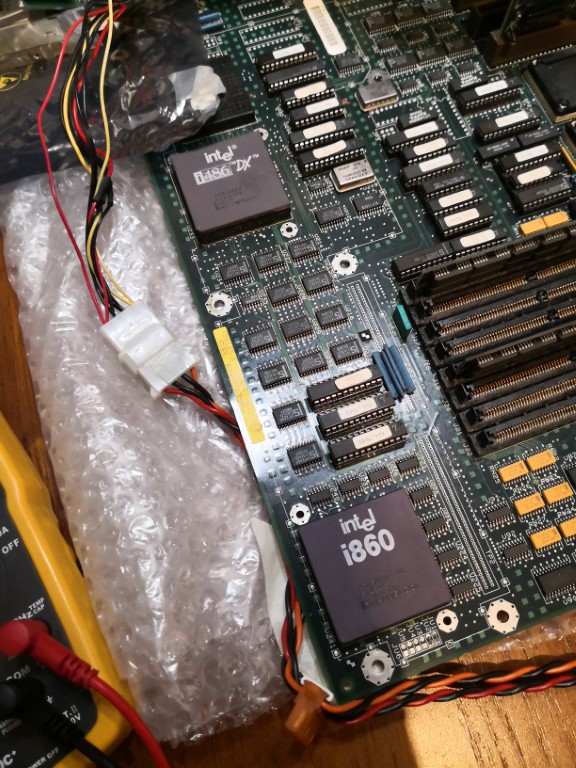
Years ago I got that broken Olivetti CP486 board (the predecessor of the LSX 5010 and 5020 family) – one of the two ever made i486/i860 combo Mainboards (the other one was the 4860 by Hauppauge). Well because it was broken, missing important parts and I felt like I’m the only one on the planet having such system I dumped it.

There’s life out there!

Now I learned there are at least two LSX 5010 owners left on this planet and one of them contacted me, primarily asking for an i860… well, long story short:
His LSX 5010 was broken, too, but complete! We agreed on a deal: I try to fix it (plus an i860) and he’ll give me a system out of his collection.

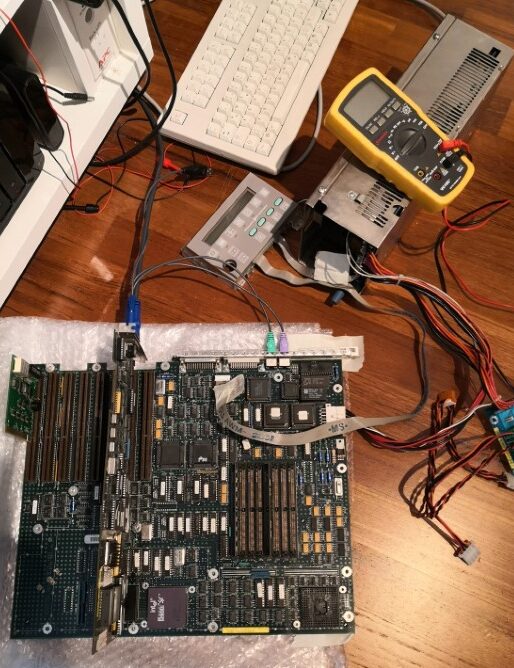
Some days later I had everything I’d call a good-to-go system:

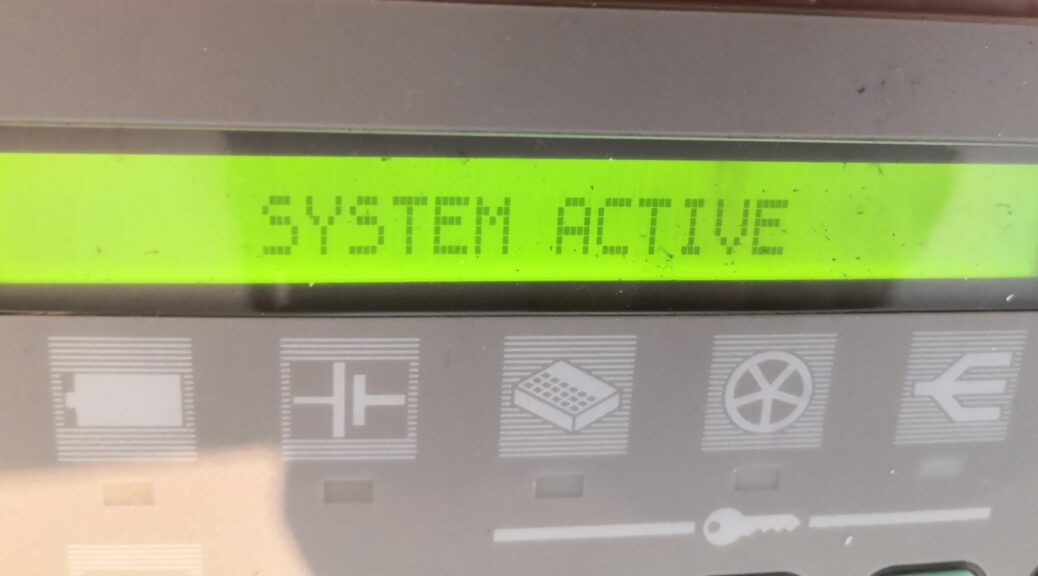
The grey box with an LCD display is the “console”, giving you POST information, a speaker and some buttons. Next to it the huge power-supply and in the slots you can spot the EVC-1 graphics card an my trusty ISA/PCI POST card…

Let there be light

Booting the system just the console showed a “CMOS Periodic Int Error“. Doing a warm-boot it replaced by a „Base 128k Ram Error“.
Additionally it behaved somehow flaky, booting  into different states every now and then:

These three Errors were solvable:

  • Flaky behavior: Replacing all caps – this always helps. Believe me. The system booted into a reproducible state after this.
  • CMOS error: The dreaded DALLAS CMOS clock-chip… we all know the drill. Its battery is empty and EISA systems heavily rely on a working CMOS storage. So it got an external battery surgery.
  • RAM error: That was a bit tricky. The LSX’es need parity RAM. One SIMM per bank. Max. mem is 16MB – I only have 16MB+ SIMMs. So I had to get small parity PS/2 SIMMs. 2x4MB did it.

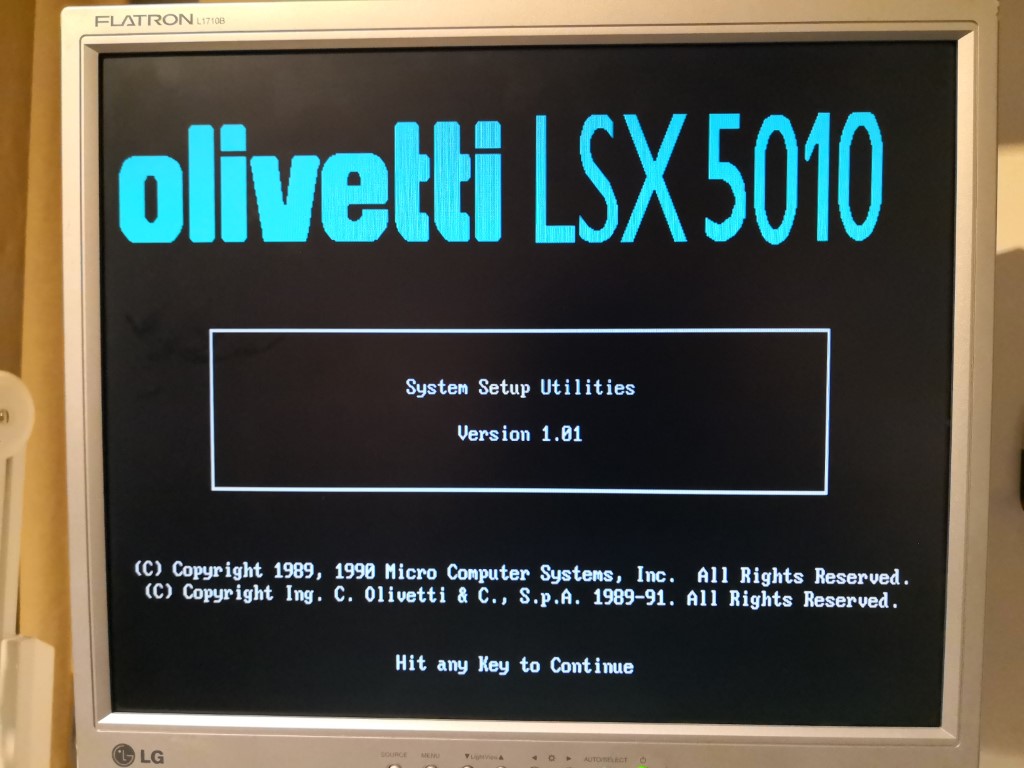
Booting the system now, the console greeted me with

  • „Console Passed“
  • „P.O.D. Running“ (That’s the Power On Diagnostic)

…and then „Non-Maskable Int. Error“. Dammit! This can have many reasons, most of the time it’s RAM (parity). But in my case, it’s been different…

That was a fun one (actually two):
The trace to the i486 processor NMI-pin (B15) was scratched and needed repairs. But it still kept throwing that error. Why-oh-why?!?! After a whole day of digging I had a severe facepalm-moment:

The owner replaced the CPU by an 80486SX because he was under the assumption the LSX 5010 was an SX system. But it wasn’t. It’s a 80486DX @ 25Mhz system (while the 5020 is 33MHz).
And while everybody is claiming the SX is just a DX minus FPU… it is not a 100% drop-in replacement!
While the DX’es have their NMI-pin at B15 the SXes have it located at A15 (where DXes have IGNEE) and B15 is not-connected. Doh! (Checkout the pinout here)

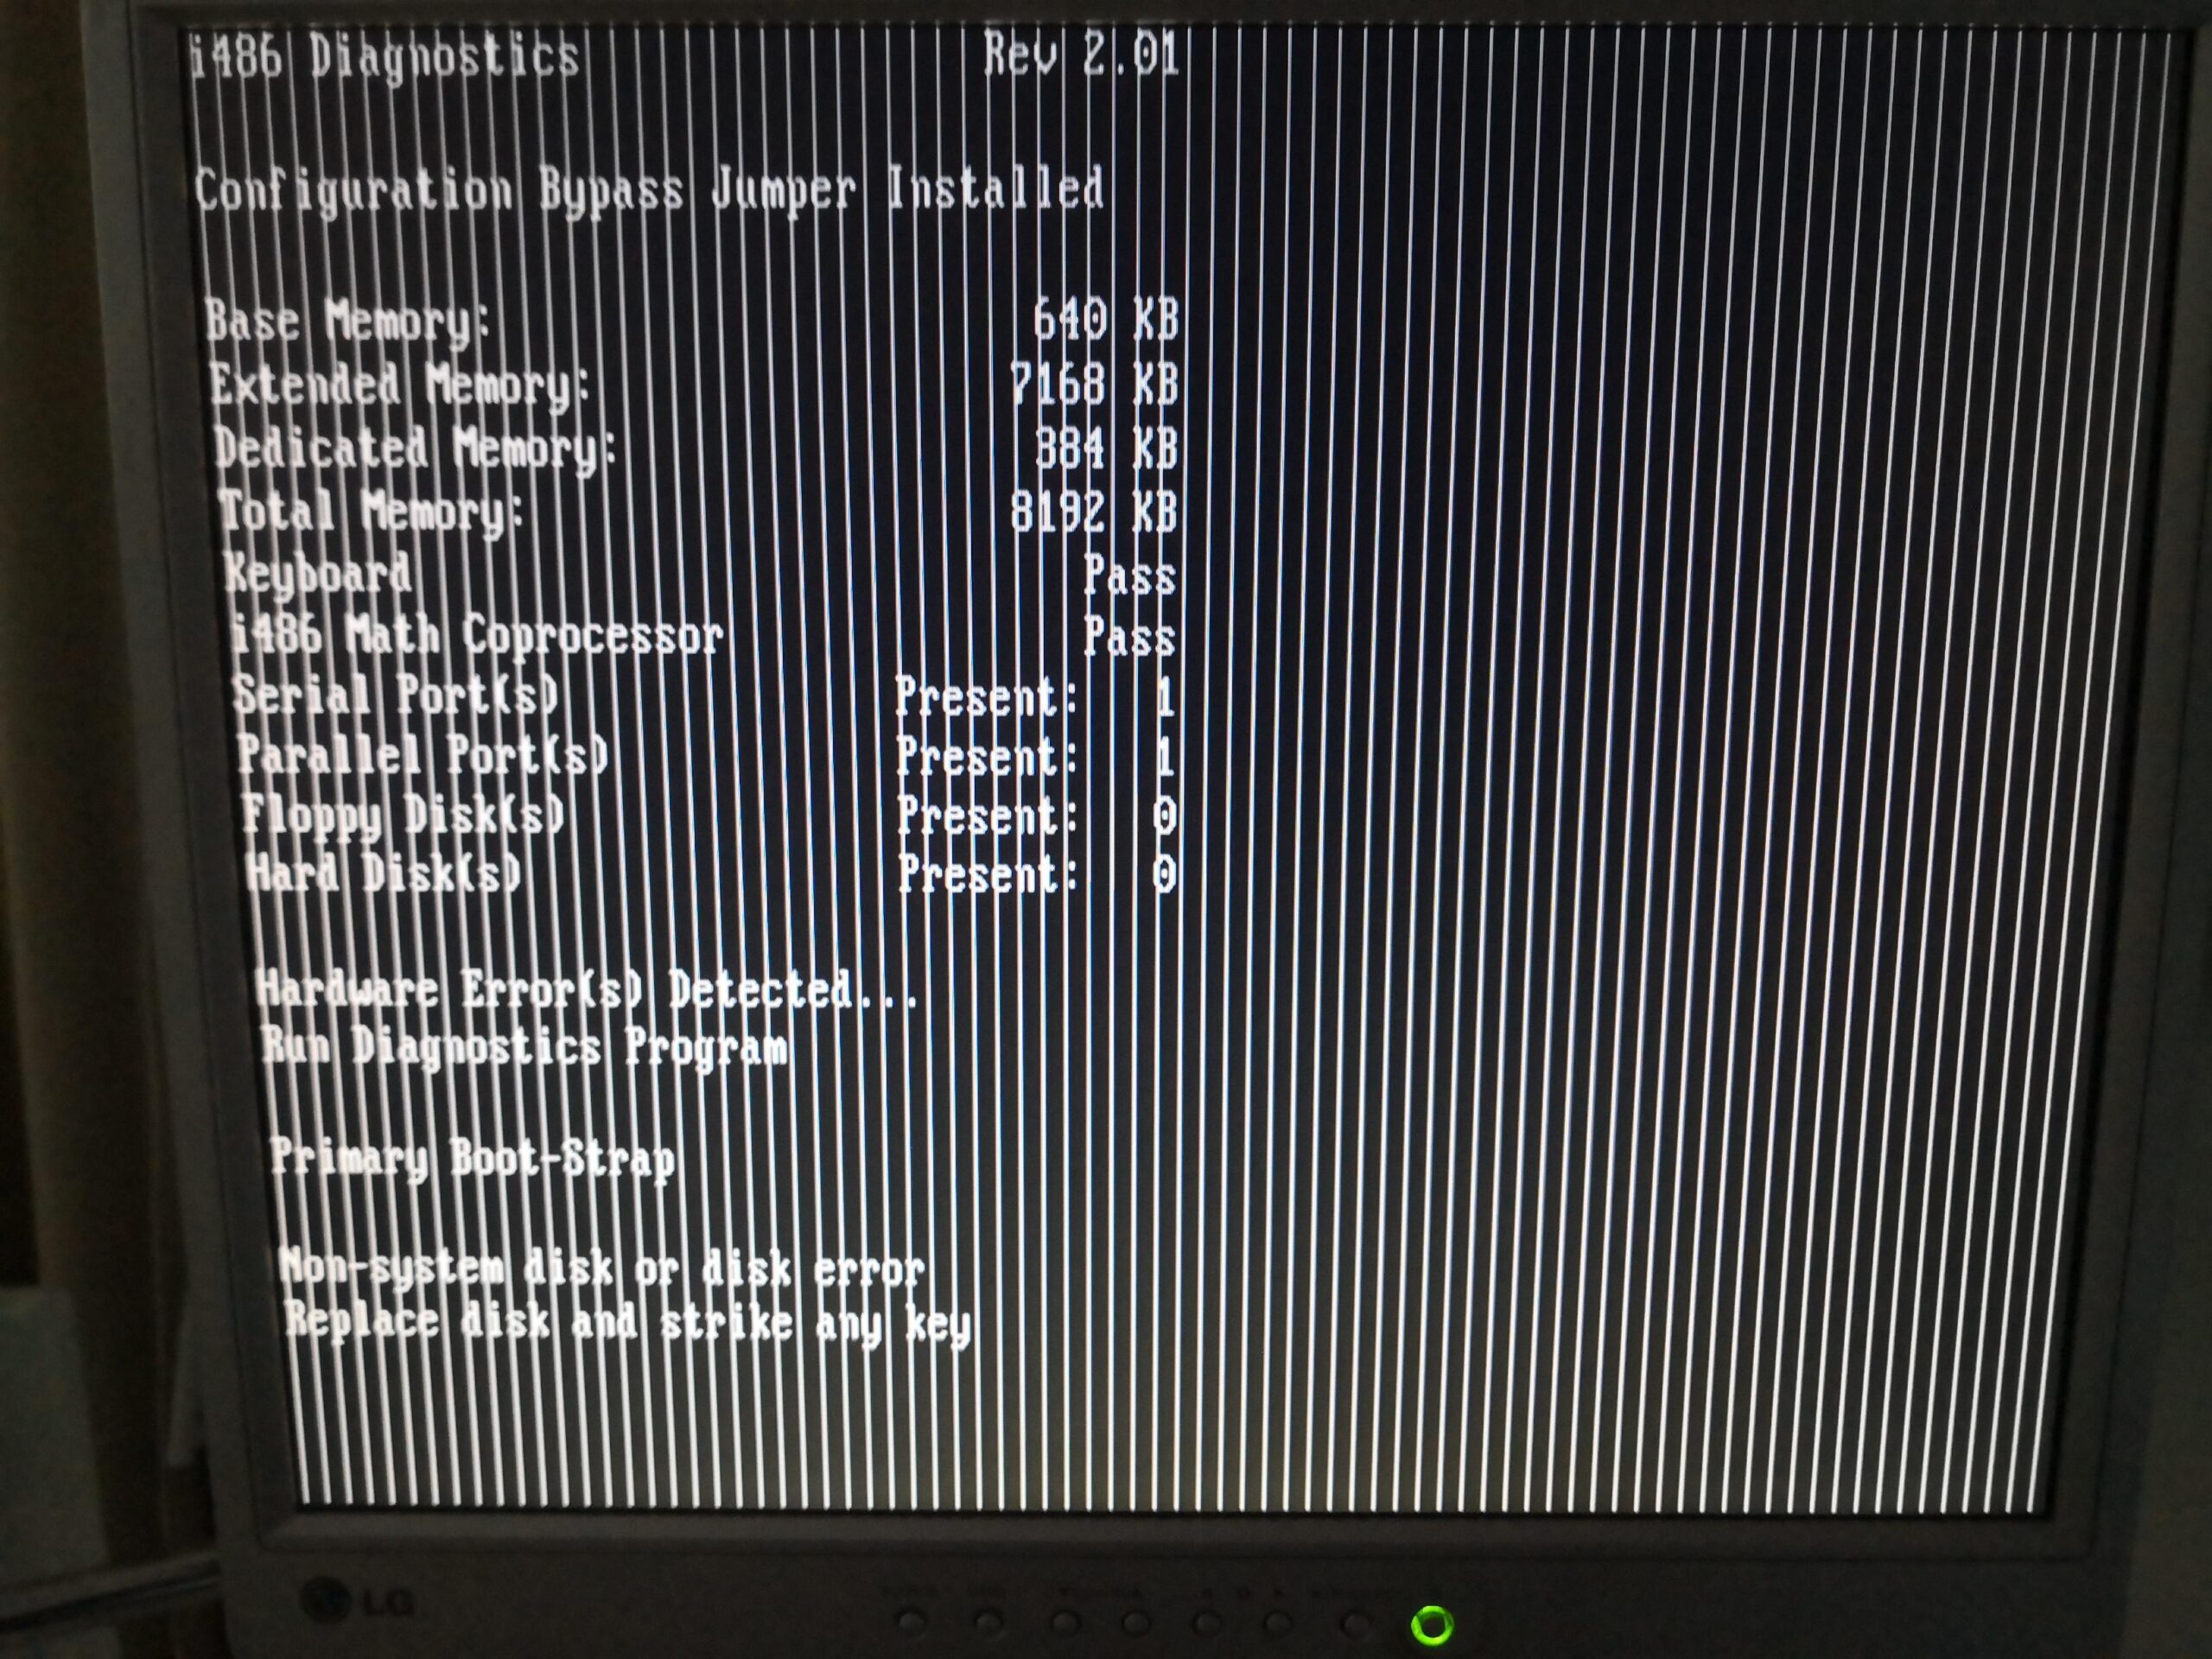
So replacing the SX by one of my 486DX  we finally got a full boot! Tadaa:

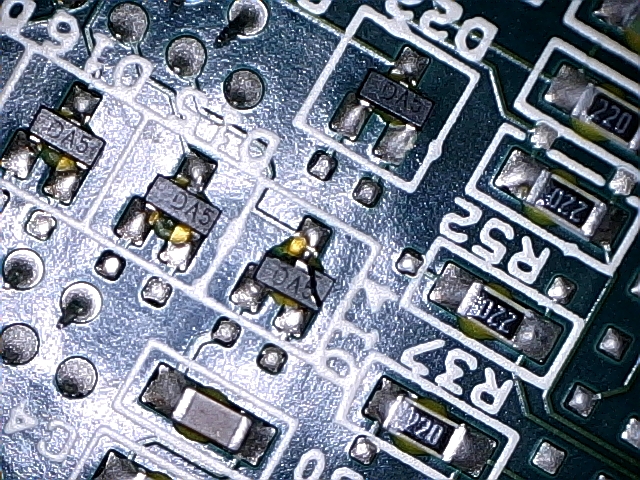
Those stripes came from the EVC-1, which definitely also had its problems. So checking its board with my microscope I came about this:

Uhhh…. a cracked diode (D14) connected to address-line A0 to the video RAM. That explains the lines quite well.
When the new DA5 (BAR43S) diodes arrived I replaced the broken one, fired up the LSX 5010:
Looking good, booting into the EISA CMOS setup and while editing the config I could watch the picture disintegrating by every keystroke. More and more garbage was displayed, columns disappearing until it was all black.
The EVC-1 literally died in action in front of my eyes 🙁

I’m not sure what happened here. The fixed address-line can’t be responsible for this. All ICs still get their clean 5 volts. I suspect that one or more of the many old PALs (some of them even bipolar) died…

Ride on…

Anyhow, plugging in my ET4000 workhorse I was able to resume the setup. EISA systems always need a setup tool to tell them all the features of their Mainboard as well as the cards being installed. Luckily the owner had the basic tools at hand… you’re screwed without them.
So this is the one for the LSX booting:

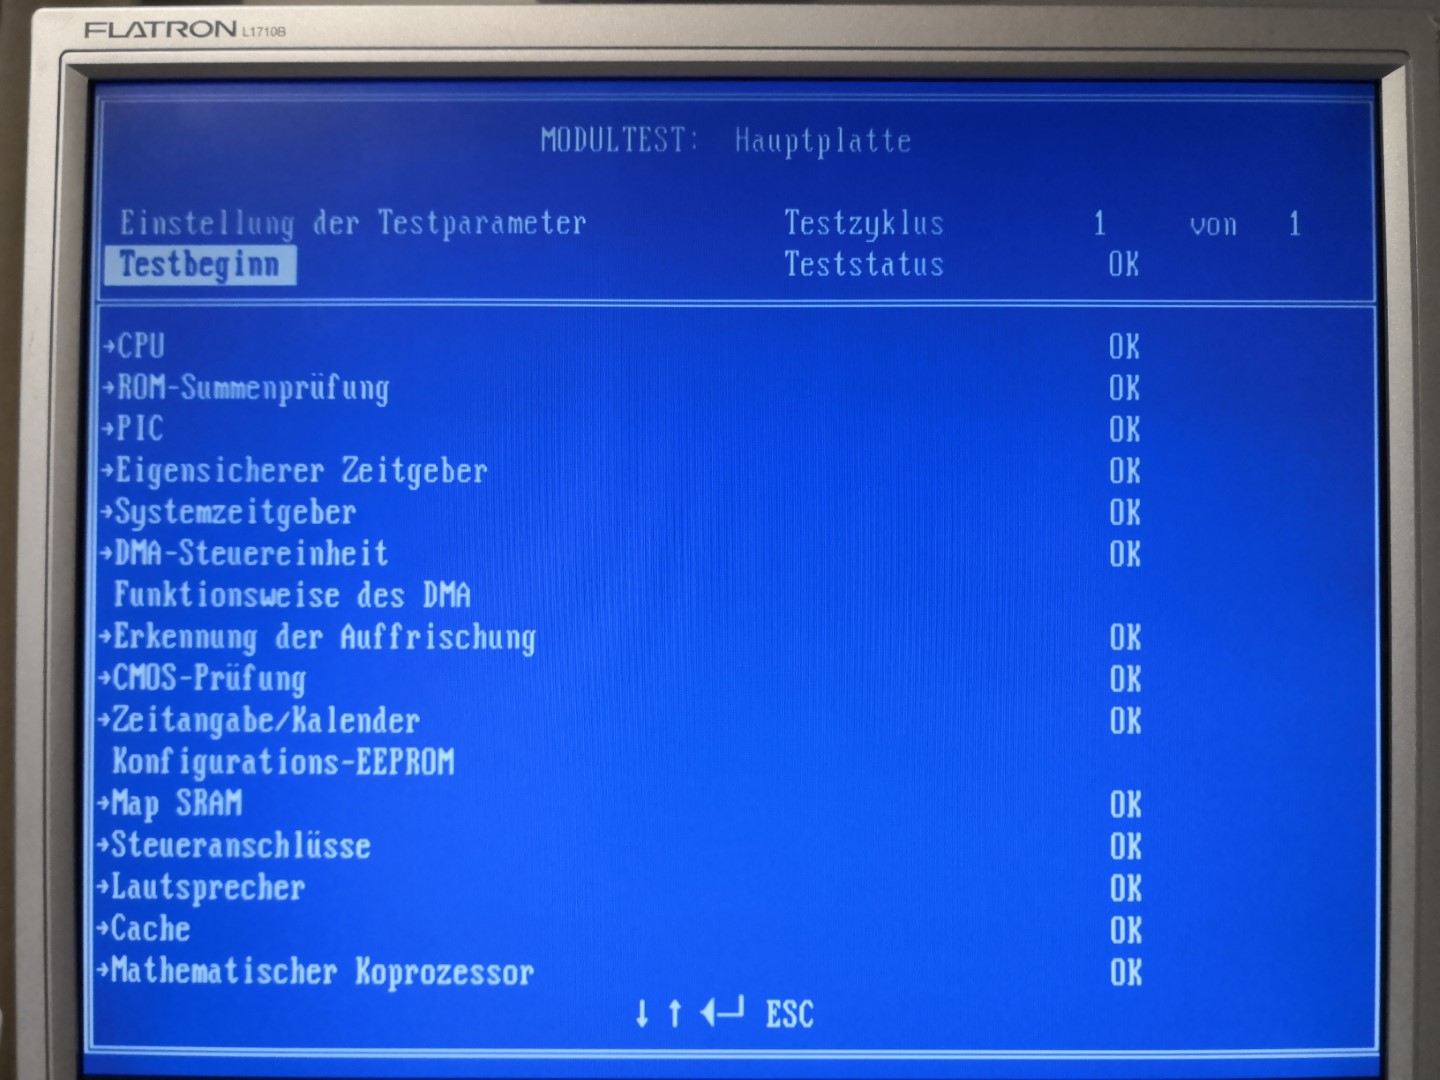
After that’s been done I ran the diagnostic tool – in German just for the fun of it (You can spot all those “OKs”, right?)

But wait a second! Isn’t there something missing?
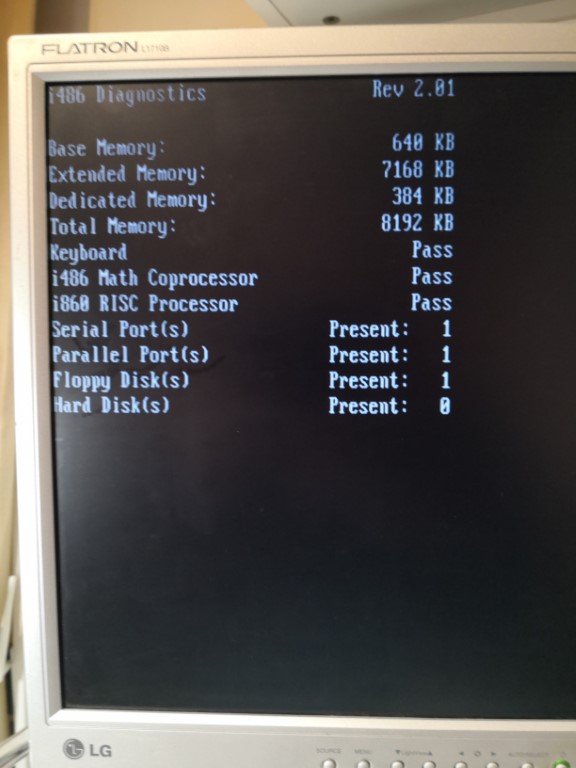
You’re right… here you go:

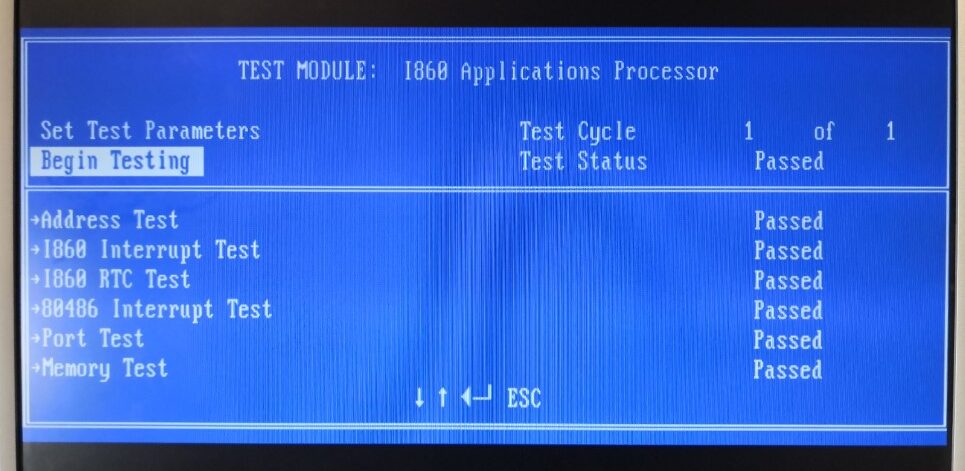
The mighty i860 RISC processor… and it is detected just fine: “Pass” 🙂

But does it work, too?

Yes it does! Hooray… mission accomplished!

Downloads

As usual, here are the dumps of the BIOS, Config EPROM and CMOS.
Additionally, you’ll find the floppy images of the config- and diagnostic tools in this archive.

Conclusion

The LSX 5010 is very much like the Hauppauge 4860 a fragile system to work with.
If the unusual configuration of EISA systems weren’t enough, the use of the many, many, many proprietary ICs (i.e. GALs and PALs) make them prone to aging and hard to fix.
They were bespoke designs, limited in their compatibility – Olivetti lists about 30 cards (VGA, SCSI, most of them multi-RS232) officially working – and most importantly need specific parts like the console and software.
Without the proper EISA config tool you always get at least error messages. Without drivers for the i860 you will not be able to use that and it’s just a heating-element inside your computers case.

Those (server) systems were meant to run as-is. Pretty much like a SUN, HP or SGI server of the same period. You can pick from like 2-3 devices to add and that’s pretty much it. They were not designed as an average PeeCee running Doom.

The truly worst Apple Product ever!

If you Googling for it it seems everybody (and his/her dog) has at least posted one top-10 listing of the worst Apple product ever (and ever-ever).

Same-Same

All those pages seem to “inspire” themselves from each other. So it’s essentially always the same suspects:

  • Apple III
  • Macintosh TV
  • Quicktake Camera
  • The Newton PDA
  • The Pippin Games-console
  • The Performa x200 family
  • The 20th Aniversary Mac
  • The first USB Mouse (aka Hockey Puck) as well as the Mighty Mouse
  • The G4 Cube and
  • the flimsy iPod Shuffle.

I’m ignoring those lists of people who learned about Apple as a company more or less with the launch of the iPhone. Pfffft, kids, come back in 20 years, will you?  😛

So before I tell you the truly worst Apple product ever (ever-ever-ever!) let me give you my two or three cents to that list…

Reality Check

First of all: All those products had a certain degree of design-language and an eye for details – I dare saying passion to them.

Even the Apple III was -at its time- a design statement (look at other computers of 1980: Commodore PET, TRS-80, ZX81 ot the KAYPROs). It was meant to be a better Apple II and yes, it had technical flaws, but if something made it “worse”, it was its price-tag.
I’d call the design of the 20th Anniversary Mac or the Hockey Puck  bold – maybe too bold for its time. And both, as well as the G4 Cube and the Newton (110 and up) were designs by Jony Ive – the much hyped designer who also did the iPhone, iMac and nearly everything since, well,  the iMac.
Some of them were more or less pioneers of their kind like the Newton being the first usable PDA and the Quicktake one of the first digital cameras (Put both put into one device, add 10 years: iPhone!)

So let’s recap:

They all might be commercial flops but they had a raison d’etre, followed a certain design concept and most important, you can feel a certain level of passion behind it. Maybe they were too expensive, released too early or just way ahead of its time – but in my humble opinion they were not the worst Apple products ever.
And do I have to add that mostly every product on that list is a highly sought-after collectors item now?

The truly worst Apple product ever

So finally, this is it. This Apple product is very unknown – probably rightly so. It ignores all the points I was recapping above:

  • No reason d’etre
  • No design philosophy or concept
  • And absolutely no passion at all!

Its only intention was to save costs… yeah, that can be reason for being, but in this case “it’s worse”.

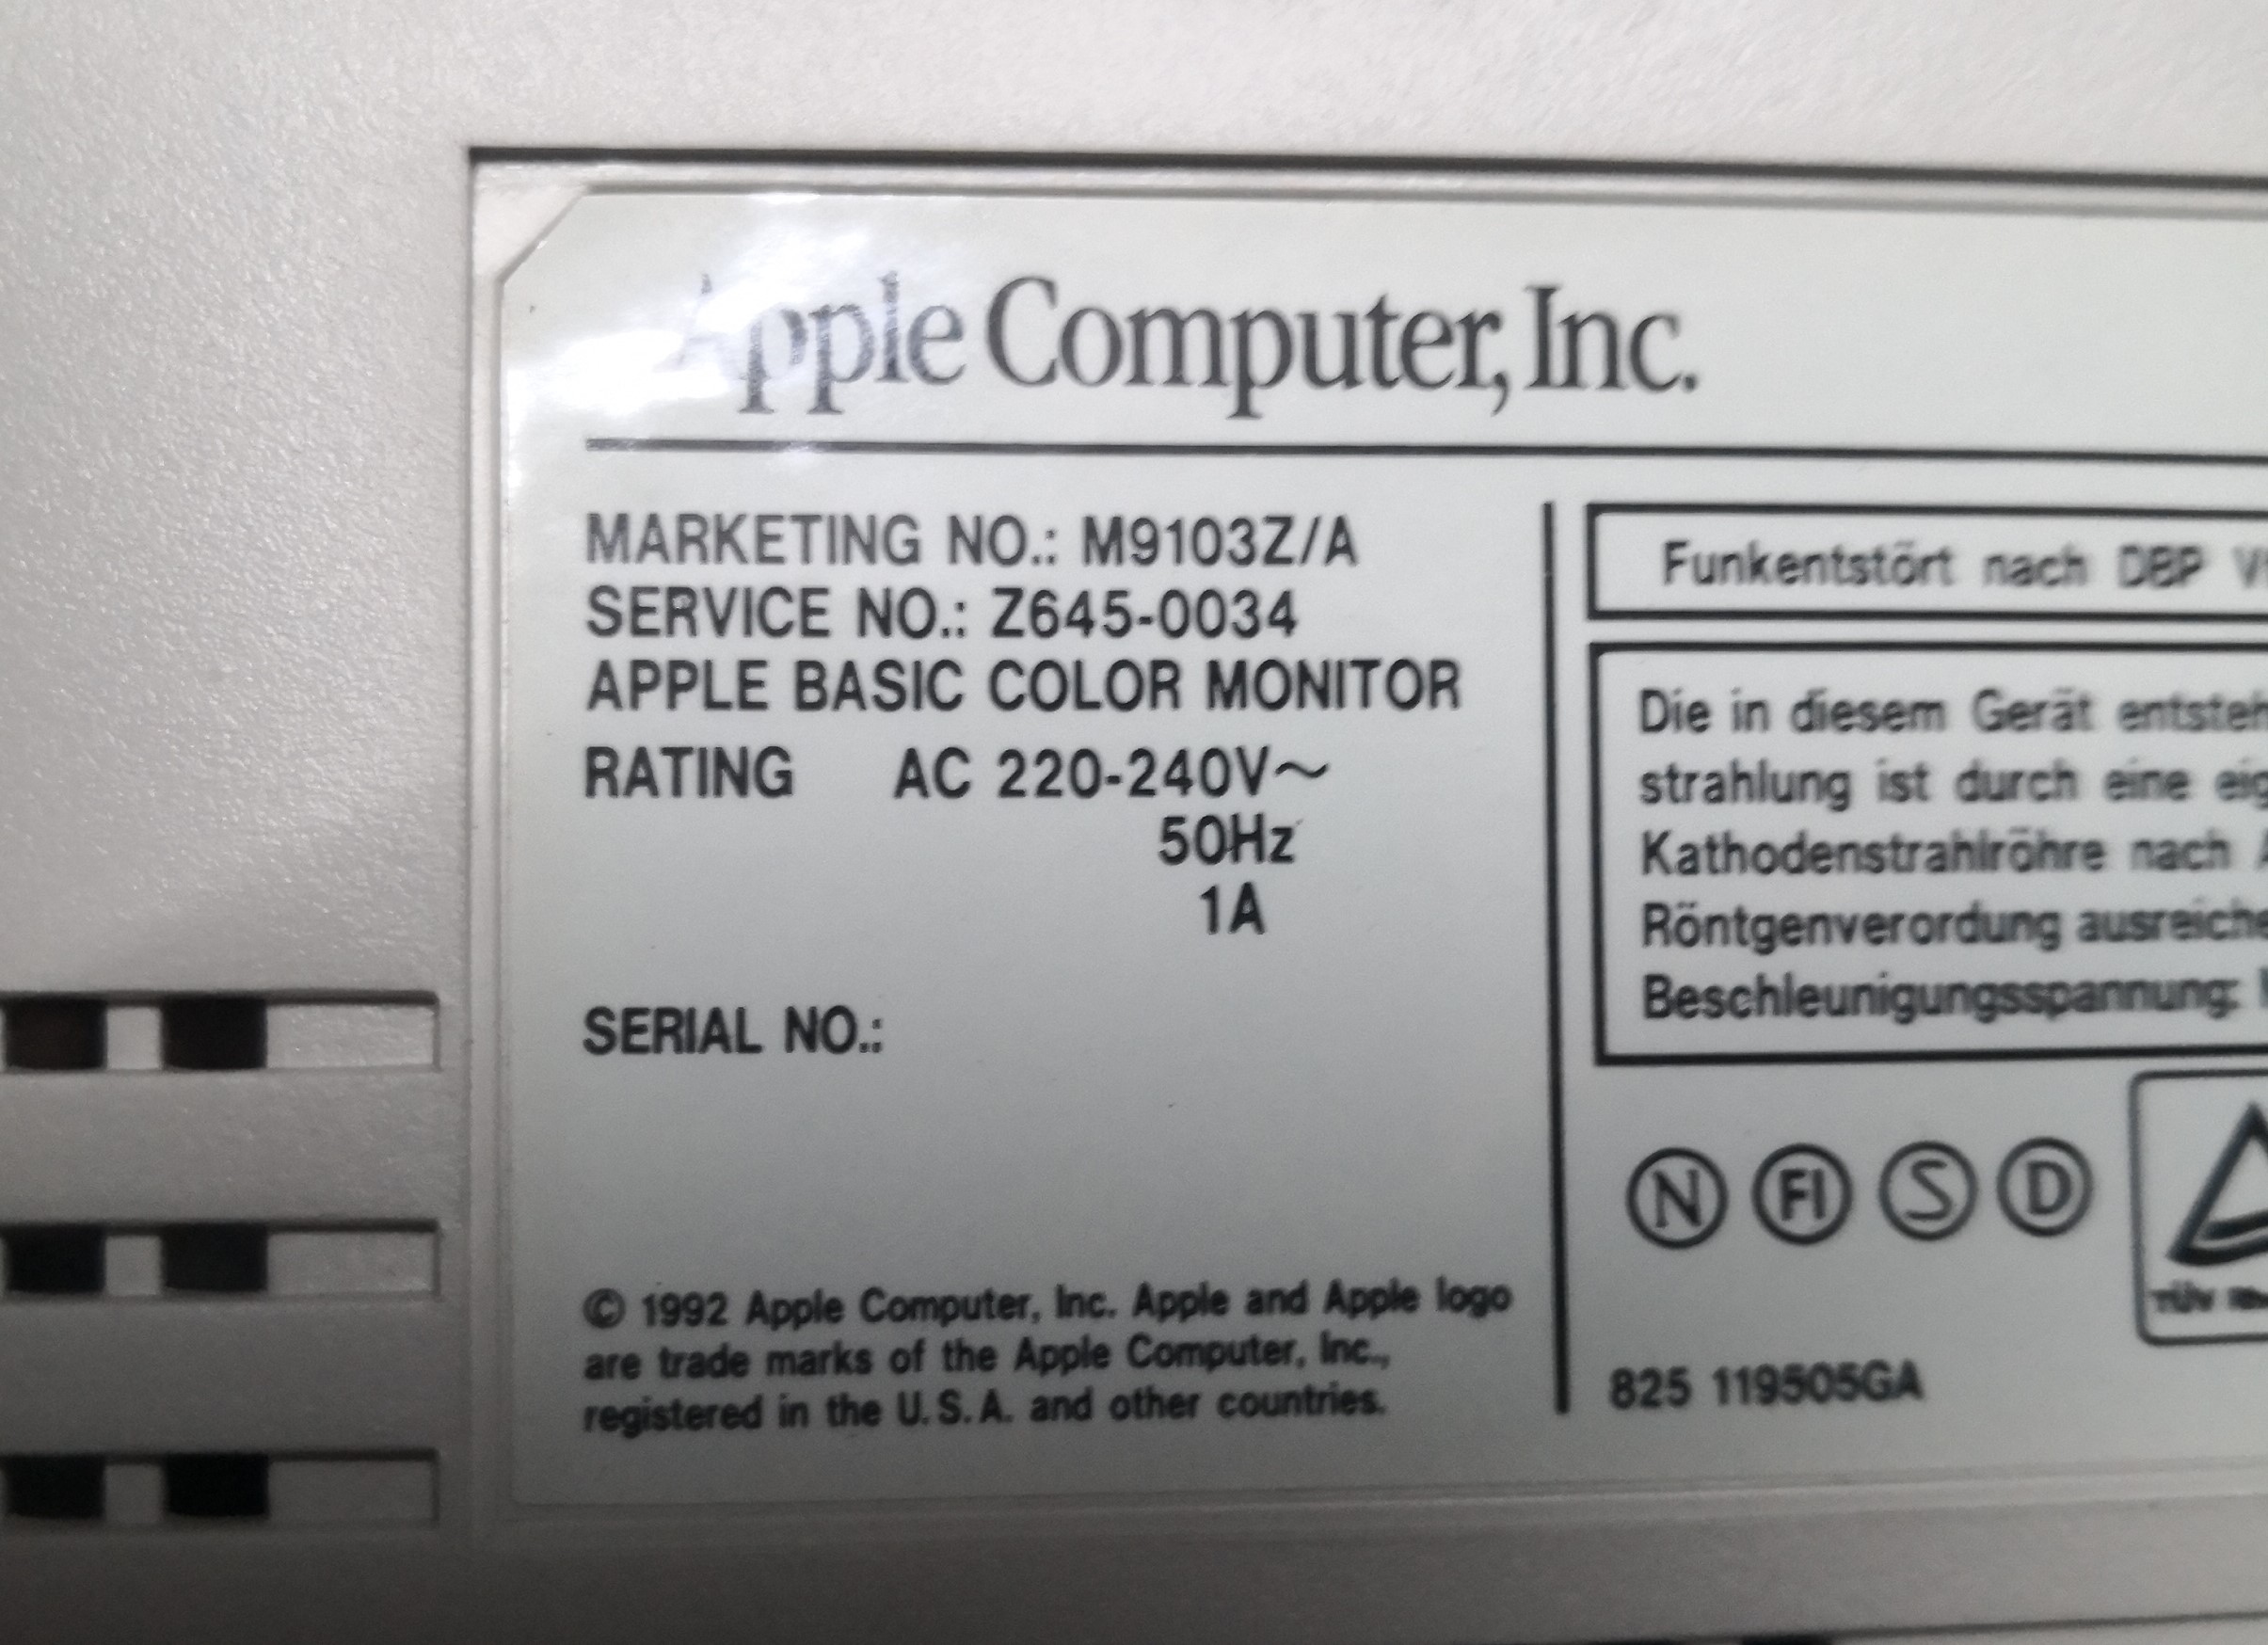
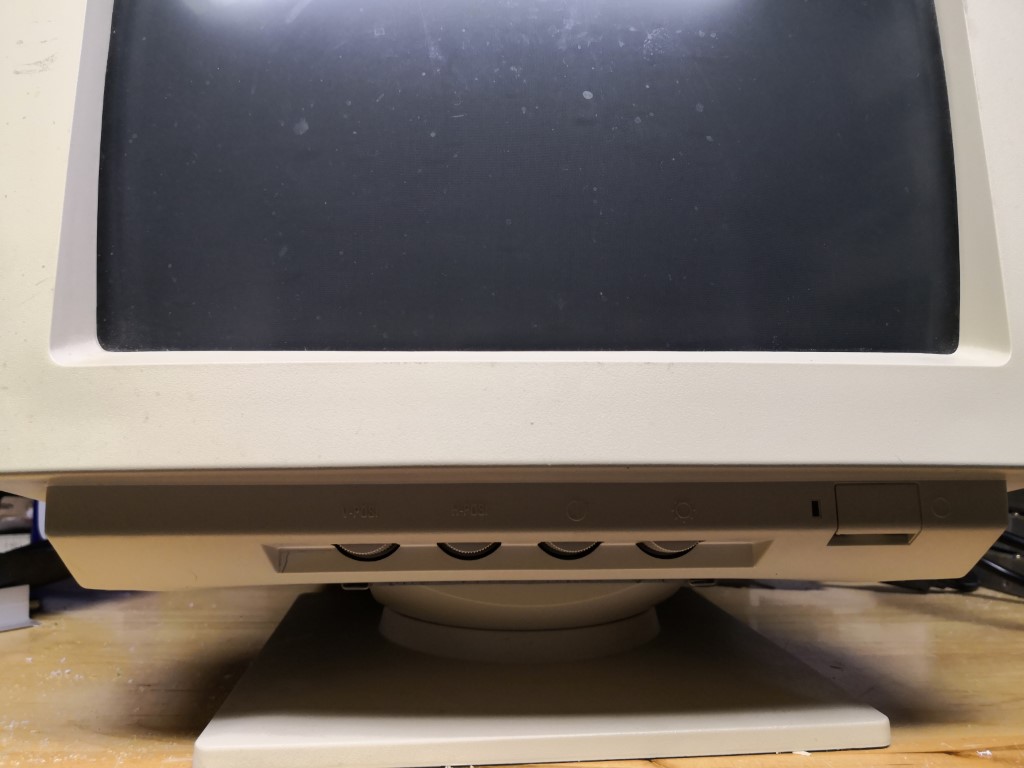
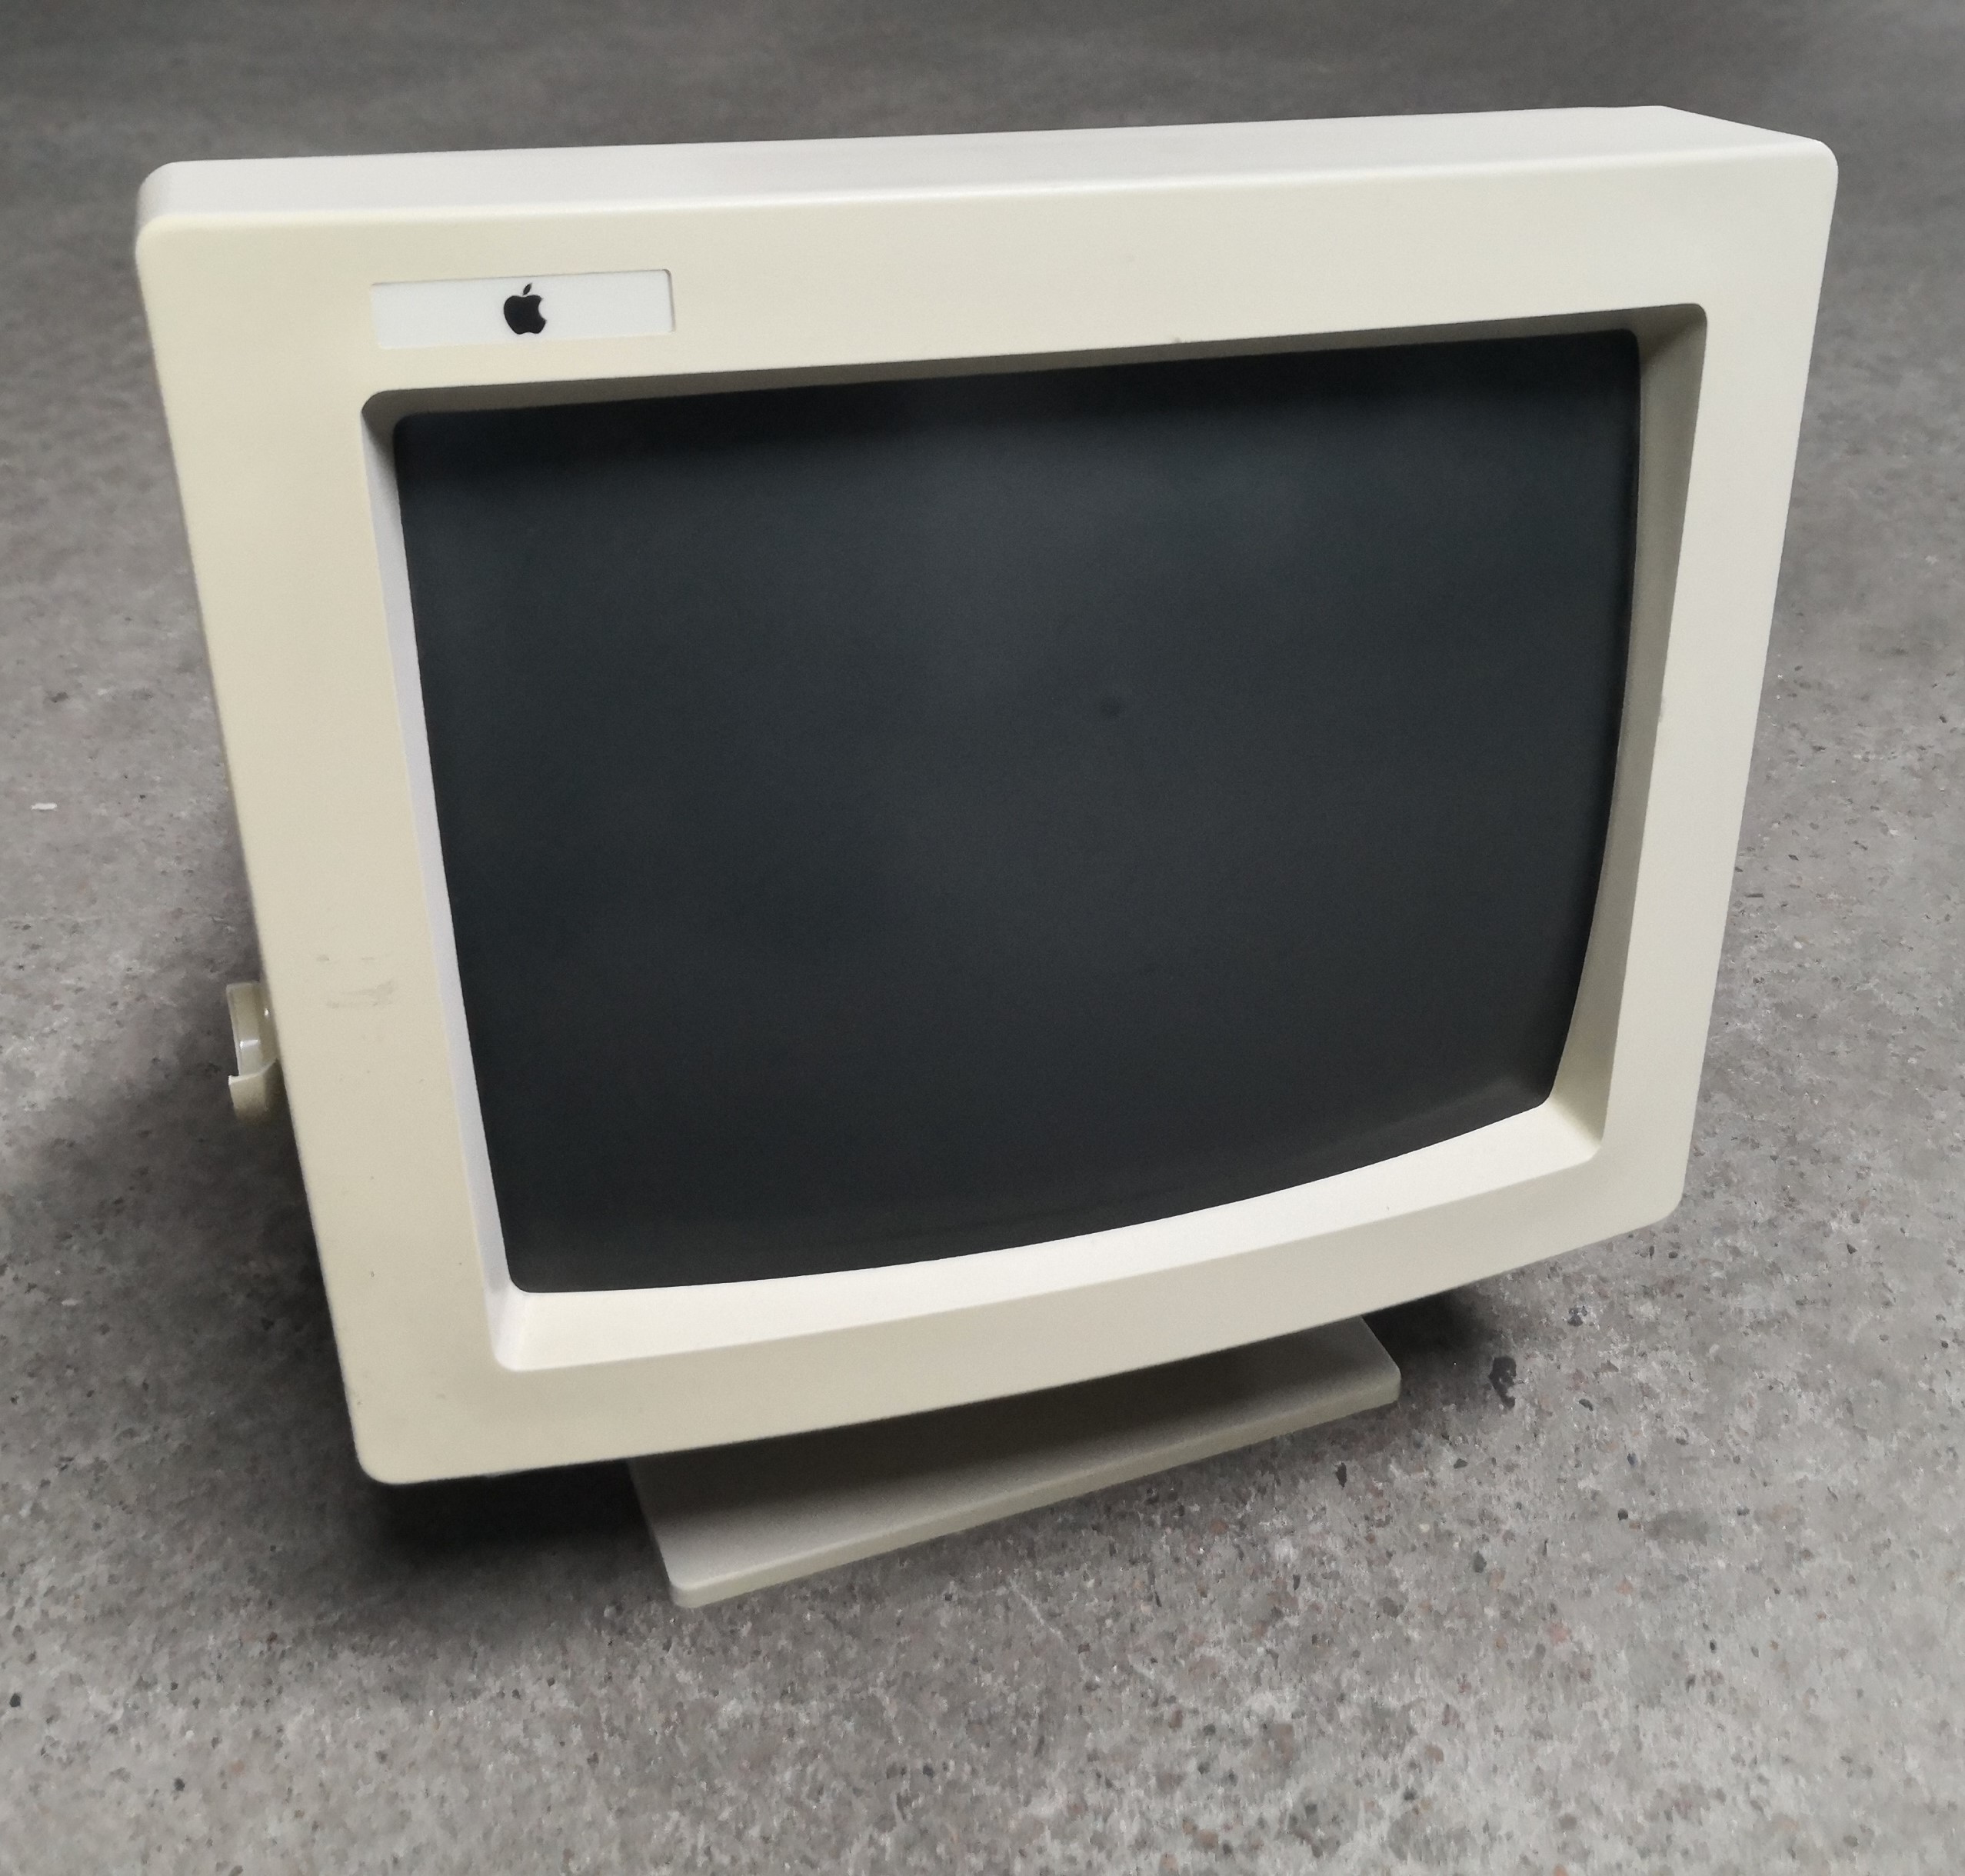
Please let me introduce you to “M9103” also known as the “Apple Basic Color Monitor“.

It’s a product from the beginning of an era in which Apple was close to bankruptcy. Struggling against the much cheaper x86 PC the Macintosh product family got confusing and they tried to somehow compete with PC prices spitting out one low-cost system after another.
The rightfully hated Performa x200 (the #1 “road apple”) and PowerMac 4400 were the pinnacle of all cost-reduced products Apple released… and the M9103 is where it all started.

To protect you from severe shock I slowly move backwards, beginning with the label on its back, proving it’s a genuine Apple product:

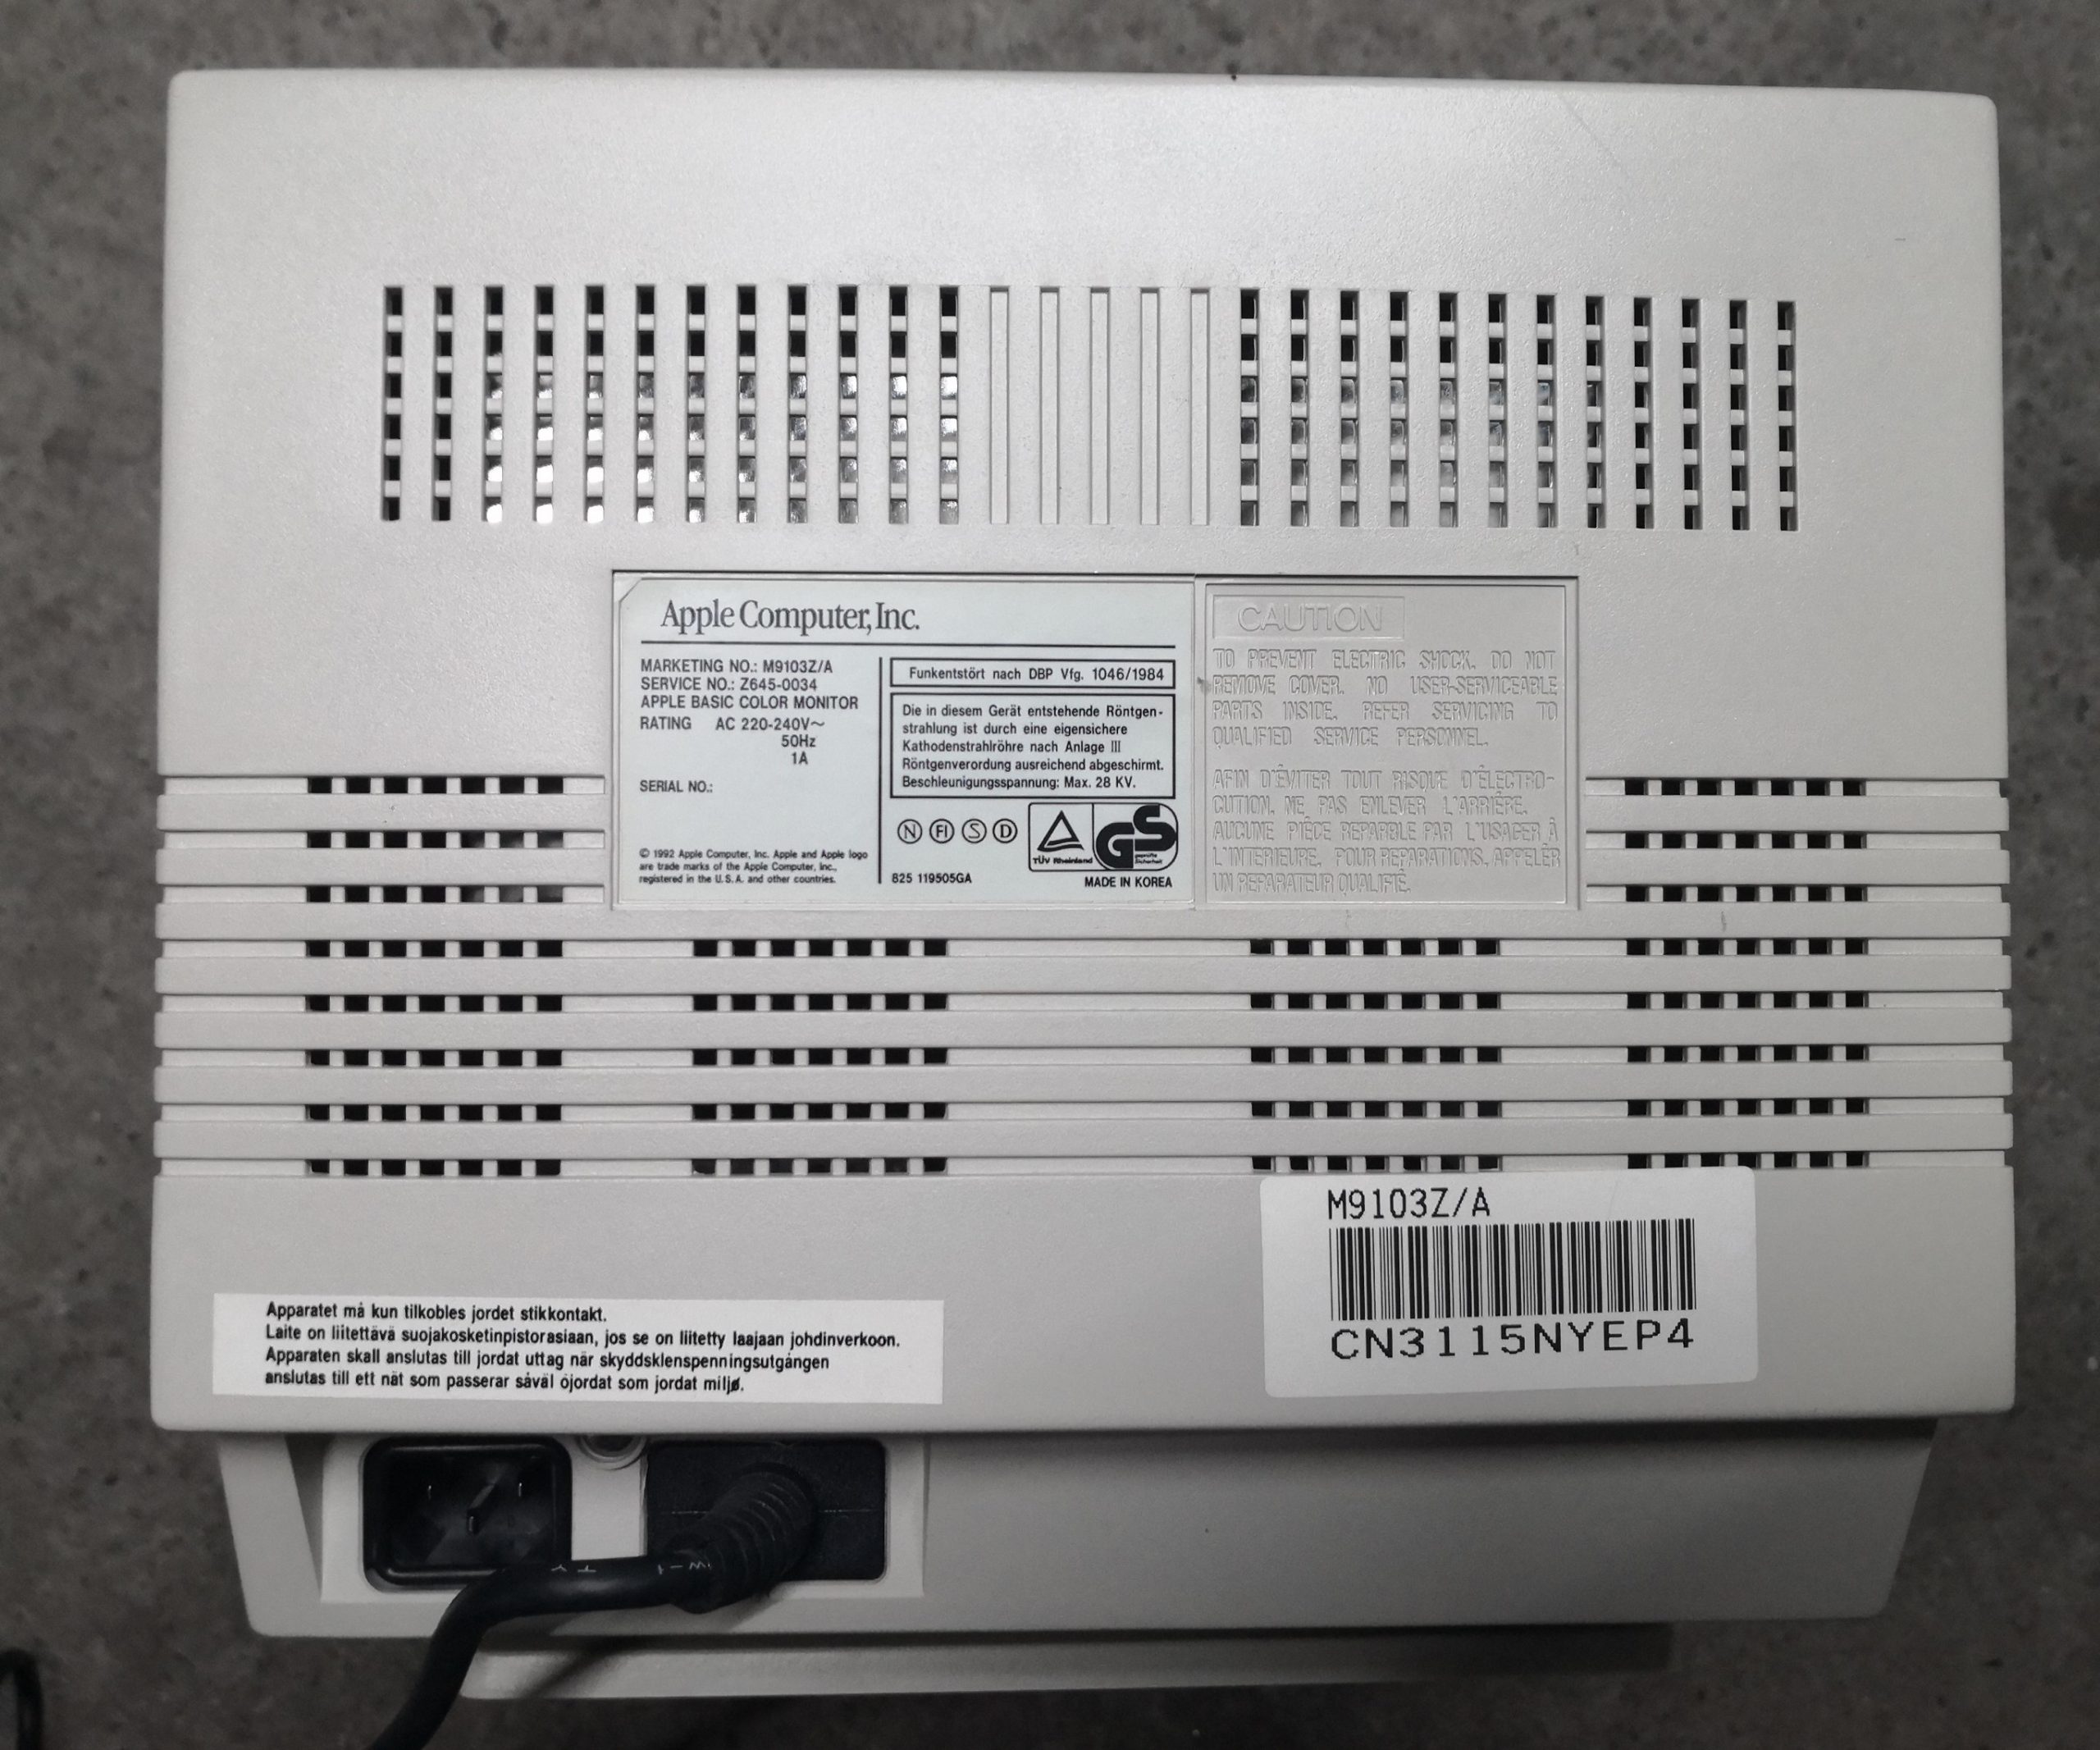
Let’s take some distance to see it’s backside in full – still, there could be hope if they would have kept the more or less rectangular shape… but bottom of the case is not looking promising.

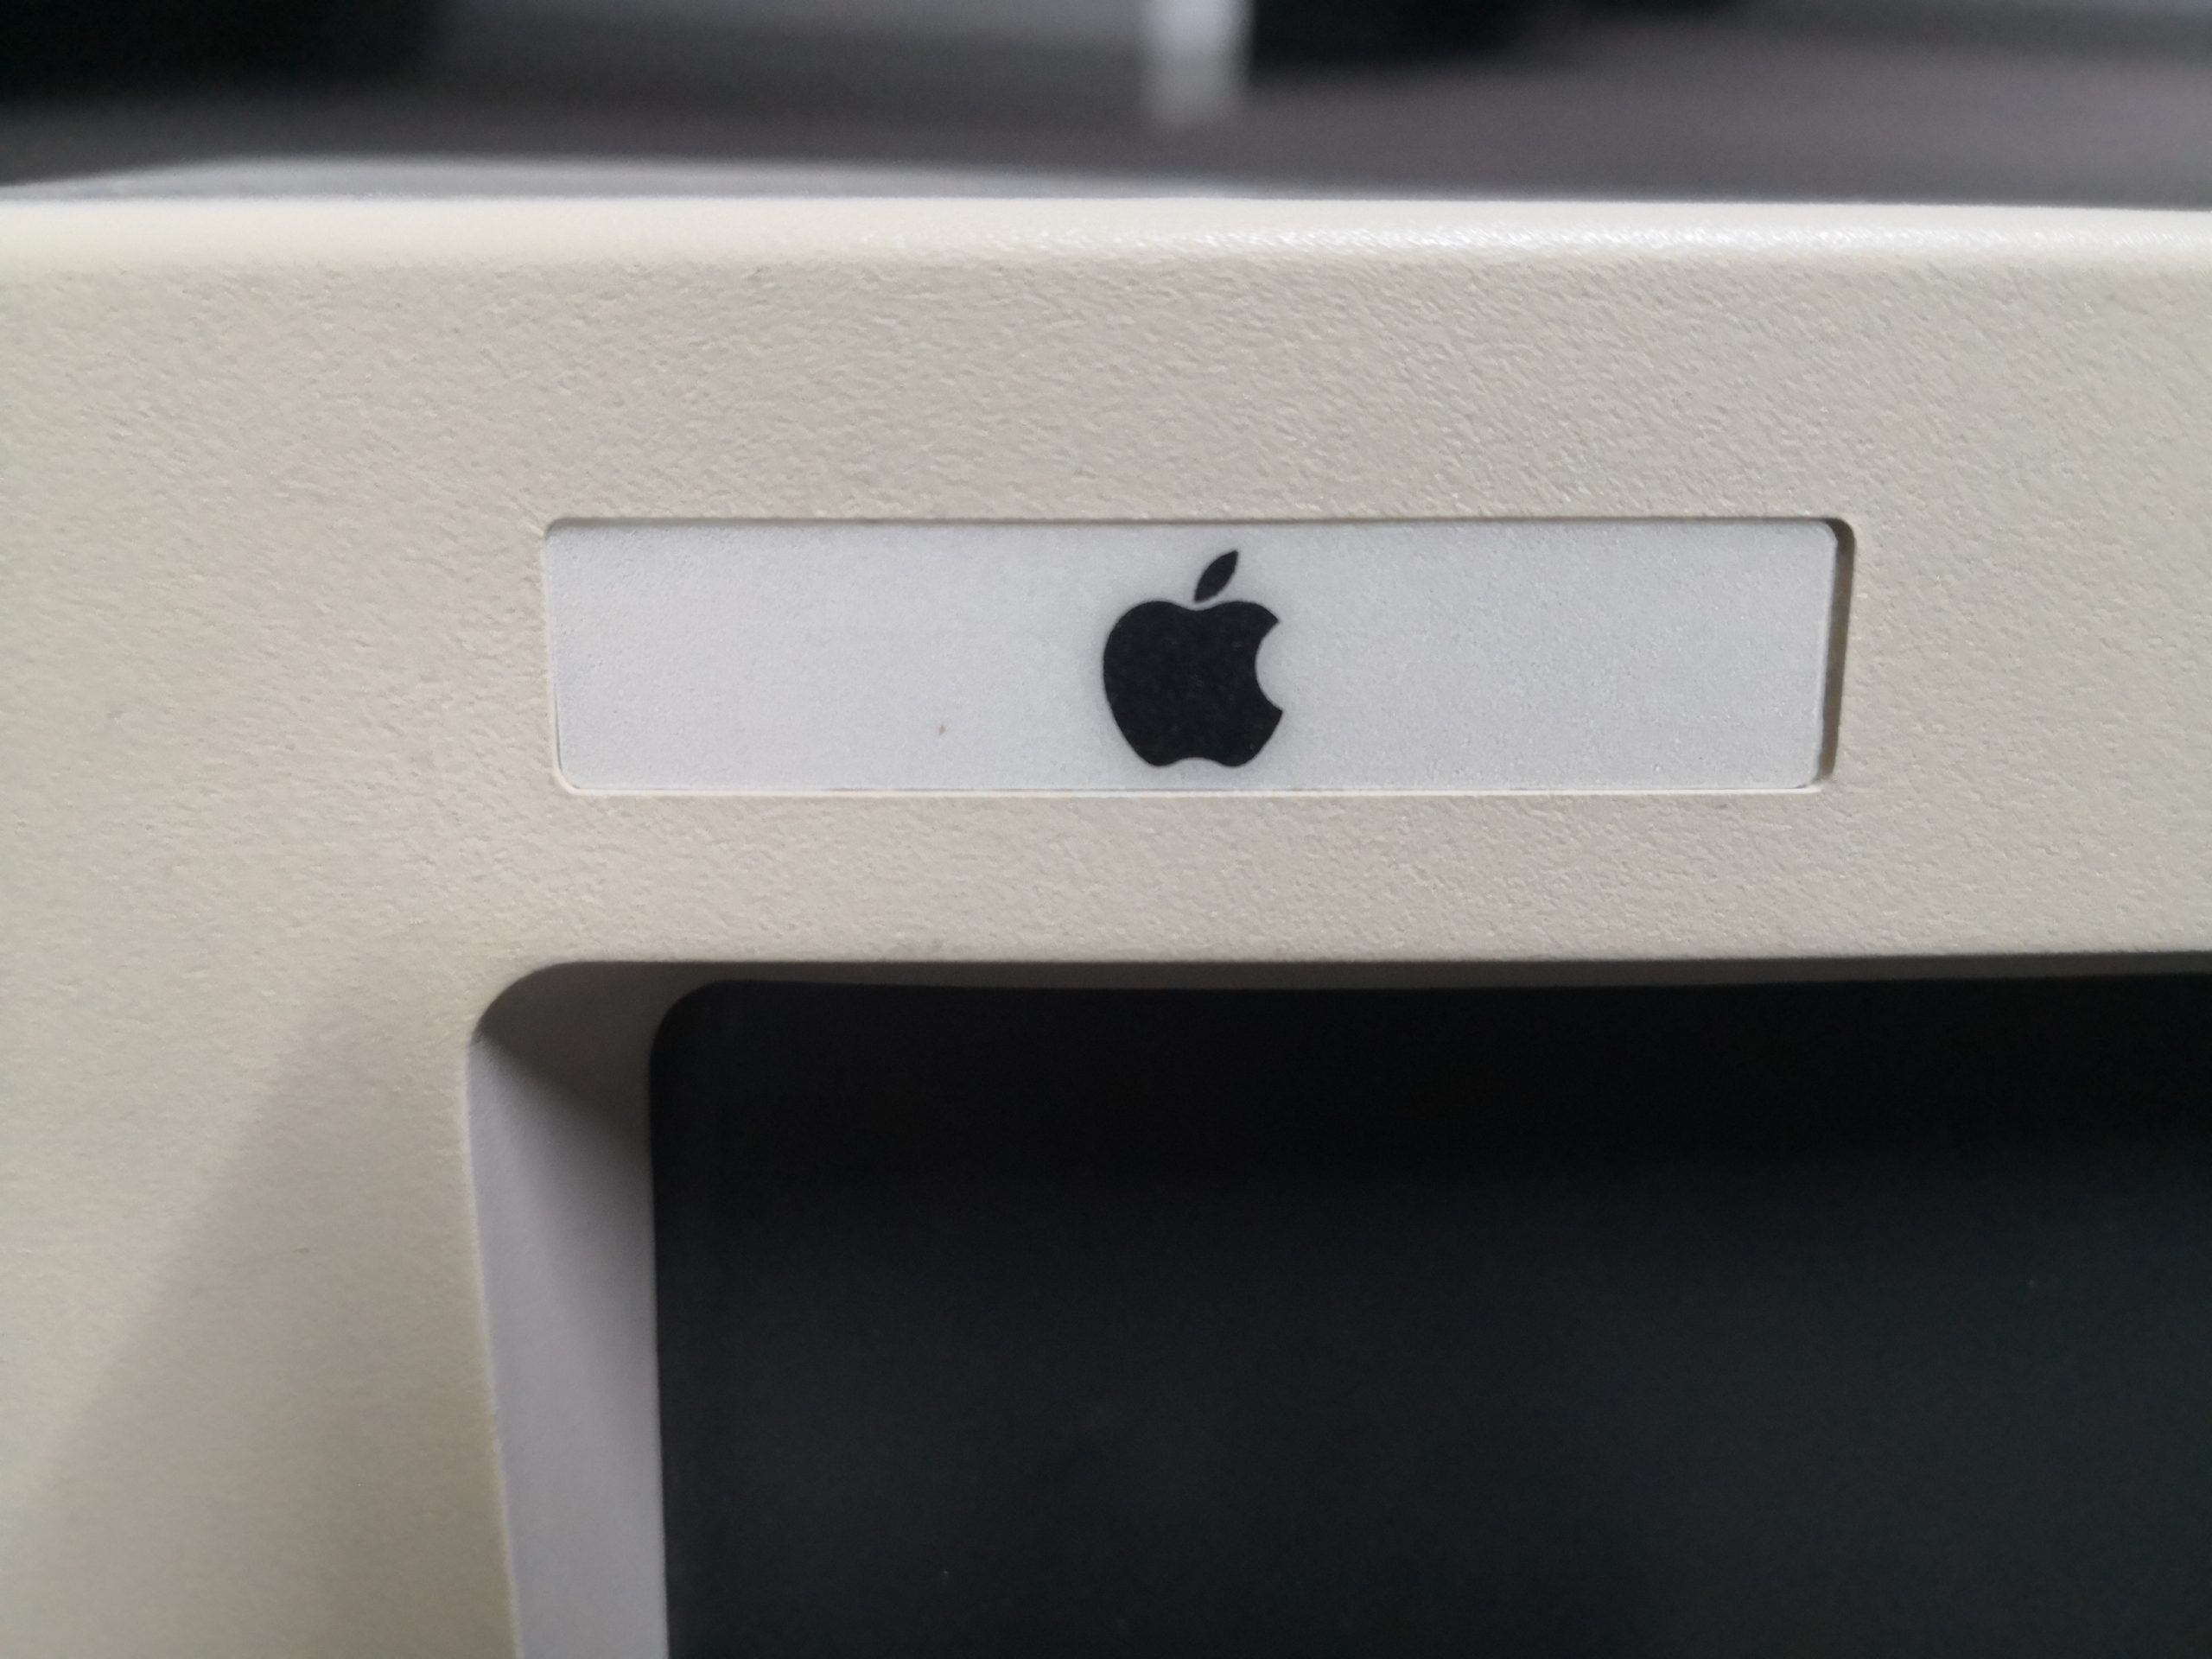
At the front you’ll spot the proof of absolute zero passion. The Apple logo somewhat slapped into the space which the OEM left there:

Yes, it’s a bog-standard,  VGA monitor, lowly specs and ugly as hell.

The photos don’t do it justice – it’s even uglier in real-life.

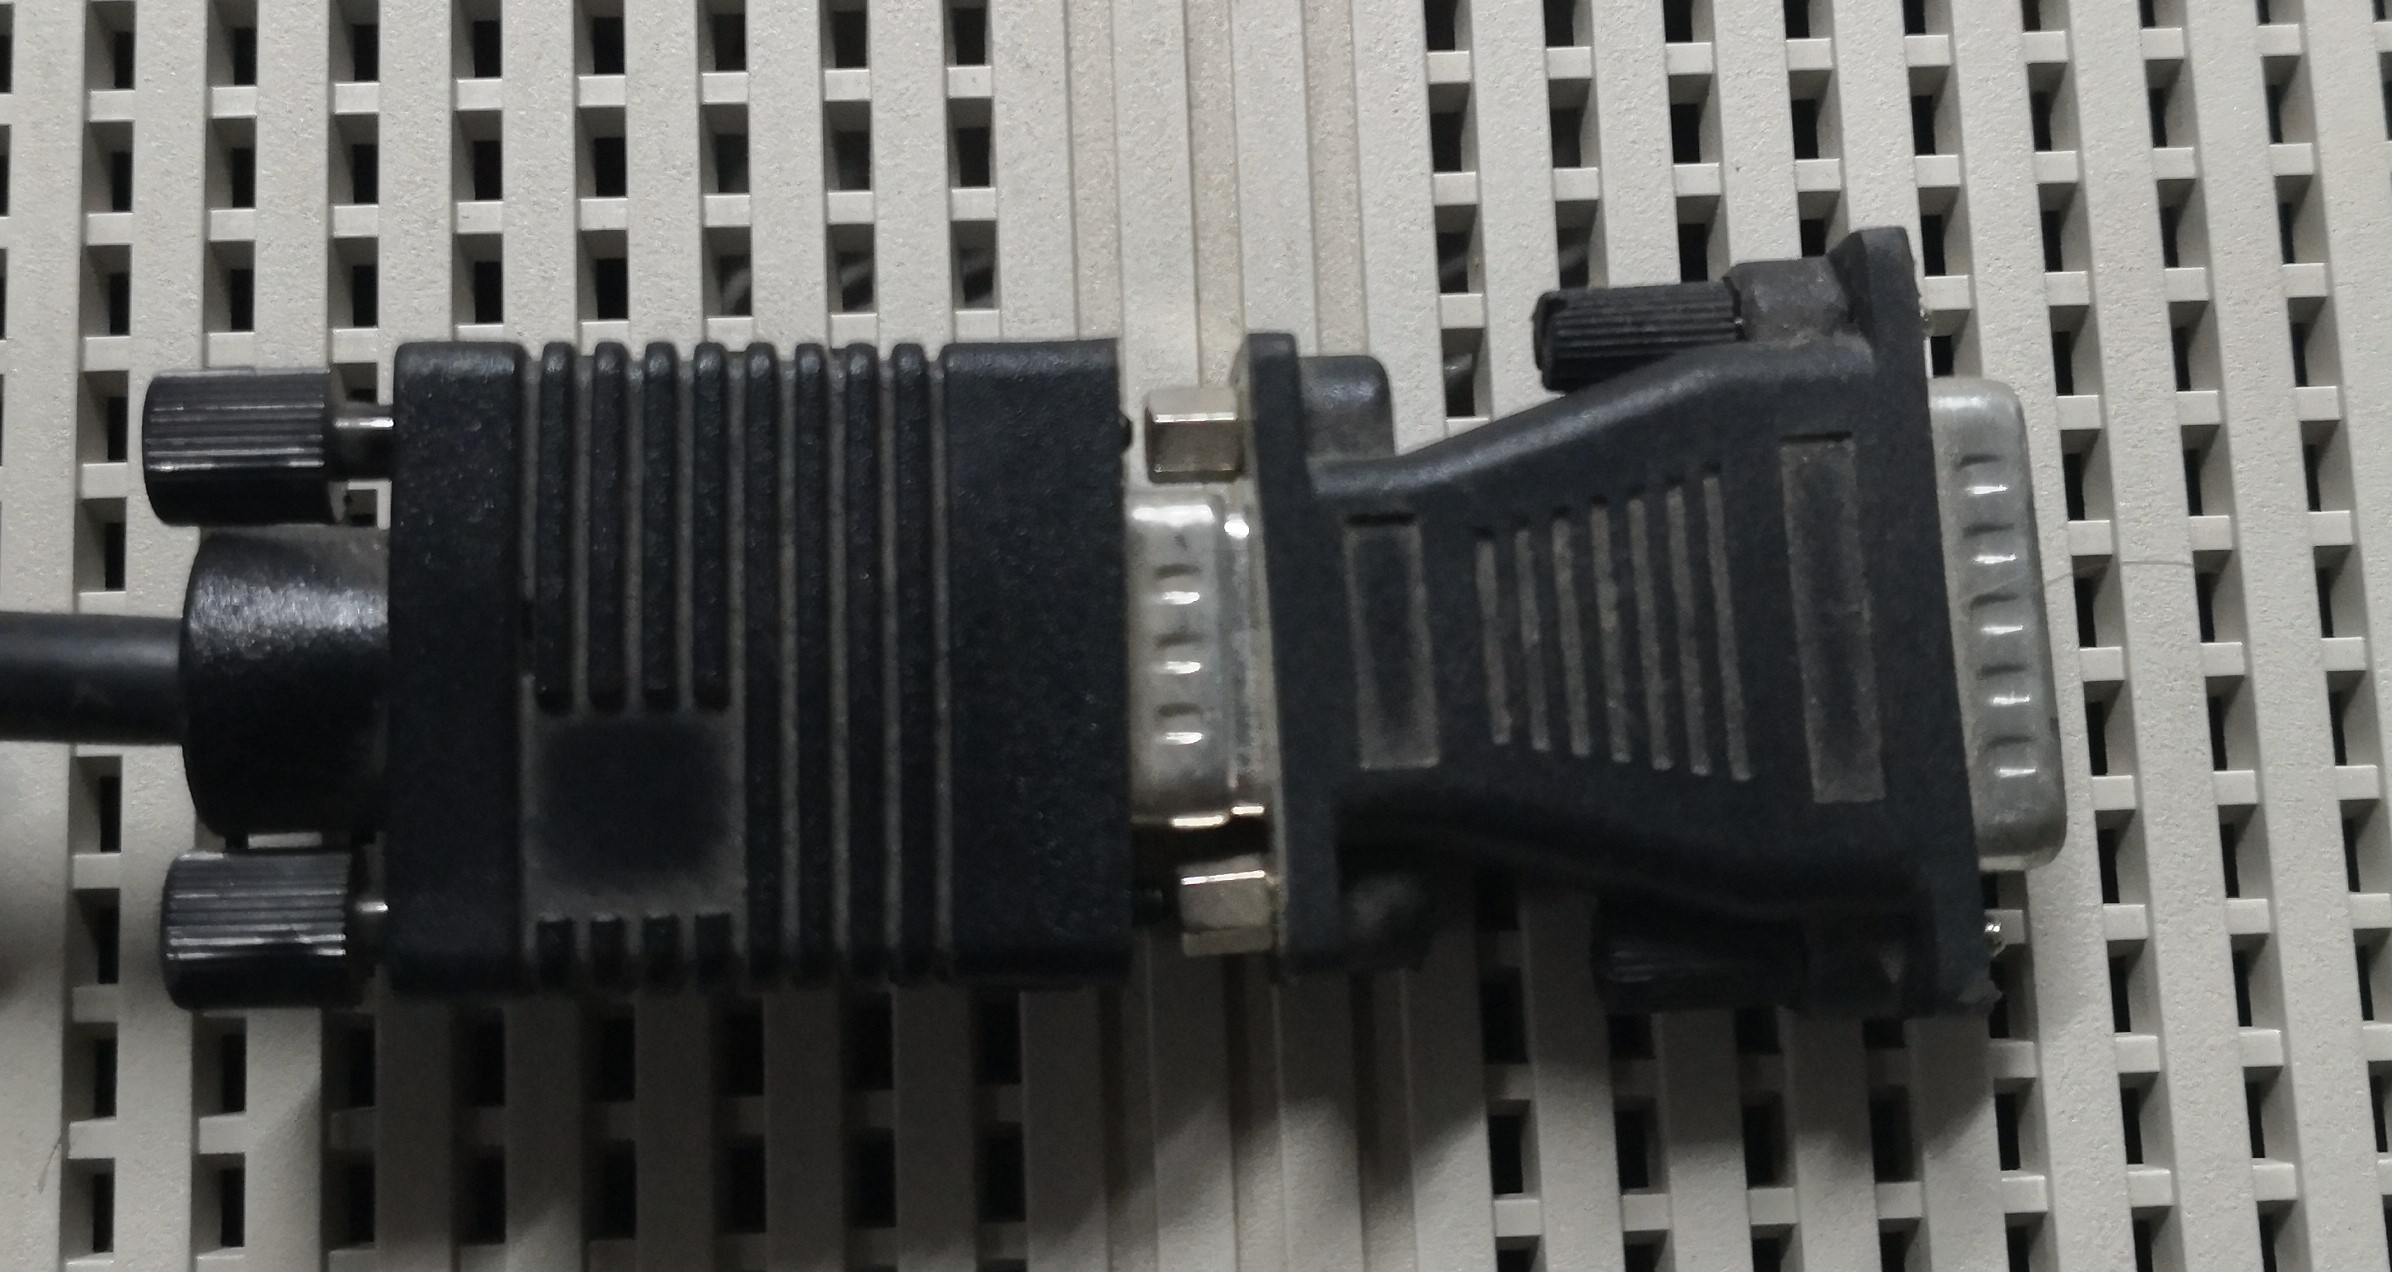
They even did not change the cable to the (back then) Apple 15-pin standard video port but just stuck an adapter to it:

No wonder it was so short-lived (February 10 to October 21, 1993)

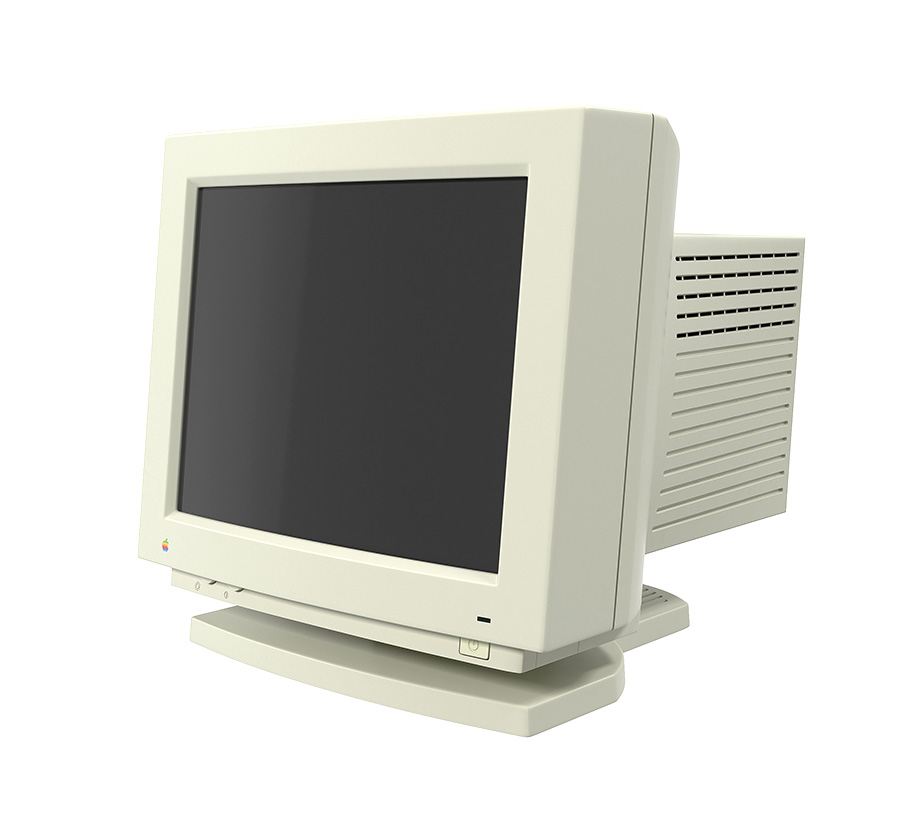
Just to show that Apple was definitely to do better. The first monitors sat more or less flush on the computer cases. Even those with a swivel-base showed the typical design language, an embossed/color Apple logo etc.

My PC builds

In Jan 2020 was planning to build a new PC, after using its predecessor for 8 years. Now that I’m done, I thought “hey, how many PC builds have I done already?” – Well let’s count while having a stroll down memory lane:
[Yes, I’m a ‘real man’ thus I never owned an off-the-shelf PeeCee]

1988 – The entry

I got my first x86 computer (built from parts) in exchange for working at a local computer shop – Even I was totally happy with my Atari ST, I was intrigued by the many ways of hard- and software hacking possible… and of course by its quirkiness, i.e x86, strange offset/segmented memory access etc.
It was much worse than my Atari in every aspect except having a hard-drive which for the Atari would have cost me as much as the complete XT System:

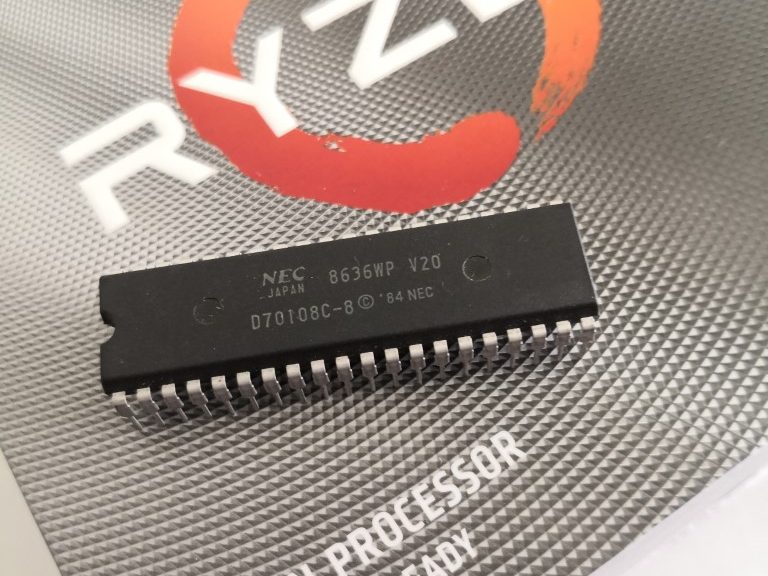
  • CPU: NEC V20, 8MHz (overclocked to 10MHz after some weeks)
  • Mainboard: No-Name 8088, fully populated with 640KB and 5 ISA slots
  • Video: No-Name Hercules compatible (to an amber 12″ screen)
  • Media: Seagate ST-225, glorious 20MB, MFM controller and a 360KB 5.25″ Floppy drive

It was fun hacking my way through Turbo-C/ASM, TSRs and such but even overclocked it was a sloth…

1990 – Affordable 32bit! And an option of UNIX…

About quitting my job at the computer store I traded my XT for a bare 80386 system on my way out. Bare because I had no money left for a case… and also because having a ‘proper SCSI’ solution was more important to me after seeing Interactive UNIX running at a friends system I planned to have that too, some fine day… so this “PC” was running lying naked on my desk. It consisted of

  • CPU: AMD 80386, 33MHz
  • Mainboard: No-Name 386, populated with 4MB and five 16-bit ISA slots
  • Video: No-Name Trident 8900, 512K (IIRC)
  • Media: A 5.25″, full-hight 170MB SCSI monster (I think it was Micropolis and already considered vintage – but cheap!) attached to a fancy (and very much loved) Adaptec 1542b – and a 1.4MB 3.5″ floppy of course.

It turned out that there was no way to get a proper UNIX for cheap – and it wasn’t planned to pursue this path any further…
(During these days in my view Apple and Acorn still were the things to come – it shows how wrong you can be)

1992 – Linux happened

Early 1992 I got wind of this Finnish guy and his ‘tuned MINIX’ – digging into the news further I was on fire, got myself a ~40 Floppy Distro (A Slackware clone from ‘Linux Support Team Erlangen’) and immediately understood, that a 386 and 4MB isn’t much if you want X11, too.

So I swapped my x86 again and got myself a 80486/33 which I originally bought as office workhorse for my first own company (which did not work out so well). Having doubled the RAM this also brought a speedy ET4000 with a whopping 1MB video-RAM making X11 possible.

  • CPU: Intel 80486, 33MHz
  • Mainboard: No-Name 486, populated with 8MB and five 16-bit ISA slots
  • Video: ET4000, 1MB
  • Media: Replaced the lame AT-BUS by my SCSI rig from above.

1994 – Going serious

Finally I was in UNIX heaven… and using a UNIX system (Linux in this case) you never have a sufficiently fast system. It became clear that my 33MHz 486 hit its limits and even my dear AHA1542B felt slow looking at this brand new PCI-Bus everybody was going crazy about. So I skipped EISA and looked for the best solution.
Attending the release show [German] of the brand new Intel Pentium at Cebit ’93 it became clear that I’ll ignore that an go for an Am5x86 and the best board you can get: The ASUS PCI/I-486SP3G

  • CPU: AMD 5×86, 133MHz
  • Mainboard: Asus 468SP3G with 16MB, four 16-bit ISA and 3 PCI slots
  • Video:ET4000  (replaced in 1995 by an S3 Trio64, 2MB)
  • Media: Onboard NCR53c810 SCSI driving a 3.5″ 200MB HD and 2x CD-ROM

1996 – Bad Ass mode

Compiling kernels and stuff like that squeezed the last inch of performance out of my trusty 5×86 (now running at 160MHz) it had to be something faster again… Having some cash at hand I decided to go “32bit and no way  back” and opted for the cool & huge Pentium PRO @ 200MHz which I got for a very good price (used, from an integrator evaluation site) before I even had a board for it.
After some research it had to be the bad-ass Tyan S1662D mainboard, featuring a 2nd socket to go dual CPU – how crazy it that!? A year later, that socket got populated and besides my Linux power-house (make -j2!) this box also rendered Cinema-4D movies like a maniac (I even was beta-tester for Maxxon).

  • CPU: 2x Intel Pentium Pro/200
  • Mainboard: Tyan S1662D with 32MB, tree 16-bit ISA and 5 PCI slots. Stuffed to 256MB later.
  • Video: S3 ViRGE/VX 2MB, replaced by later by a very much loved Nvidia Riva 128/4MB
  • Media: Symbios Logic 53C875 PCI SCSI controller driving a 3.5″ 500MB HD and 2x CD-ROM

1999 – Last x86 update for a long time

Finishing my studies I mainly used my beloved PowerMac 6100 for creative work, while my ‘Pro’ was Linux and render-box only.
I started a day-job in IT earning real money and had the chance of hosting my server – so the PPro became my first physical server hosting this very page (and others). So I needed to get into PC builds gain – even I can’t remember a real reason for this 😉
Intels Pentium-II easily outperformed my two PPros already and AMD did not convince me with their product line, so it became an PII @ 333MHz and an Asus P2B-F board which ran solid as a rock… but when my iMac G4 with OS X moved in, I got the perfect UNIX/BSD system I ever wanted and this little PCs fate was clear… it replaced the PPro Webserver. The PC-at-home time ended…

  • CPU: Intel Pentium II 333MHz
  • Mainboard: Asus P2B-F with 512MB, tree 16-bit ISA and 5 PCI slots
  • Video: AGP Riva TNT
  • Media: ATA became cheaper and faster than affordable SCSI. So this was the end of an era.

The Orphan

In 2012 I inherited my work PC when they closed office and I was pink slipped. Well, if it’s free… and a nice system it was: The Intel i7 2600K is still considered a decent CPU and was an animal back then. The Gigabyte z68x-ud3 mainboard neither is a bad choice (if you don’t need the beta UEFI BIOS) and this box made a strong gaming box with some casual VM and Hackintosh experiments… but beyond that, Macs-only it was from 2000 up to now.

  • CPU: Intel i7 2600K
  • Mainboard: Gigabyte z68x-ud3 with 16GB, still two classic PCI slots and some PCIe.
  • Video: Some AMD 6950 I think…
  • Media: SATA SSD and HD

One box to rule them all

Because my MacPro 3,1 (early2008) finally reached its limits – even rigged and modded to run Mojave (Incl. Metal graphics) just fine. Compared to its size and power consumption the performance doesn’t justify running it for longer. The i7 PC sitting next to it started to annoy me with its beta UEFI BIOS and it clearly started showing its age.
So this brought me to the decision to modernize while consolidating. Still owning a legal licence of MacOS (and some more Macs in the household) I will build a single machine, hosting MacOS and Windoze 10 using all the latest shebang – and going back to where my x86 heart is (if there’s something like that ;-)): AMD.
AMD is back. Big time. The Zen architecture really brought them back into the race and they caught Intel cold.
This means my one-an-only (recent, not vintage ;)) system will something along these lines:

  • CPU: AMD Ryzen 3600
  • Mainboard: Asrock b450 pro4 with 16GB, no classic PCI slots and about 4 PCIe with different lanes.
  • Video: AMD R9 280 RX570…
  • Media: M.2 SSD and still some HD for the archives.

Conclusion… for now.

Phew, this all came a long way. 31 years of building x86 PCs… and how things changed (as they did with my SPARC comparison):

Let’s compare the first and last CPU of the above list

Spec NEC V20 Ryzen 3600 factor
Max stock MHz 8 4200 33600
External Bus-width 8 64 8
Max addressable RAM in MB 1 32000 32000
Pins 40 1331 33.2
Manufacturing process 1200nm (less than half of Intels 8088) 7nm 171.42
Transistors 63.000 (double of an i8088) 9.900.000.000 (sum of chiplets and IOD) 157142.8
Cache 0 35.3 MB (all levels)

(more Cache than a 286 could even address)

Opcodes 154 About 1013 (incl. everything from MMX, SSEx to SGX/VMX/SMX) 6.5

That’s quite impressive, isn’t it? I’m still blown away by the number of instructions… ~1013! Holy Bat-Opcode! IIRC the 6502/10 had 56… and still isn’t considered pure RISC.

The final Cube – Snow white coffin

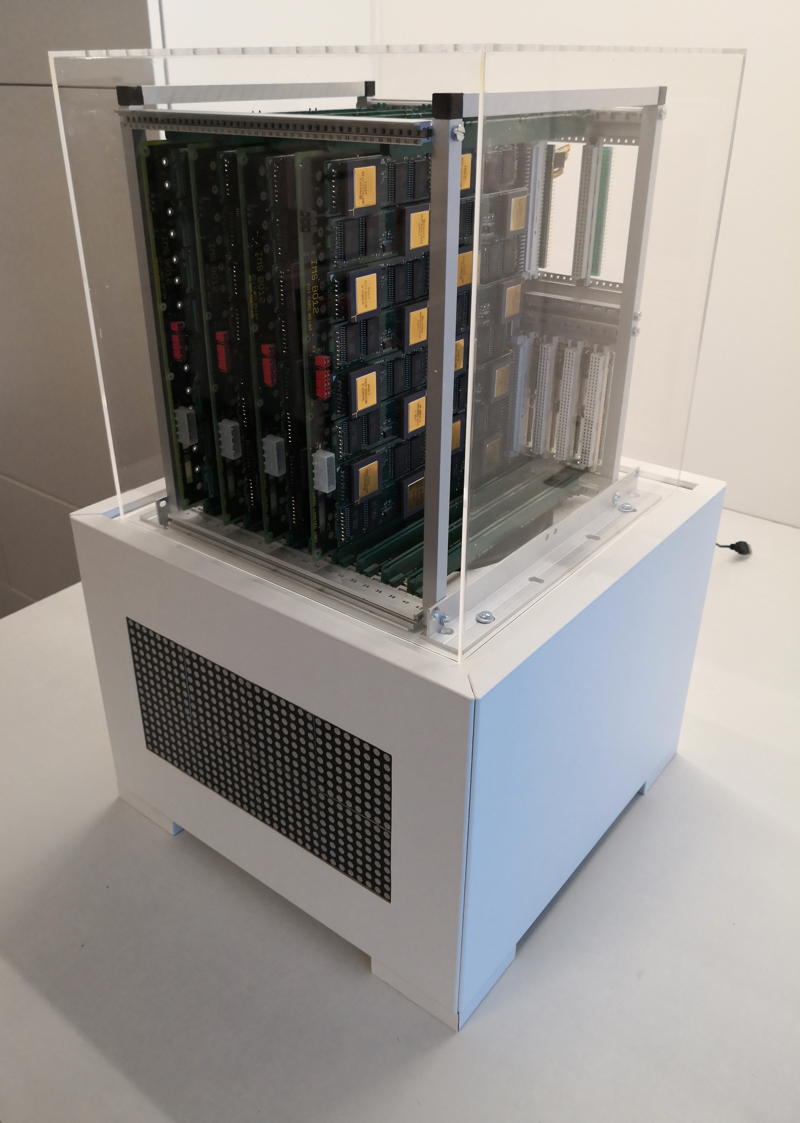
This is it. Hooray! The final Cube as I always wanted it to be.
It just took me about 2 years of planning, blood, sweat & tears, huffing and puffing. Many tries to find the right parts, plenty materials evaluated always trying to keep the budget low.

The sleeping beauty – yeah, it’s a bit snow white coffin’ish

Meet the ancestors

You might have followed the route I took for quite some time now:
It began with the ‘Tower of Power‘, basically a component carrier with a power-supply.
After some years it was replaced by the first Cube.  Well, yes, while it had a somewhat cubic’ish case, is still was just a dull standard industrial case. Not really what I imagined how my computer should look.

Form follows function

If you’ve read some posts here on GeekDot, you might already got the impression that I’m a sucker for design. Well, not that kind of a surprise, given I studied design some decades ago 🙄
I’m also heavily influenced by the works and philosophy of Dieter Rams (mainly for BRAUN) and Hartmut Esslinger (of frog design), of which you might not have heard about, but you know their designs for sure…
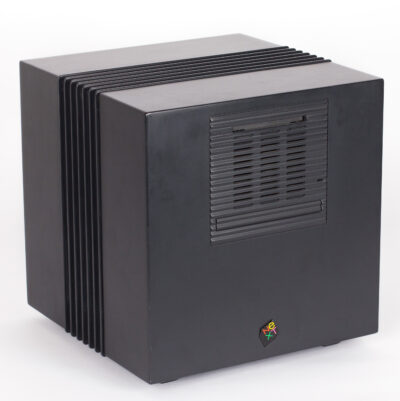
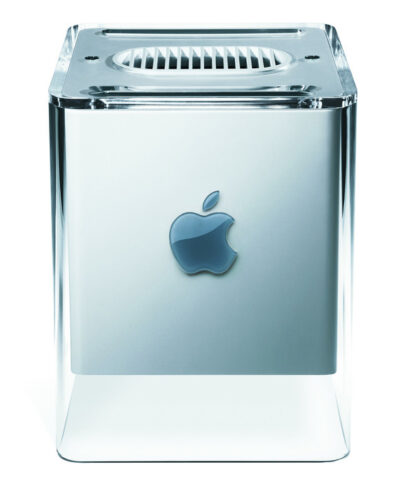
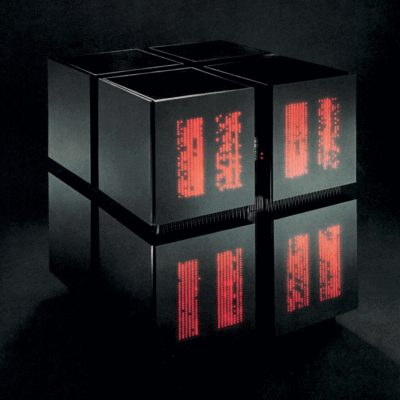
So I fell in love with the Parsytec x’plorer and other iconic computer designs like these ‘cubistic’ examples:

Yes, I am a strong believer that a computer, while basically being a rather boring calculation tool, should look good, timeless and might give you an idea of its innards are actually doing something.
We could probably go on forever, defining how a well designed computer should look like. But like the Romans used to say: “non potest argui per gustum” (You can’t argue about taste)…
Let’s say, I’m probably not totally off, given that most designs I like are also on display at the Museum Of Modern Art 😉

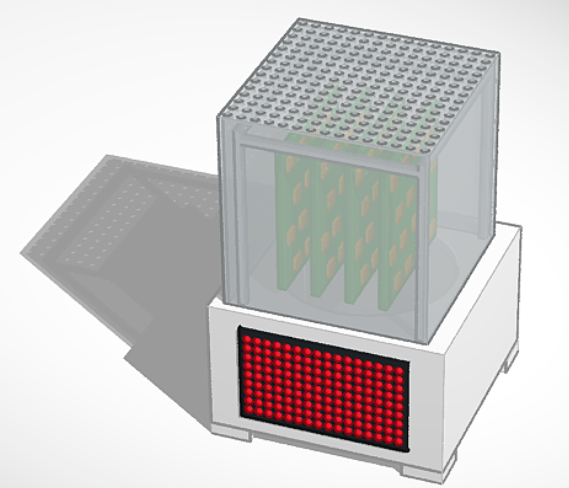
So mentioning the Final Cubes design, it’s  case we’re talking about: If you’re really picky, then yes, the Final Cube is actually two cubes:

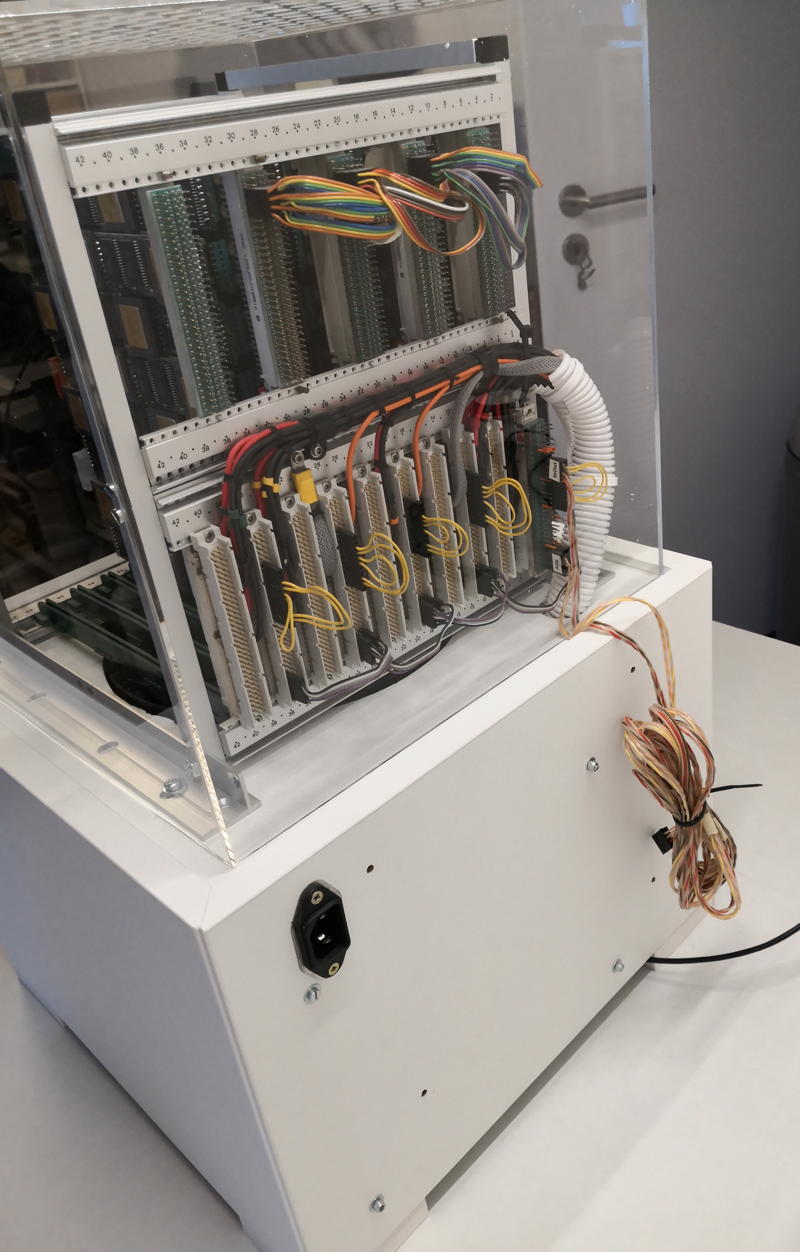
The carrier-cage on the top which I tried to keep simplistic and invisible to give the PCBs as much stage as possible. The user should be able to see the many, shining CPUs. So 10x10mm aluminum square tubes are connected by 3D-printed frame-corners to provide maximum view onto the technology.
For protection but also as a design statement and tribute to Rams’/Gugelots famous ‘snow white’s coffin‘ everything is surrounded by a 30x30x30cm translucent acrylic cube.

The white base actually isn’t cubical at all being much wider than tall. Nevertheless, its design should be even more simplistic and cautious to serve three purposes:

  • Give the computing-parts above it a proper podium
  • House the LED array which provides the fitting aura
  • …and finally house all the tech the user should not care about

With quite a big fan between the base and the top both work like a chimney (following the convection) sucking the air from the bottom and blowing it through 169 holes in the top plate of the cube.
Here’s an idea out how it looks “working”:

When one thing comes to another

The parts of which the Final Cube is build from aren’t all created this year. Actually only the case and the cage-frame are from 2019 – all other parts were designed by me some years before.

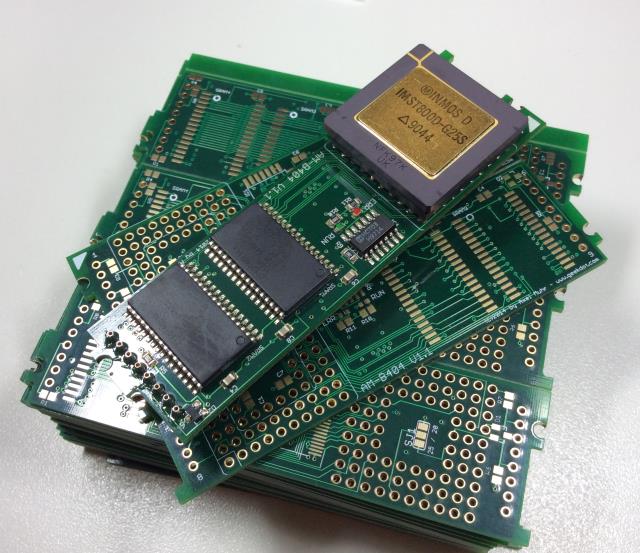
The core of everything are TRAMs – these are Transputer computing modules defined by Inmos back in 1990. The specific TRAMs used are my own AM-B404, each containing a 25MHz T800 and 2MB of  fast SRAM.

Finest home-made TRAMs

16 of these TRAMs are placed onto an Inmos B012 (or compatible) carrier board. And up to 10 of these carriers can be put into the Cubes carrier-frame creating the cluster.

Under the hood

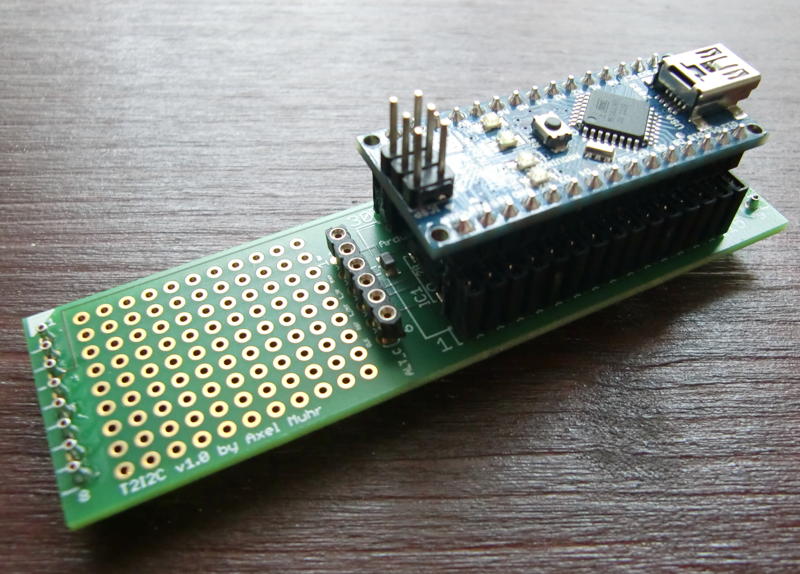
Below the carrier-frame, in the base, you can spot a 32×16 LED panel. This one is actually from 2012 when I designed the T2i2c, an i2c-bus to Transputer TRAM.

Yes, that’s an Arduino Micro on top of a TRAM

So it was a natural move to make the T2i2c into a system-controller. It does not only controls the LEDs displaying the current load of all Transputers, but also using a photo-diode to set the display brightness as well as measuring the internal temperature and overall power consumption.

Here’s an overview of the base internals:

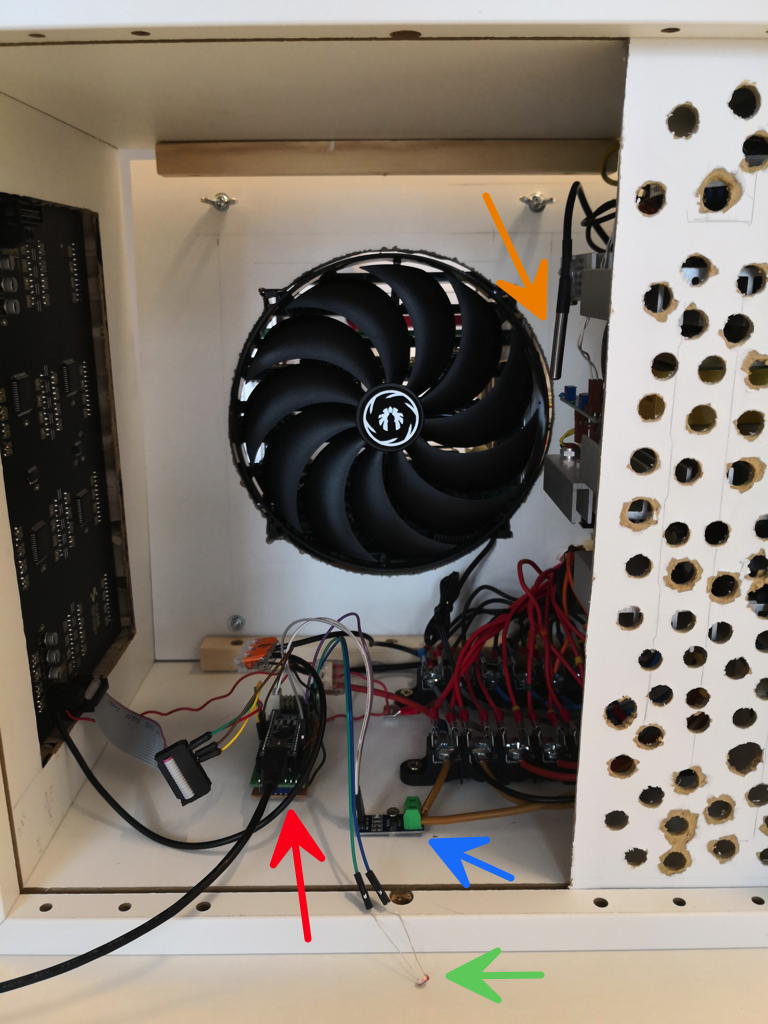
I know, the venting holes are not pretty – but they do their job and prevent you from accidentally touching the power-supply.

The red arrow points to the T2i2c being connected to the LED panel to the left as well as to a hall-sensor (blue arrow) measuring the power consumption, a temperature sensor (orange) and a photo-diode (green).
You cannot overlook the 22cm fan in the back sucking air from the bottom along the power-supply and pushing it up to the Transputers above to keep them cool.

And their power consumption is not to be trivialized. In average a single Transputer TRAM requires is about 1 ampere… so the math is easy. This means the quest for a powerful power-supply was on.
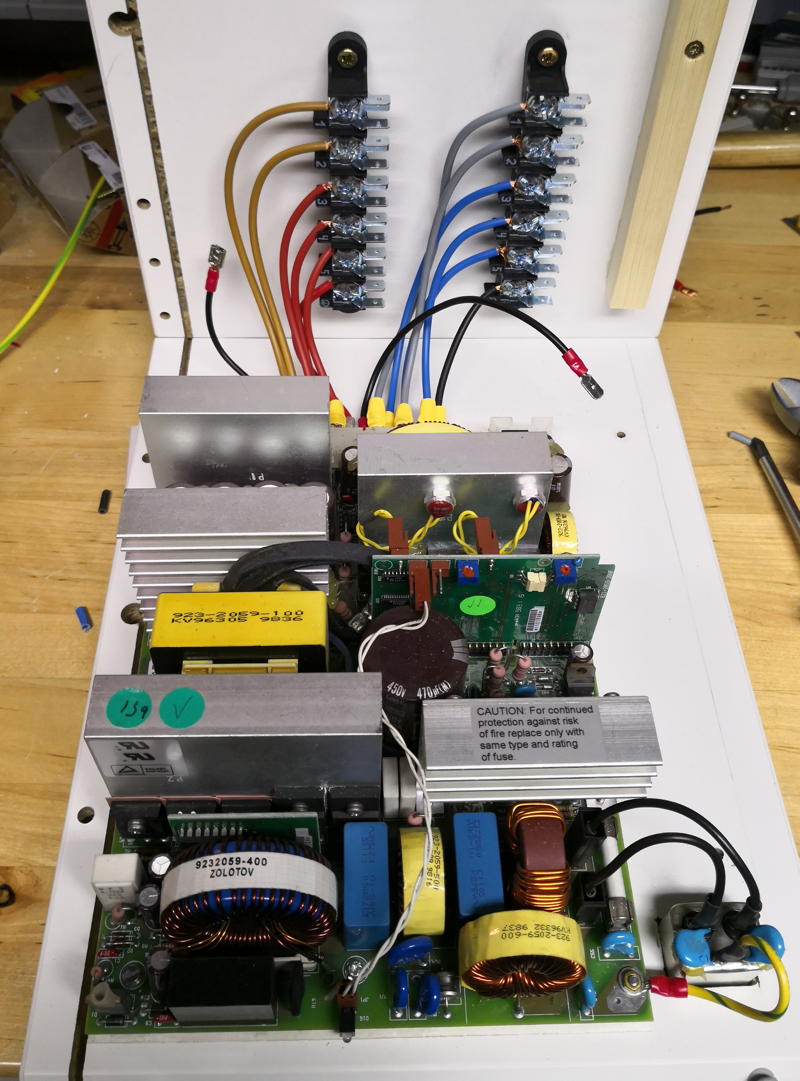
After some months I found what used to be the power-supply meant for a 3Com Corebuilder 7000: The mighty 3C37010A. A whopping 90A@5V should be OK for starters… here’s the fitting procedure:

Mooooore powerrrrrrr, Igor! You touch, you die!

The back of the medal…

The backside did not change compared to the previous Cube back  – well besides the supply-cabling which now goes down into the base instead to the side of the cage.


In consequence you’ll spot the power-connector there. No switch though  – still thinking about that… as well as a nicer cable-management for the link-cable which is normally connected to the host.

Next up would be a host matching the look. Mhhhh….

ATW800 Farmcard

Sometimes a man has to do what a man has to do 😉 And this time it got to be an ATW800 Farmcard.
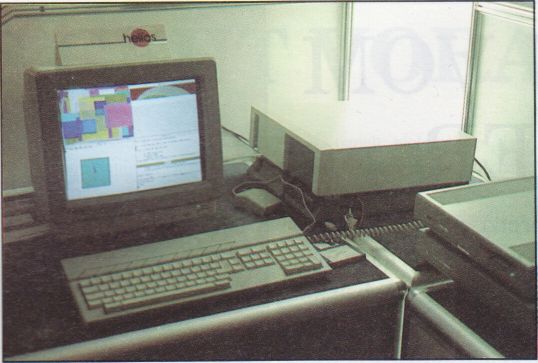
A what? ATW800 stands for ATARI Transputer Workstation – basically an Atari ST and a Transputer subsystem in a tower case (just about 250 were build and sold) and looks like this:

Atw front.jpg

Background

Even I still do not own an ATARI Transputer Workstation (yet), I “know” it from the very first presentation when working at the 1988 CeBIT Atari booth back then. The initial demo version used a standard Atari Mega-ST connected to a blunt Atari-PC3 case which housed the Transputer stuff… and the whole thing ran the Helios Operation System about which you can read quite a lot in this GeekDot chapter. Well, actually that was no wonder given that Perihelion Ltd. was not only the creator of Helios but also the birthplace of the ATW800 (Called ABAQ in the early stages).

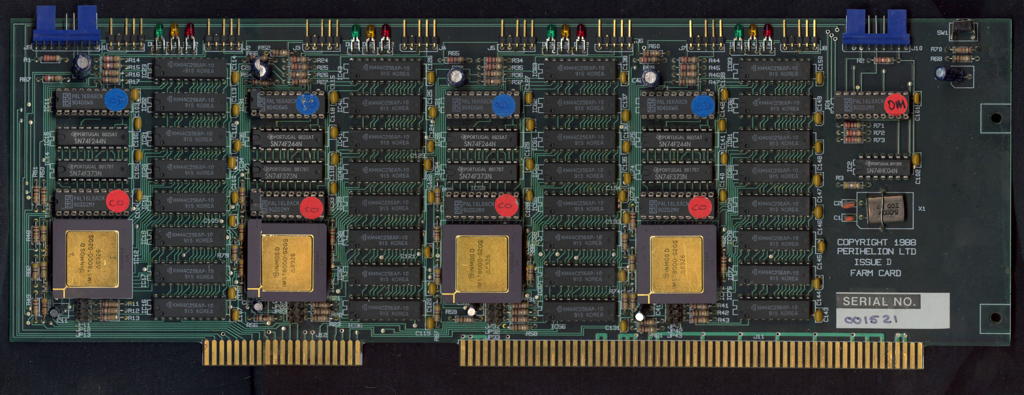
The final version (the one in the tower case) used so-called Farmcards to expand the number of Transputers available to the system. A Farmcard featured 4 fixed Transputers (T425 or T800) with 1MB of RAM each. Here’s a piccy (click to zoom):

That might be plenty back then, but even in those days progress was made quickly and INMOS presented their TRAM Modules at nearly the same time… and these give you so much more flexibility and also save space. Actually, if you closely read the marketing material from Perihelion you will spot the announcement of a TRAM Farmcard. It just never made it…

I did it my way…

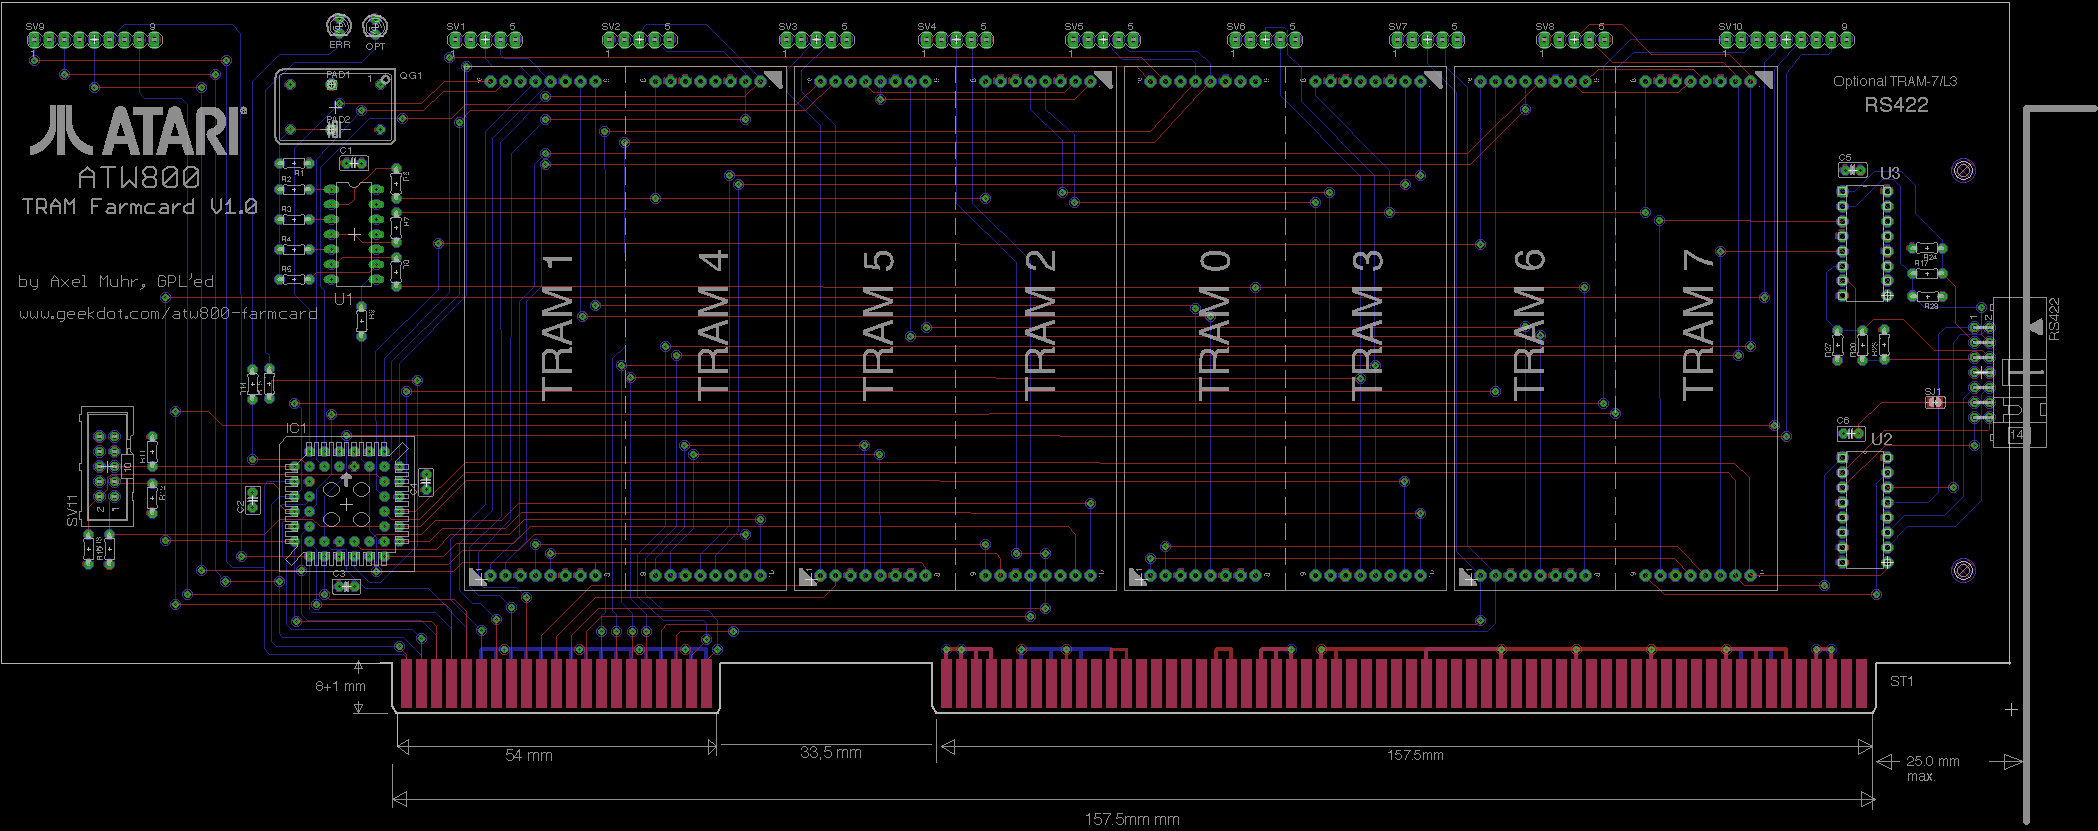
So it was just a question of time until I start to design a TRAM-Farmcard. After many years of unsuccessfully hunting an ATW which is for sale, I at least met shock__ (atari-home.de forum) a lucky ATW800 owner who was happy to help. So using the available documentation and the data provided by shock__ I created this:

Features

So what gives? Well, first of all, there aren’t any original Farmcards available anymore. Even if there were, they’re pretty limited. One Megabyte is enough for a computing slave using pure OCCAM but if you’re using Helios, 300k will already ate up by its core demons. Then there’s space for just 4 Transputers, not many given the size of the card.
That said here’s what this new Farmcard provides:

  • 8 TRAM slots. Can be used for anything. Computing, SCSI, Ethernet or graphics TRAMs. Be it size-1 to 8. There were many, many cool modules available. Today you can at least use my AM-B404 TRAM, a super-fast 2MB size-1 compute TRAM.
    This would mean twice the CPU oomp, and double the RAM.
  • Freely programmable Altera EPM7032/64 CPLD. It will implement Perihelions diagnostic-bus, meant for controlling each Transputer separately. Updates can be done in-field.
  • An external RS422-link. Using differential transceivers (26LS31/32) one can connect external Transputer networks over a distance up to 20-30 meters (vs. 30cm in pure TTL).
  • 4 layer PCB design giving stable power distribution throughout the board. Still, simple layout, easy to patch and only through-hole parts being used to make building as easy as possible.
  • 2 LEDs. Just say’in…

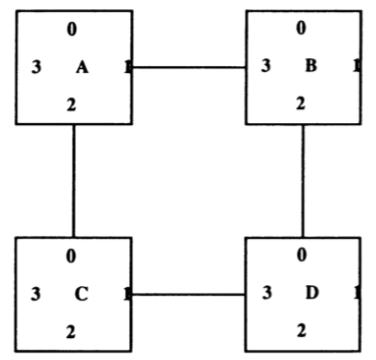
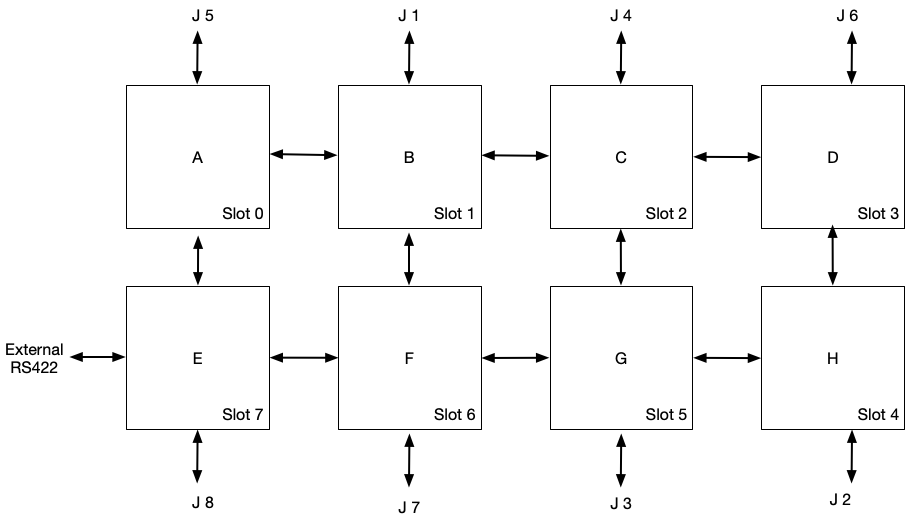
Because of the added Transputer-Slots the network topology looks a bit different than is used to be on the original Farmcard.
This is the “old one”, a simple square, each Transputer has two free links being available at the edge connectors J1-J8:

And this is how the 8 slots are connected:

Now each Transputer has just one link connected to the edge-connectors. Slot 7 uses link-3 to connect to the optional external RS422 connector.

Free as free beer!

Because there are probably only two handful of ATW800 owners out there, I made the schematics freely available here under the GPL license. But to make things clear:
This is untested stuff! The card is huge. It is not cheap to have it manufactured. The best price for 10 PCBs I was able to find was about $250.

The hard part

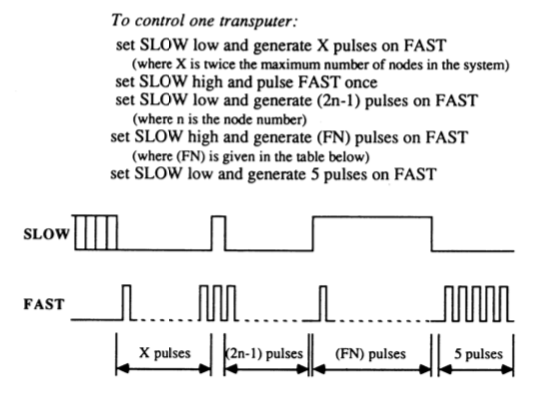
While the cards design was pretty straightforward the “firmware” of the CPLD will be a different beast. As said, Perihelion used a proprietary bus called “diagnostic bus” (DBus) – a two wire bus used to address all or just a single Transputer in a network to either reset or put him into the so-called analyze-state to do some post-mortem debugging. Pretty advanced stuff given that standard Transputer networks simply used a global reset.

Luckily the DBus is documented in the (short) Farmcard Manual (p.8-10). So we have a rough idea what’s going to be expected:

The DBus is daisy-chained through all Farmcards on the slots as well as on the edge-connectors J9 & J10 (in/out). Because I hadn’t had an original Farmcard at hand I wasn’t sure which of these signals are needed to be controlled by the CPLD. So I connected them all using all available I/O ports.  This is the pinout:

pin function
04 5_ANA
05 1_RES
06 1_ANA
08 LED1 (Error)
09 L_IN
11 L_OUT
12 FAST_IN
14 FAST_OUT
16 SLOW_IN
17 SLOW_OUT
18 GLOBAL_RESET_IN
19 GLOBAL_RESET_OUT
20 T_ERR_IN
21 T_ERR_OUT
24 LED2 (Opt)
25 4_ANA
26 4_RES
27 2_ANA
28 2_RES
29 3_ANA
31 3_RES
33 7_ANA
34 7_RES
36 6_ANA
37 6_RES
39 0_ANA
40 0_RES
41 5_RES

So, this is it for now… it’s an ongoing project and it depends on you how fast progress will be made.

  • Do you own an ATW800? We’re looking for brave testers!
  • Are you a VHDL hero? Grab the manual and do your thing!
  • Transputer nut? Feel free to check the schematic… I’m not swearing it’s 100% bug-free.

To be continued…

Atari, my love.

This blog post is due to the fact I was just reanimating my Atari 2080ST, which triggered lots of memories I urgently needed to write down… so here we go:
Yes, the 1st proper (i.e. not soldered) computer I owned was a C64… I loved it, really. I loved it for 3 years… and seriously dreamt about getting an C128D – until I’ve read the fist reports about that Atari 260ST.

I was hooked just by the specs on paper. For me it looked like a Macintosh but with a realistic chance to own one some fine day.
Actually there was a day in the beginning of 1985 when I sat with Heinrich-Hermann Huth, (one of the founders of later Application System Heidelberg, ASH for short) discussing what’s the best upcoming computer. He was 100% Commodore 128… until I started my Atari ST anthem.
Around June or July, he invited me to his parents house to “show me something exciting”. There it was, one of the first STs in Germany, serial number 6, directly picked-up at Frankfurt airport. TOS came on an awesome 3.5″ floppy, the included Basic was slow as hell and the the Digital Research SDK left me puzzled. C? Compiler? Linker?
It became clear that I have to learn a lot to be worthy for such a serious system.
Looking back I wonder if ASH would ever been founded without my evangelism 😉

So in early 1986 it was my turn: My Confirmation. This is a big deal over here and the most “profitable” observance. While the standard wish of kids in these days were big stereos, mine was clear.
Thanks to perfect timing, the 520ST just became 520ST+ and now had a whopping megabyte… it was heaven.

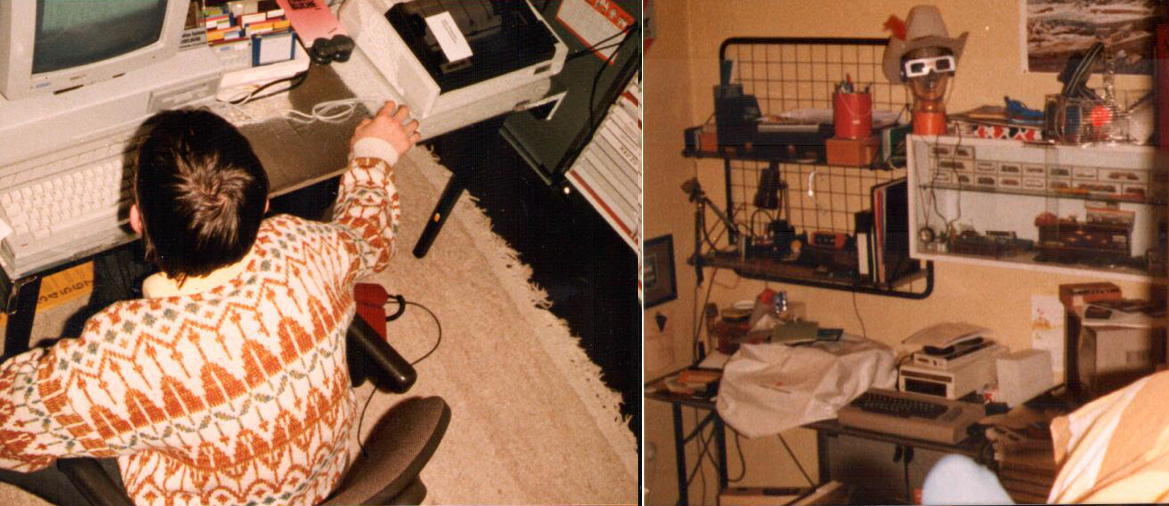
The glory of the 80s… bad jumpers and paper 3D-glasses.The right half shows the C64 moved into a far corner before it was sold to buy a 2nd floppy for my ST.

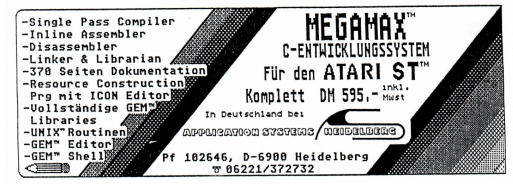
Just about that time, Application Systems Heidelberg was founded… in the child’s room of Heinrich-Herrmann, who somehow managed to get the exclusive distribution rights of Megamax C for Germany.
This proved to be a lucky pick, because the ST was taking the German market by storm and there was no good SDK available. So magazine ads were needed and I was the only one who had a design talent. This was my first design made with my brand new 520+:

The company logo was cut out and glued onto the b/w print which came out of a 9-needle-printer.

Mind the small pencil in the lower left corner. In German, that’s a “Stift”, which is also slang for “apprentice” – which was me 😆
There even was an article about this ad in the German ST-Computer magazine (issue 1/2016, pg. 7/8).  Quote:

Doch selbst der Software­Gigant aus Heidelberg fing klein an: Auf einer Viertelseite bewarb die Firma in der Ausgabe 07­08/1986 das Megamax C­ Entwicklungssystem, gestaltet wurde die Anzeige mit der Systemschrift und den Füllmustern des STs.

Which translates into “Even the software giant from Heidelberg started out small: In issue 07-08/1986 the company advertised the Megamax-C SDK  on a quarter-page, designed using system fonts and the fill-patterns of the ST“.
Yeah, that’s all true. And “The Stift” was payed for this and other ads by being allowed to keep the glorious Citizen MSP-20 9-needle printer.

In the following years I spend my time mostly in 3 places: In school because I had to, at home in front of my Atari ST or in the ASH office because it was just so cool. During these days I did many thing for them:

  • Packed so many, many, many Megamax, Signum! and STAD boxes, labeled 100s of floppy-disks (was payed in M&M currency)
  • Some levels for Oxyd, Bolo and Esprit.
  • Some Signum! Fonts (forgot which ones, but they were in the 1st 251-Fonts book)
  • Phoenix Ornitho Database (containing samples of each bird singing)
  • The cartoon on the last page of their in-house magazine. Was quite a fancy oversized, glossy thing.
  • Probably 10 other things I forgot…

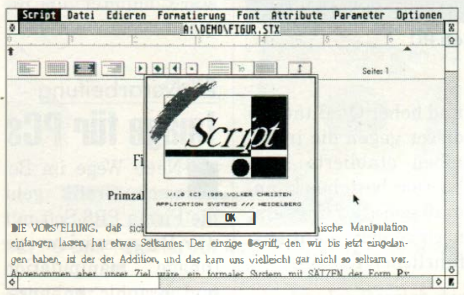
Icons and Infobox for Script v1

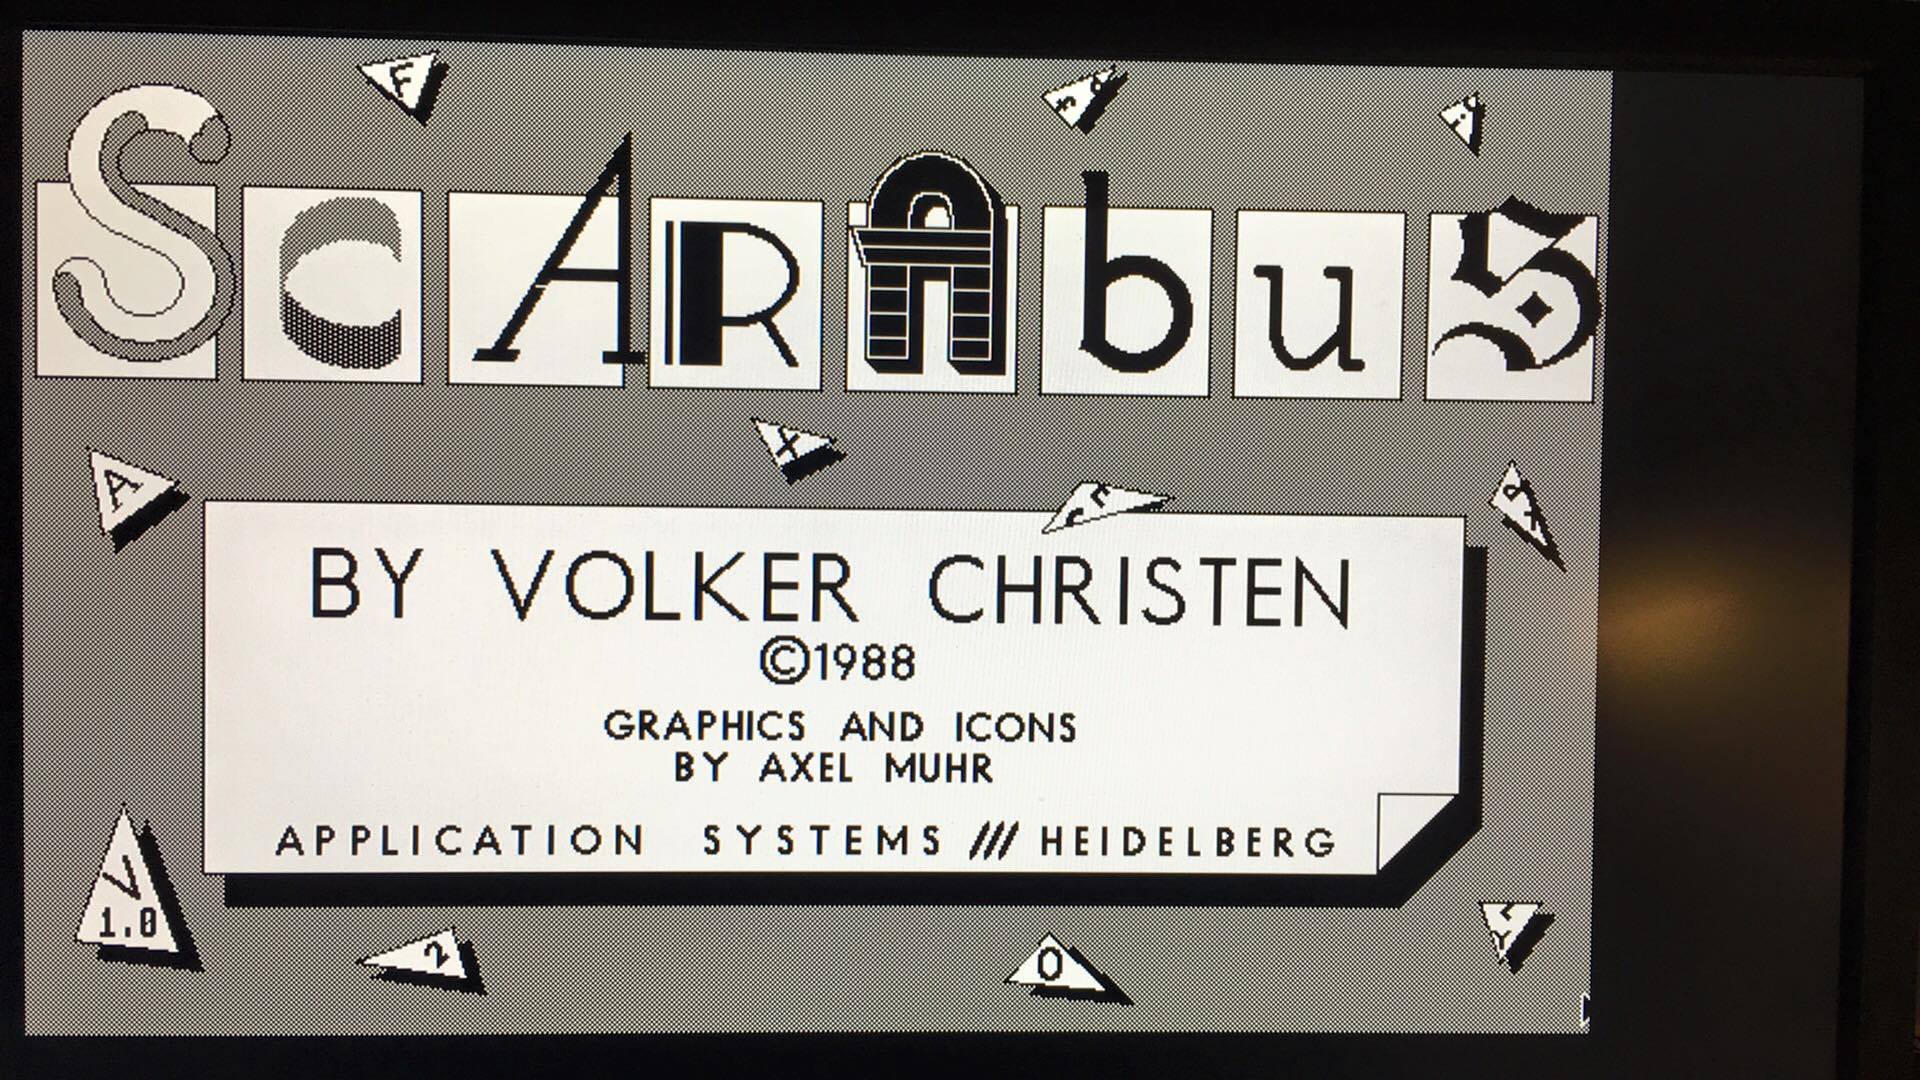
…and Scarabus.

Boy – this was definitely one of the top-5 times of my life. Thanks for this H3, Volker, Ojo (always in my heart), Karen (my heart ;)), Oili, Thomas and all the other great guys’n’gals from back then! Love y’all!