I spent nearly a week fiddling around with my new “DOS/Windoze retro workhorse” (a newer version of the Compaq Deskpro 2000). Setting up/moving DOS was a piece of cake and so I went on to install NT 4.0 which is the most recent (sic!) version of Windows supported by INMOS tools as well as it’s the favorite weapon of choice of Michael of transputer.net, so it’s wise to have it handy if you like to play around with his latest creations.
I stopped counting how many times I installed NT in different versions, languages and service packs. It constantly crashed, BSODs mostly hinting towards filesystem errors. So I swapped the drive – 3 times. Each time formatting, creating partitions for DOS etc…
Just today, in total desperation I tried Win XP and finally I got an error message which rang a very silent bell in the back of my head: “PAGE_FAULT_IN_NONPAGED_AREA” – this steered me away from possibly faulty drives and filesystems… towards RAM.
Blindly following my rule not to leave any socket empty, I stuffed that little machine to the brim. Replacing the ‘bad apple’ fixed it all. NT4SP6 is running like a charm – happy dance. Fine.
What really nags me about that is that I would have suspected RAM issues much earlier some years ago – it was a reflex, an instinct back then. MemTest86 was a trustworthy companion all days.
Are you loosing nerd-instincts too while piling new knowledge on old skills?
Yesterday it happened again. Another (little) wonder died in action 😥
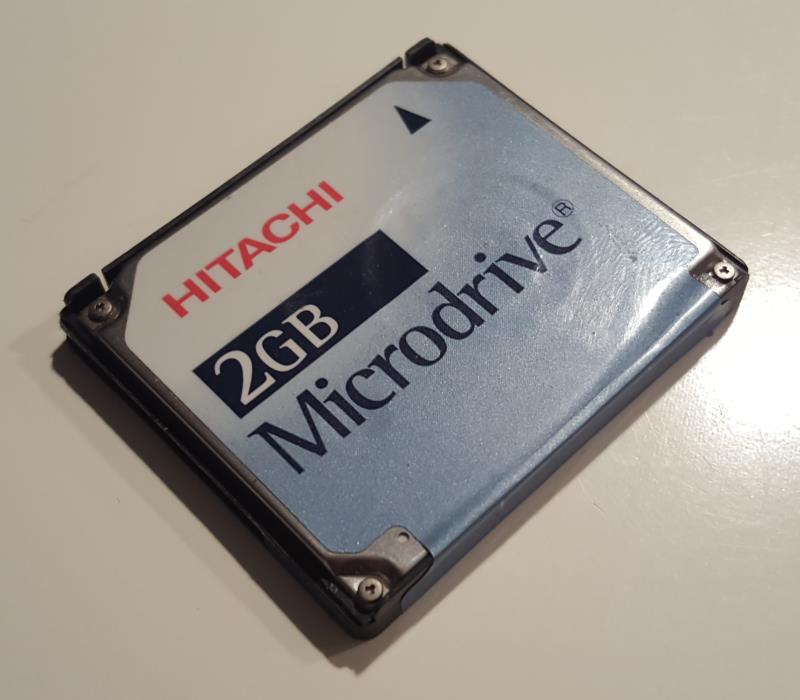
My beloved Microdrive started to make those noises you don’t want to hear from a harddrive: Click, click, toc, toc…
I must admit that I already forgot about it, as it silently ran in my dual CF-card adapter as slave drive to store the swapping partitions/files for the Linux/Windows NT installations living on the primary drive (a real flash card) to prevent the massive wear-out through constant reading and writing.
The Microdrive was one of those things which were, when released, considered as a real miracle by myself. When I took part in the presentation at CeBit 1999 it was just sooooo unbelievable that IBM managed to build a 1″ harddrive and pack everything into a Compact Flash Type II card. Announcing the will squeeze 1GB into it the next year doubled the amazement.
Thinking back, those ‘wonder moments’ became quite rare these days. I mean really breathtaking releases that make you think “WTF!?” and stop breathing for more than 10 seconds.
Now it’s dead. Built 2003, in hard-working duty for me since 2008. Rest in peace little wonder.
Do you remember your last ‘real wonder moment(tm)’ in IT space?
Next bigger work were two articles about (ISA) Transputer Interfaces: The INMOS B004 and the HEMA TA2. Those two are -roughly- the first and the most recent models of their kind, before PCI and USB took over.
This is the kick-off to document the most important cards you can plug into your computer to dive into the fascinating world of transputing. Come back often.
The Hema TA2 is some very special specimen of ISA interface cards. IMHO it’s the last and most sophisticated interface you can run in an ISA bus. These are the feature highlights:
16 bit ISA interface
half-size card
4 TRAM sockets
TTL and RS422 link connectors (if RS422 drivers are fitted, TTL is not usable)
B004 compatible ‘Fast Mode’ as well as 100% vanilla ‘Slow Mode’
The TA2 implements an Idea which can be found in some documents from those days, about getting the maximum speed from the sluggish ISA bus and a link-interface chip like the IMS C011/012:
Overlapping acknowledge by using FIFO buffers and a controlling FPGA.
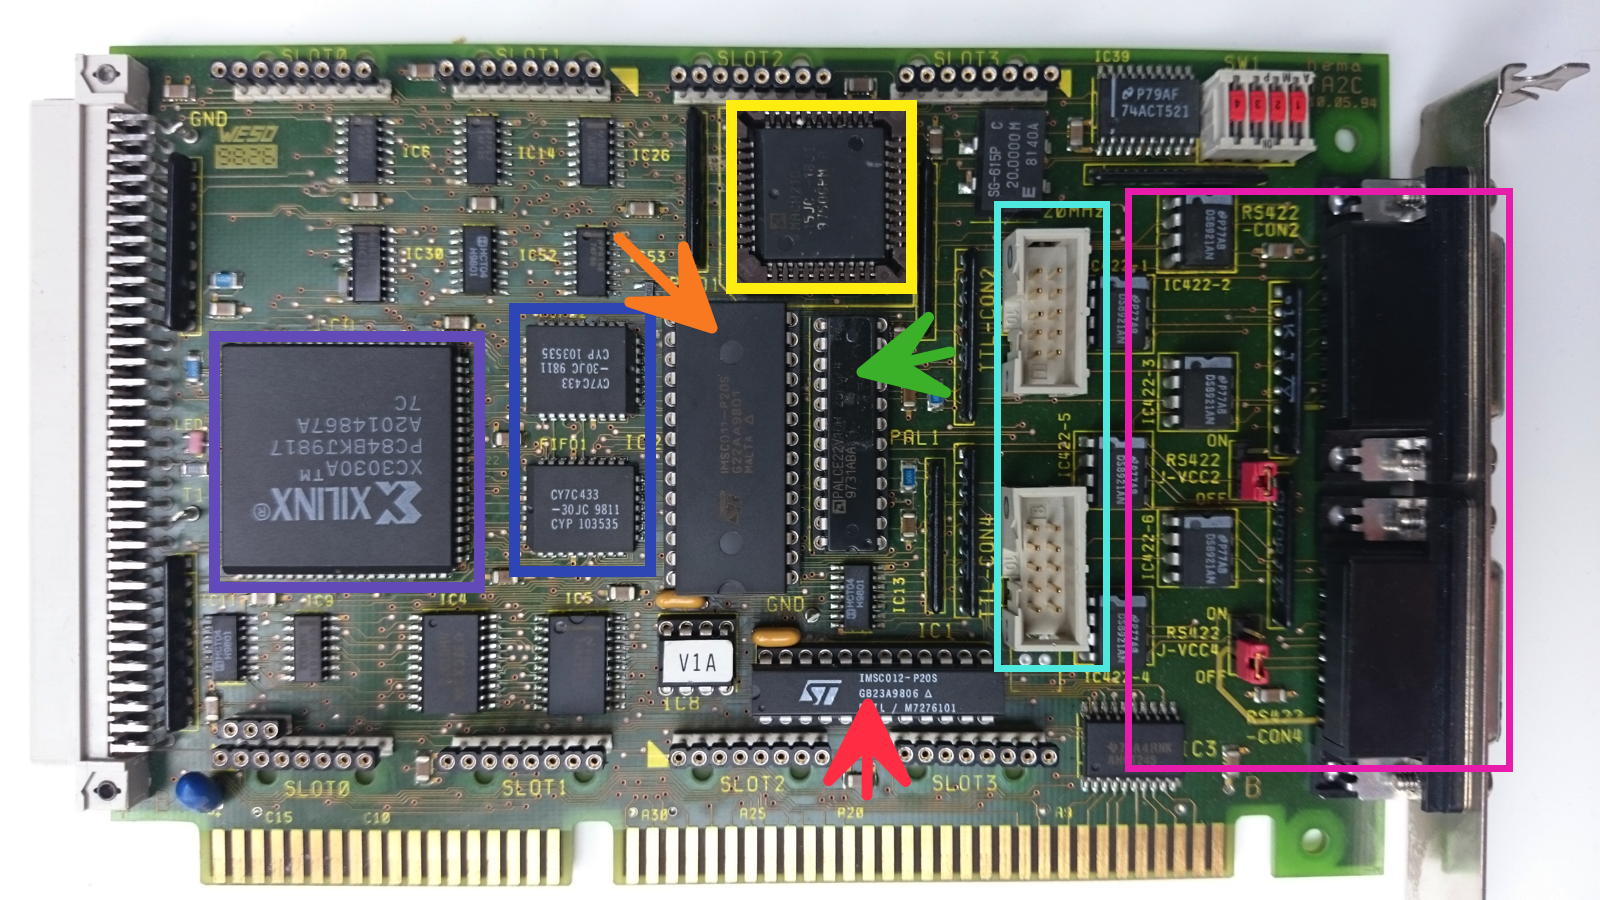
This is how the TA2 looks like:
I’ve marked the the important parts with colors/arrows:
red arrow – the IMS C012
orange arrow – the IMS C011 connected to
blue – two 1KB FIFOs controlled by
yellow – a MACH 110 CPLD and
green arrow – a PAL
purple – a XILINX 3030 FPGA doing the control logic
cyan & magenta – TTL and RS422 link connectors
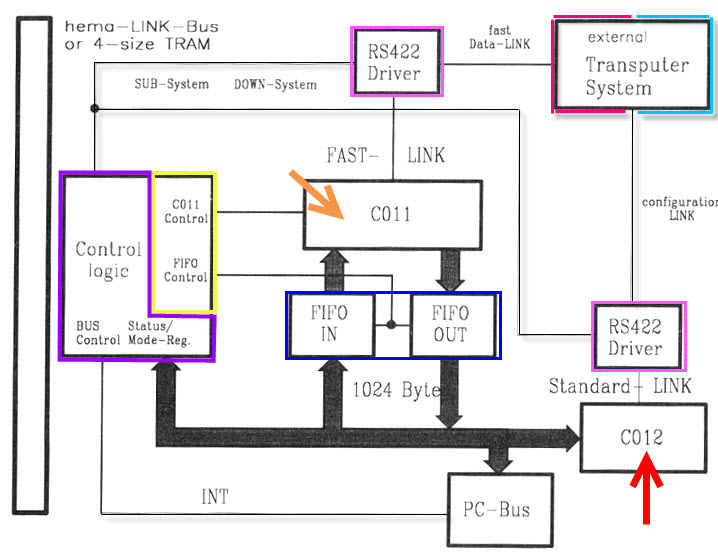
And here’s the block-schematic using the same colors:
The schematic also mentioned the two other cool features of the Hema TA2:
Four TRAM slots and the “hema LINK-Bus”, a proprietary two row DIN 41612 connector which provides all links/subsystem which were used otherwise by the 4 TRAMs.
Finally there is a 4-bit microswitch (upper right corner) to set a unique ID for the card so you can identify up to 16 cards in a single system.
Software
Using the provided control program “CTA2” everything can be set by software, e.g.
Base addresses for the fast- and slow link (0x150/0x158 by default)
Swapping fast/slow link configuration
Linkspeed for every link (fast/slow/TRAM/hema-bus)
Up- /Down-subsystem control
Interrupts per link
Waitstates
All the hardware wise ‘jumping through hoops’ still doesn’t do the job alone. To reach the ultimate ISA speed (the docs are talking about up to 1mbps) the communication needs to be tuned, too.
Lets talk a bit x86 assembler here (ahhhh), and DOS-only for sure:
It’s not enough to use simple in and out port instructions and constantly poll the C011/12 status register – that’s way too slow. You’ll need to go for the string variant(s) ins[b|w|d] combined with the rep instruction. Here’s an example for a C insb wapper function:
void insb(UINT16 port, void *buf, int count) { _ES = FP_SEG(buf); /* Buffer Segment */ _DI = FP_OFF(buf); /* Buffer Offset*/ _CX = count; /* Bytes to read*/ _DX = port;/* from Port xy */ asm REP INSB; }
Same goes for outs[b|w|d] respectively. But there’s another extra to care for: The TA2 provides special registers to give you deeper insight into its status, e.g. FiFo fill-rate (empty, half-full, full), FiFo interrupt settings.
So in effect, you couple the fast ins/outs instructions with interrupts attached to e.g. input half-full and output full.
That said, there are some caveats. ins[b|w] and outs[b|w] are supported from the i8018x and V20 on. insd and outsd needs a 386.
And then there are possible speed penalties with 32nit processors (i.e. 386 and up) as they optimized the port instructions for virtualization (Virtual 8088 mode, not todays VM!) resulting in 100+ cycles per call.
So when everything is 100% optimal, hema says in its documents these are the possible transfer speeds to reach:
Function/Array size
1K
10K
100K
1MB
Read FiFo
150kB/s
390kB/s
570kB/s
615kB/s
Read Polled
160kB/s
160kB/s
160kB/s
160kB/s
Read Direct
600kB/s
610kB/s
610kB/s
610kB/s
Write FiFo
565kB/s
600kB/s
610kB/s
610kB/s
Write Polled
160kB/s
160kB/s
160kB/s
160kB/s
Write Direct
610kB/s
610kB/s
610kB/s
610kB/s
FiFo – Using interrupts and syncing status of fill level.
Polled: Each byte is synchronized with the C012 status
Direct: Like FiFo but no syncing.
Well, this has to be proved yet. Seem I need to write a benchmark… someday 😉
I’d call the Inmos B004 the “mother of all Interface cards”, simply because it was the first ISA card sold by INMOS. And it wasn’t just the card but it also defined the (PC) standard of the software interface, mostly called the “B004-interface”. What a surprise 😉
So being the first card, it is quite big (full ISA length) while not offering really impressing specs: 8bit XT Bus, just one Transputer –TRAMs weren’t invented yet- and a max. of 2MB RAM (DILs). To do it justice, the manual rightfully calls it “Evaluation Board” and for that purpose it’s totally fine – remember that 2MB were quite an amount of RAM back in 1984.
To create a multi-Transputer network you had to either plug-in multiple B004s or connect an external network to the onboard connectors (the blue ones in the picture below).
As mentioned, the B004 software interface is what makes this card a keystone in the Transputer universe. All communication to the host (i.e. the XT/AT compatible PC) is done through a port range normally beginning at 0x150 (base, can be moved by some cards).
With certain offsets the host software can communicate with the Transputer, or the C011 to be precise:
Base Address
Register
Comment
+0x00
C011/12 input data
read
+0x01
C011/12 Output data
write
+0x02
C011/12 input status register
read = returns input status
write = set input interrupt on/off
+0x03
C011/12 Output status register
read = returns output status
write = set output interrupt on/off
+0x10
Reset/Error register
write: Reset Transputer & C011/12 and possibly subsystem (check manual)
read: Get Error status
+0x11
Analyse register
(un)set analyse
This mapping was used by more or less all ISA interface cards and extended by other more sophisticated interface cards later.
Clones
Needless to say, that very soon there were a couple of “inspired” models from other manufacturers. AFAIK all of them support Transputers up to 30MHz, which the B004 didn’t… so they’re actually better.
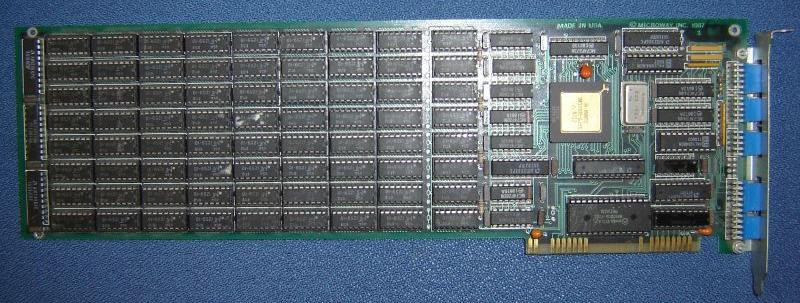
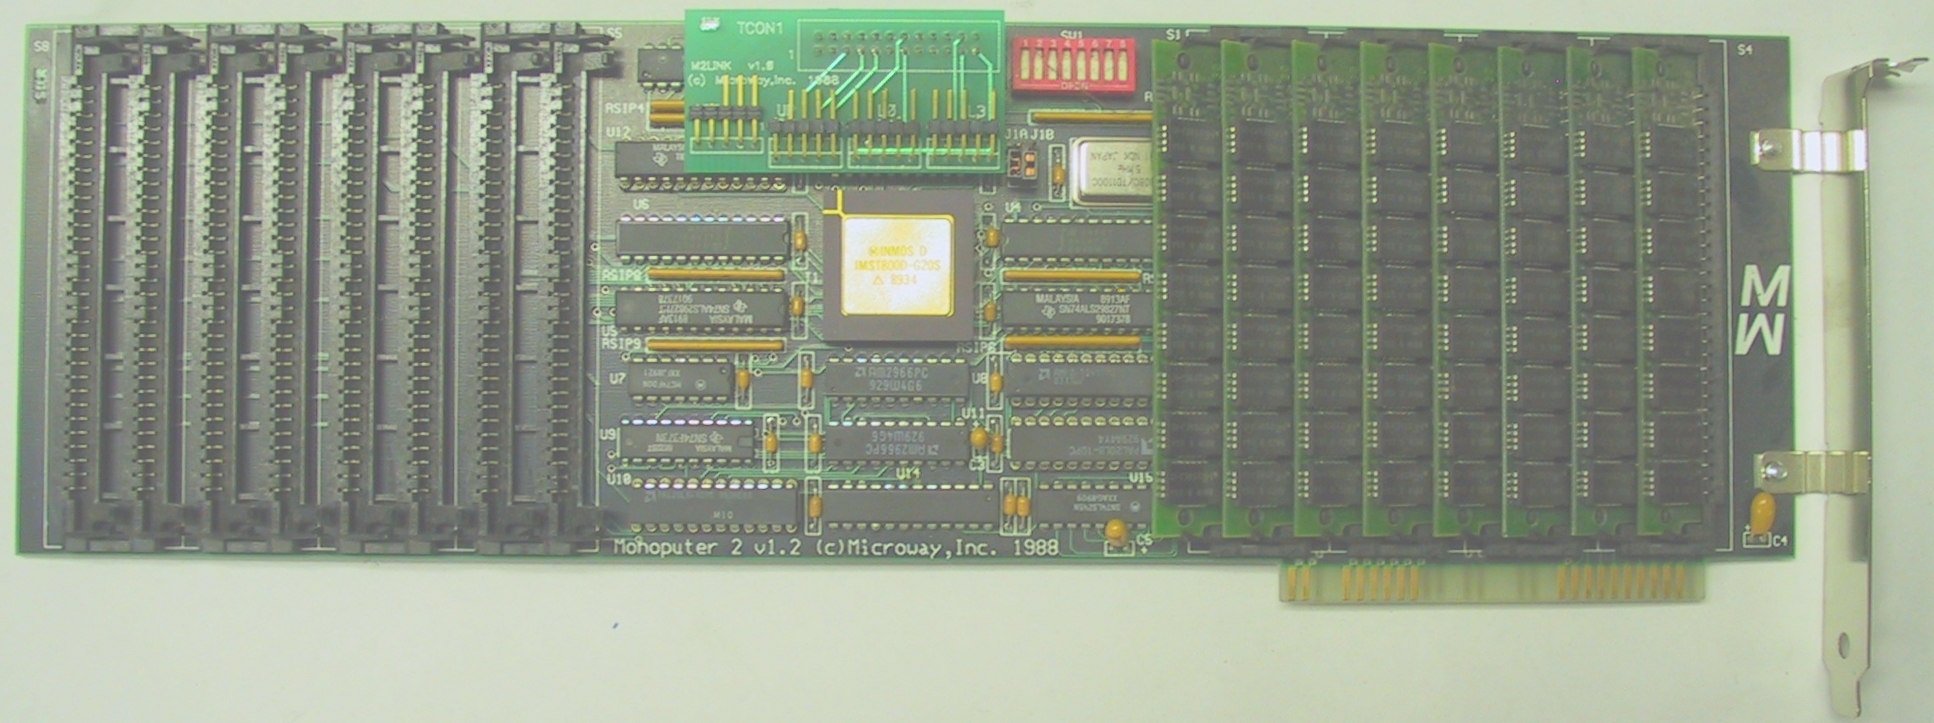
This example is from Microway (yes, those guys who later build the i860 Number Smasher), named Monoputer and dated 1987. Up to 2MB could be used on it. Mind the connectors being accessible from the outside:
Later they produced the “Monoputer 2” which was more modern and used SIMM RAM modules instead of DIL parts. The Transputer and Linkinterface moved into the middle of the card and the link connectors were moved inside the pc case again – the connectors are the very same used on the NumberSmasher860:
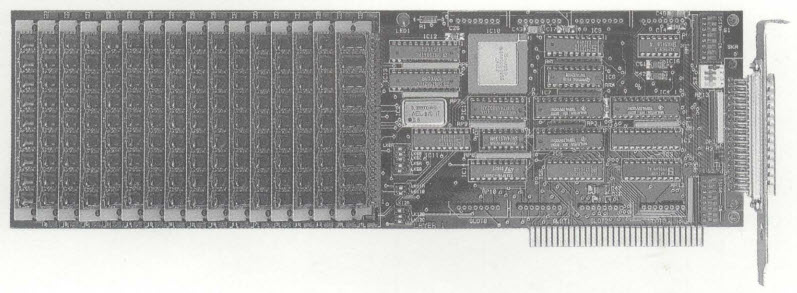
And here’s the one Transtech made, calling it TMB04 mind the SIMM banks which enable the card to give home up to 16MB RAM (at 3 cycle speed!):
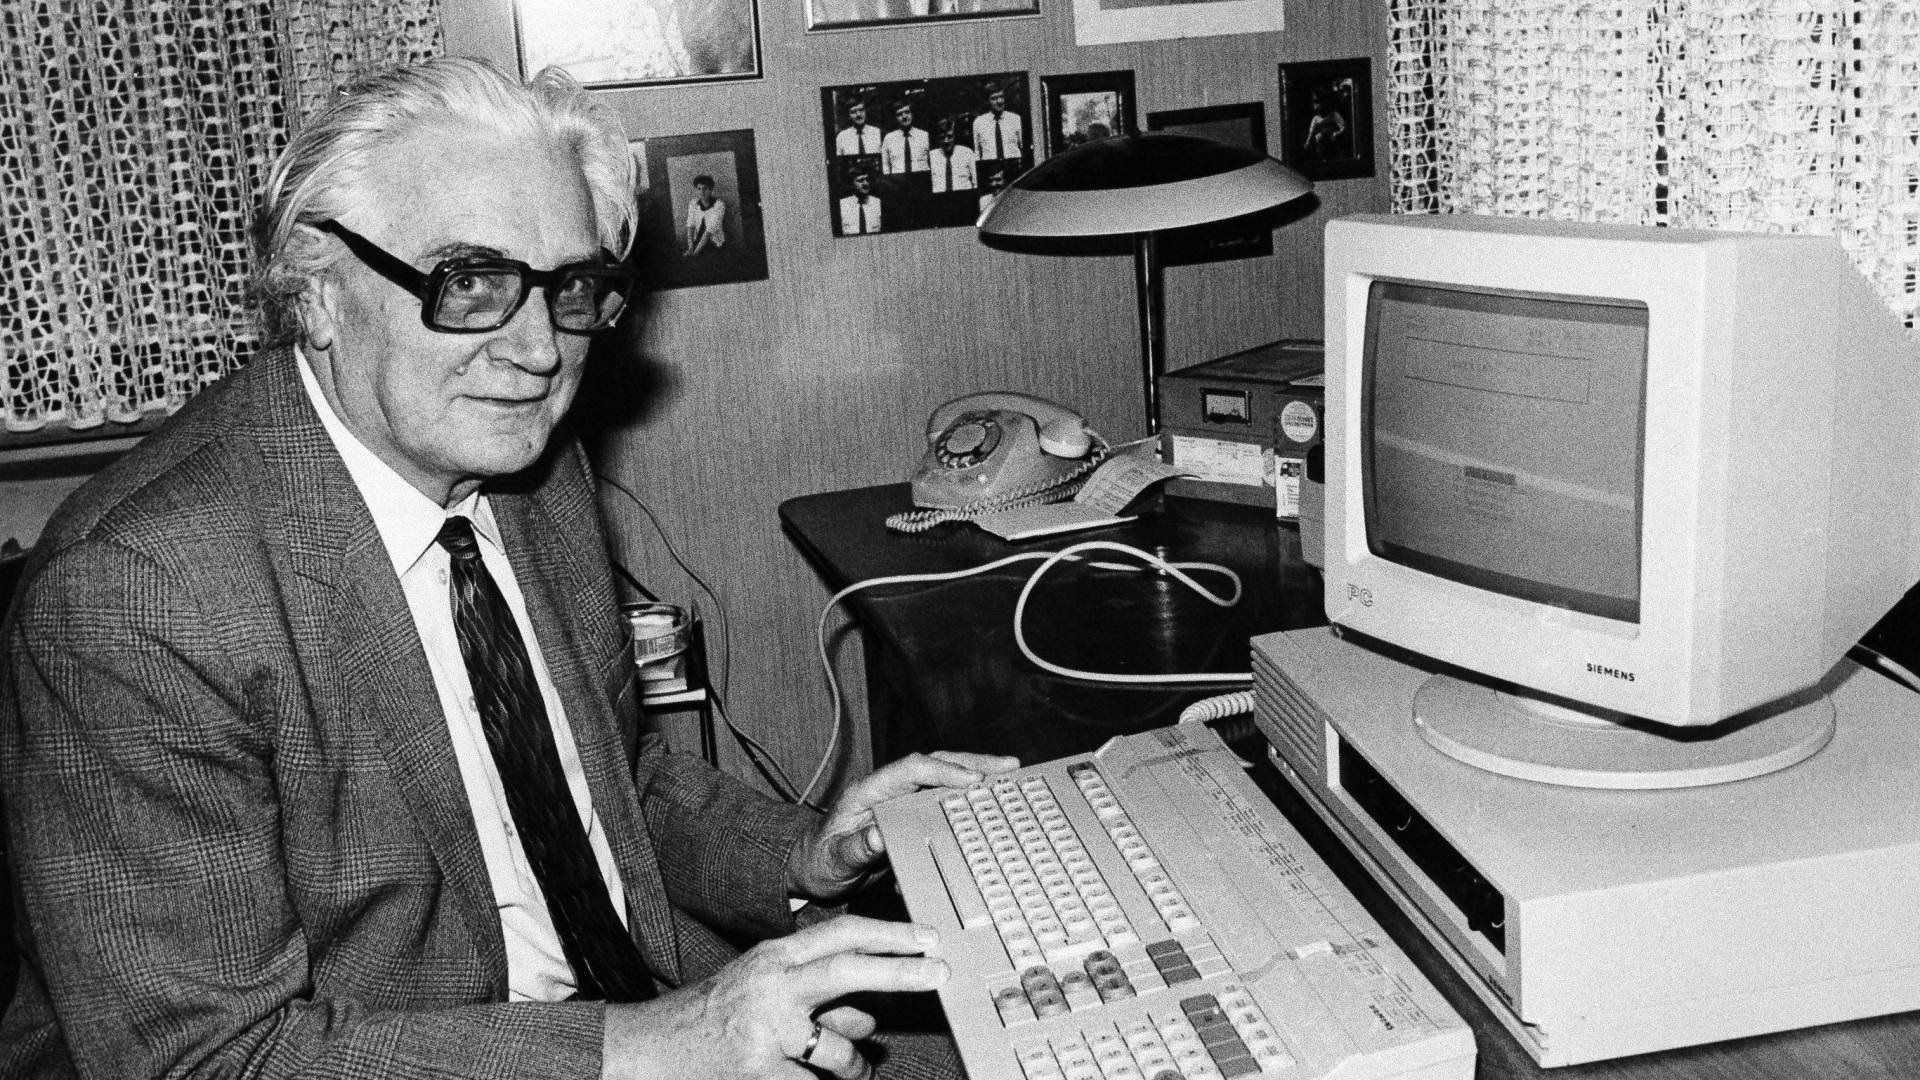
The Siemens PC-X is an oddball from the very early days of the PC/XT world. And as you might have seen yourself browsing this page, I have a soft spot for the oddballs… ok, now for the facts:
It is based on the original “PC-D” design. Actually besides the ROM, the (optional) MMU, a slightly different graphics card and a hard drive as standard they’re the same… BUT the “X” came with SINIX, Siemens’ XENIX based flavor of UNIX. That’s somewhat impressive when you check out the rather limited specs:
8MHz i80186 CPU
1MB RAM
10-20MB hard drive (depending on drive used)
640x350x1 bit Black on white display – that was very high-rez back then
Yes, the PC-X/D were one of the few machines using the 80186 instead of the “industry standard” 8088/8086.
That move seemed to be advanced but it was a step backwards actually, because all those machines were more or less incompatible to the available, ever-growing MS-DOS software library.
For the “X” model, it was even worse. Running SINIX you more or less totally depended on Siemens for getting Software. There was their own office suite and you could buy MS Word/Multiplan/Chart and dBase II from them. Well, pretty ok to run a multitasking( !) office system in 1984. Here’s a video showing a Siemens PC-X booting into SINIX:
Because nearly everything was non-standard in this beast (graphics, expansion bus etc), its career didn’t take long. I love the keyboard, though. It looks very 80’s and is another example of German over-engineering: You can run over it with your car, it’ll still works – like an IBM Type M.
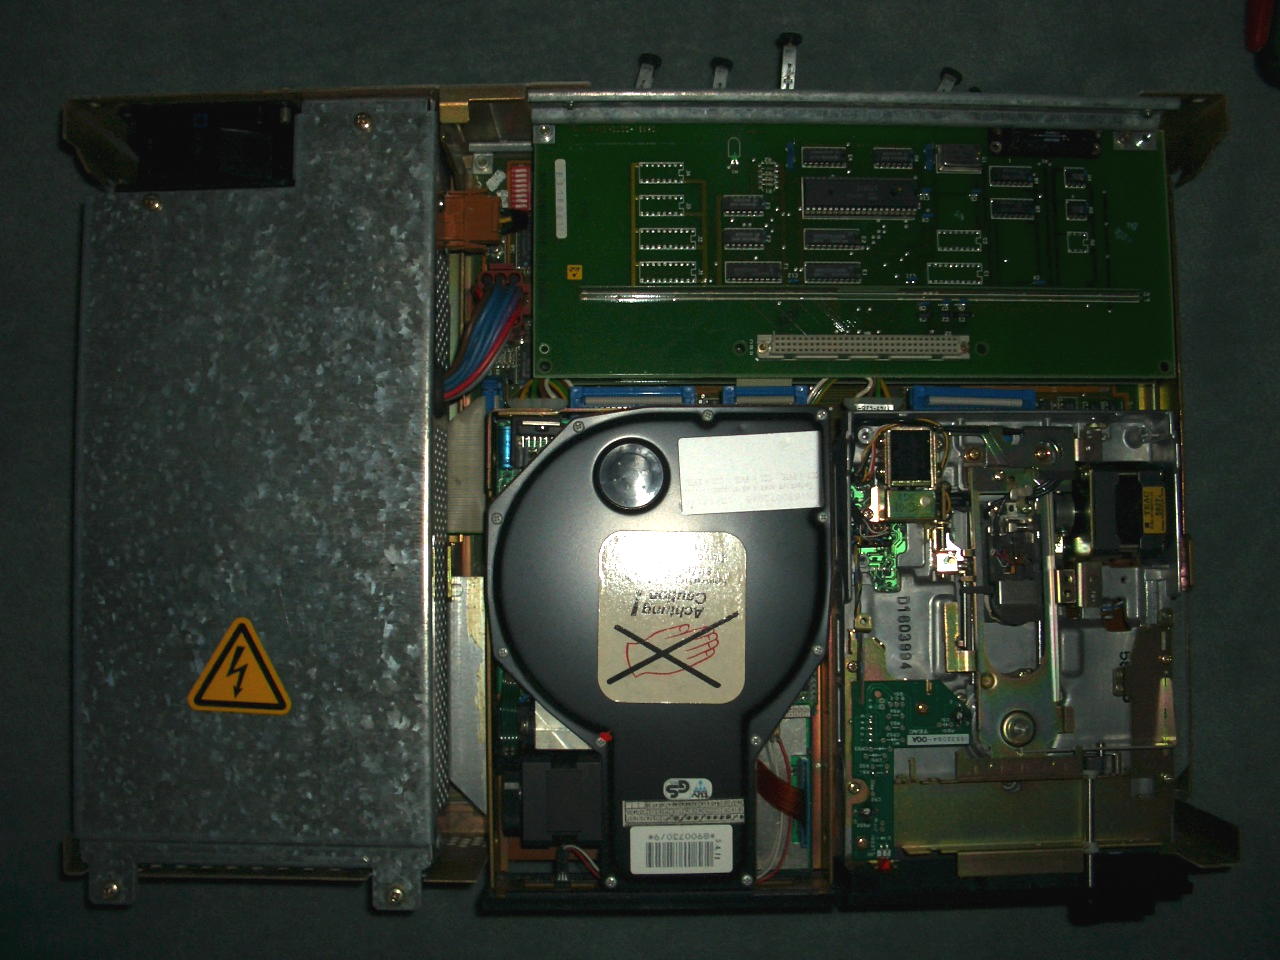
This is what you see as soon you opened the 0.8mm thick steel case – left 3rd the huge power-supply, front drive case, back the mezzanine bus:
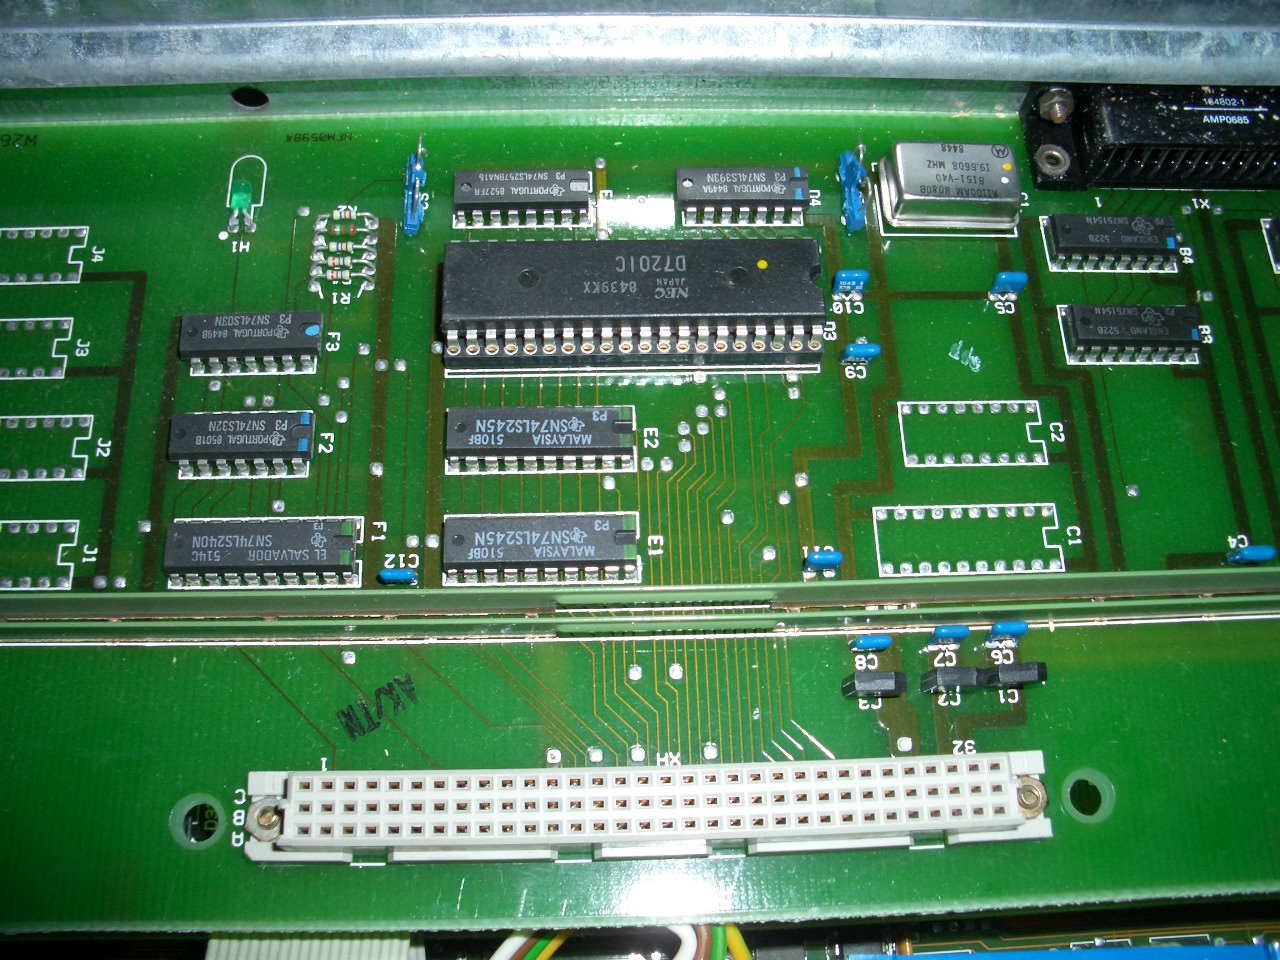
Remove the drive-cage (Left: BASF 6188 10MB MFM hard drive and right: TEAC FD-55FV floppy) and you’ll see the GPIB/RS232 expansion card – very simple NEC D7210 design – the external connector is marked “DFÜ” (German acronym for “Datenfernübertragung”, i.e. Modem and stuff) :
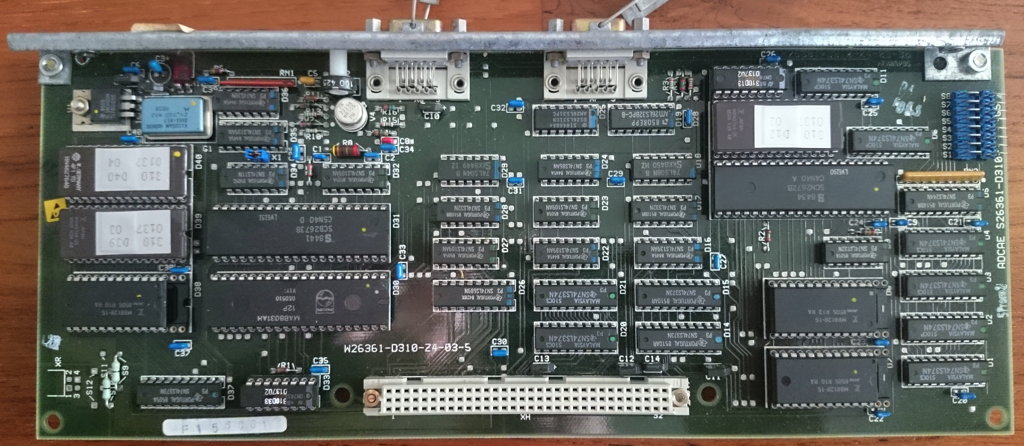
Next in the “stack” is the graphics card which also controls the keyboard. It seems to be different from the one used in the PC-D version. Left side a 8031 and a SCB2673 (Video attributes controller), 2 EPROMs (D39/40) and a 2k SRAM.
Right side, a SCN2672 (Programmable Video Timing Controller) with its own 8K EPROM (D12) and 4k of SRAM:
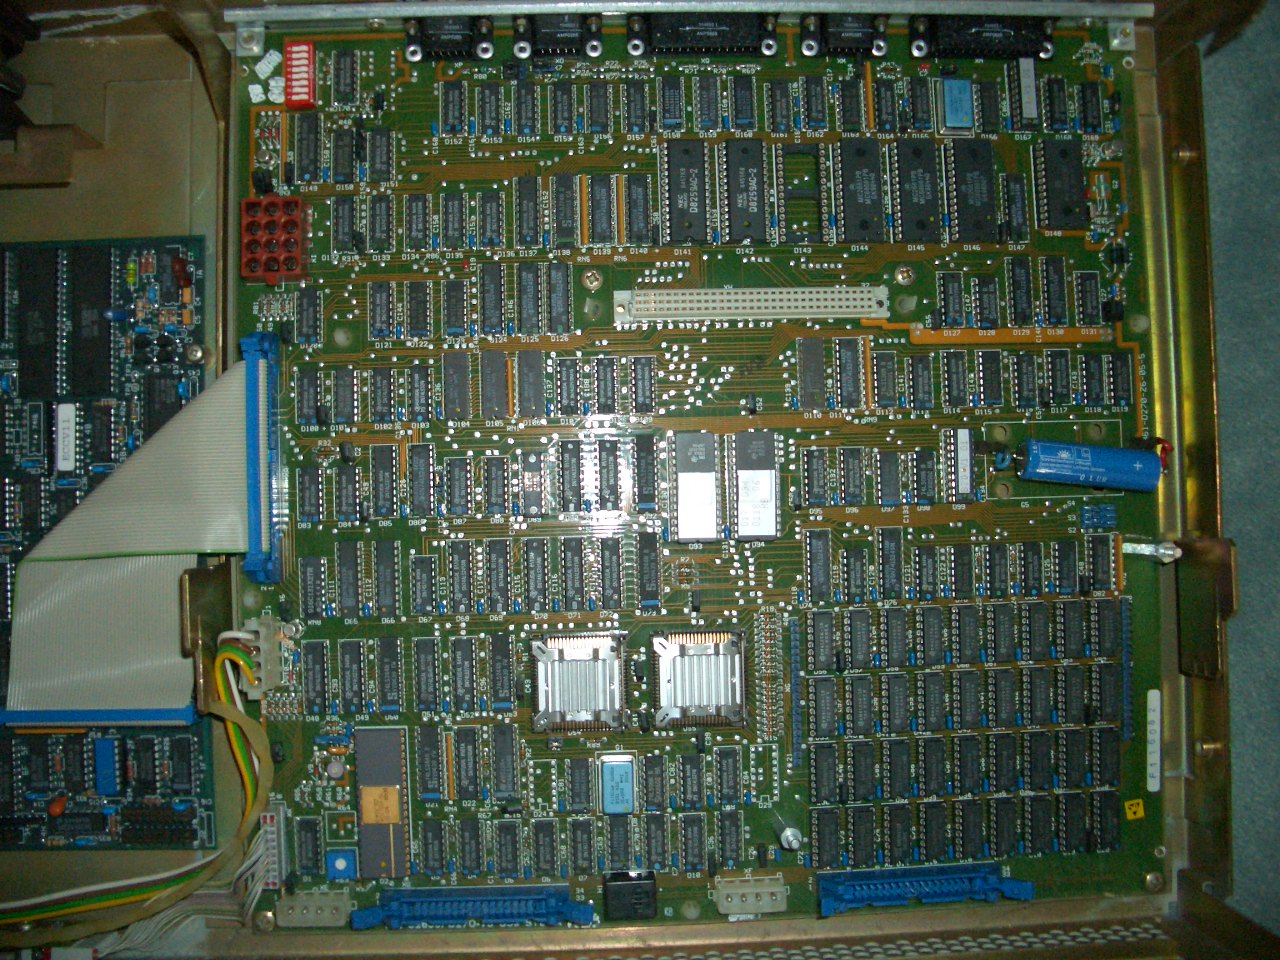
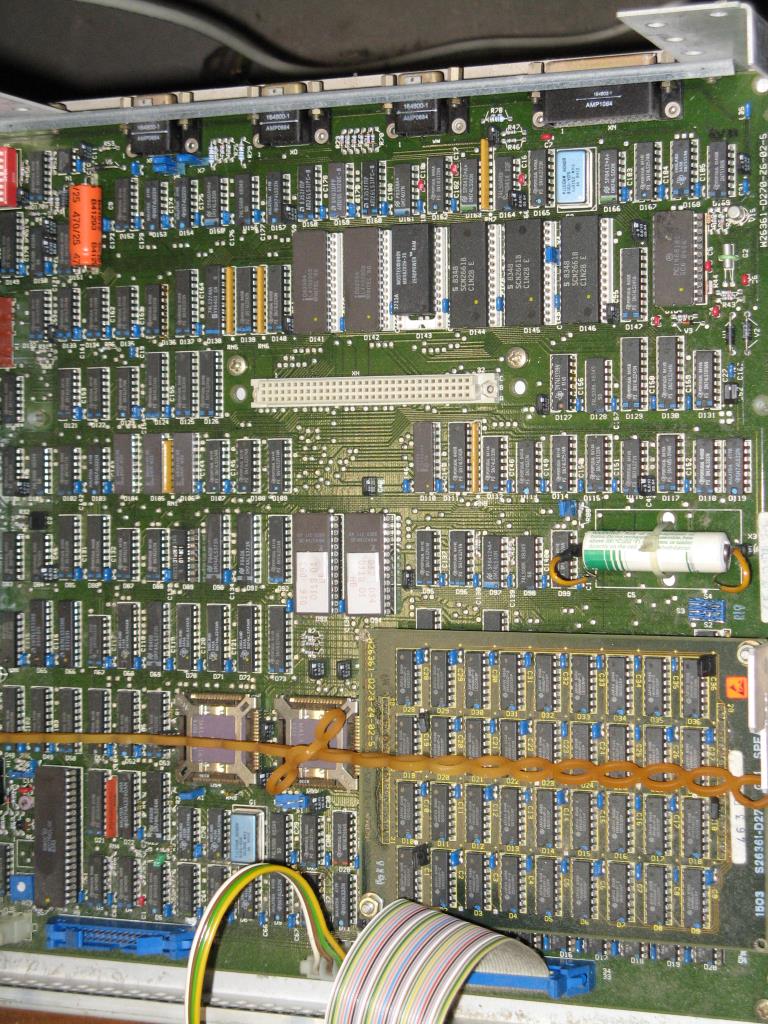
Having removed that expansion board you have the full view of the main board – Bottom right the RAM, left the CPU, a WD2791 Floppy controller and of course the 80186 CPU and a C8207-8 memory controller (which I falsely identified as MMU) next to it:
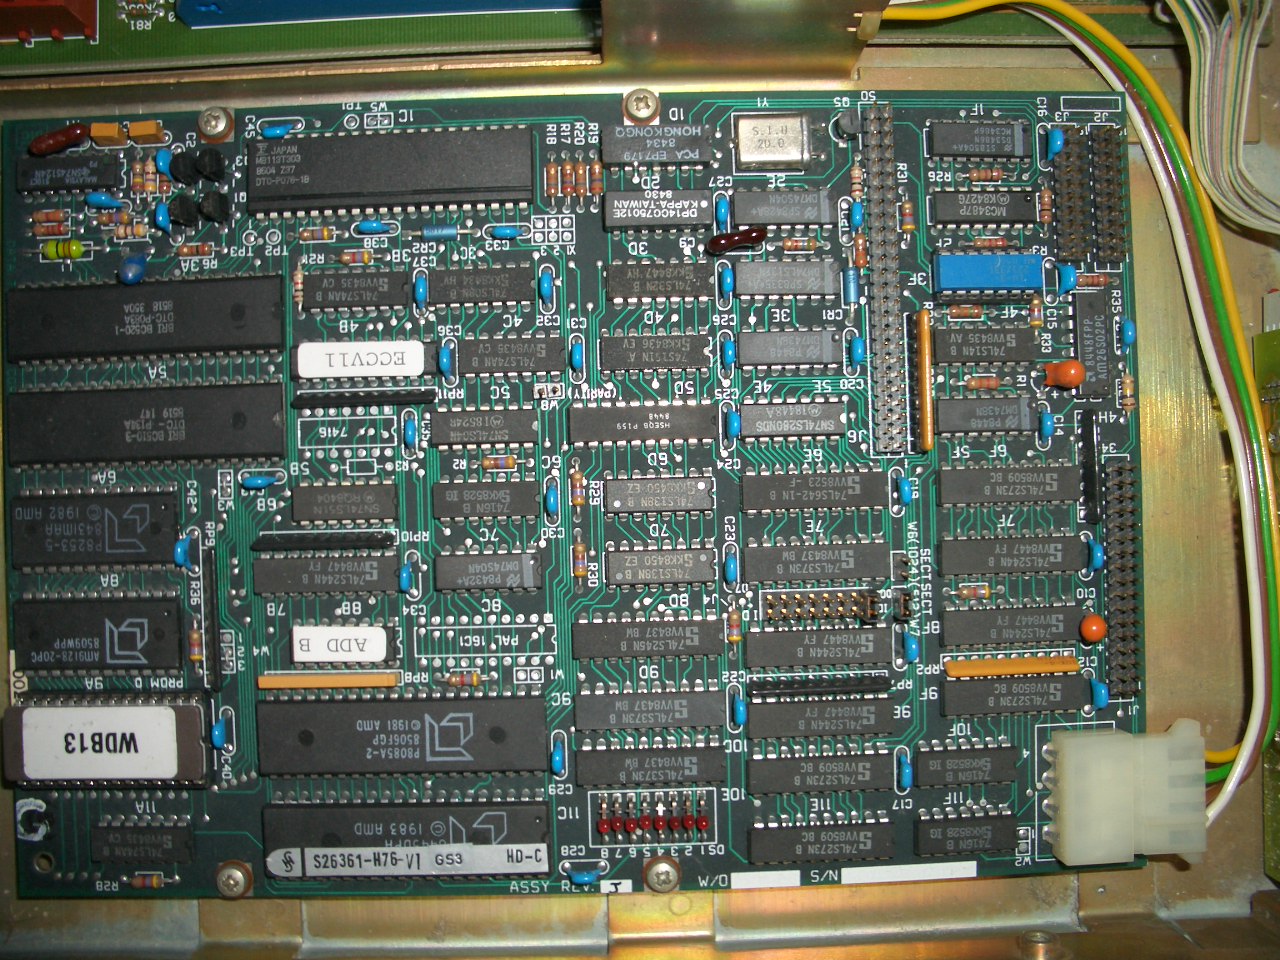
If you also remove the power supply, you will find another odd thing (also a bit visible at the left edge of the above picture): A SCSI-to-MFM converter board, the “DTC 520B“. So SIEMENS decided it’s better to fit an MFM hard disk and this converter than using the on-board SCSI bus an provide an (expensive) SCSI drive. Mhhh…
The reason to finally write this post is that I was asked for an image of SINIX and of the PC-X’s ROM to get the whole thing emulated in MESS.
So here are the ROM images of what I have. Maybe I’ll be able to add some more floppy images… stay tuned.
Other versions
While browsing the web, I came about another version of the mainboard and graphics-card. According to their model numbers and their design, they seem to be predecessors of my boards.
Here’s the mainboard. While mine has model W26361-D270-Z6-05-36, this one is marked -D270-Z6-02-05.
Many ICs are featuring a ceramic case. The RAM seems to be put on a separate PCB
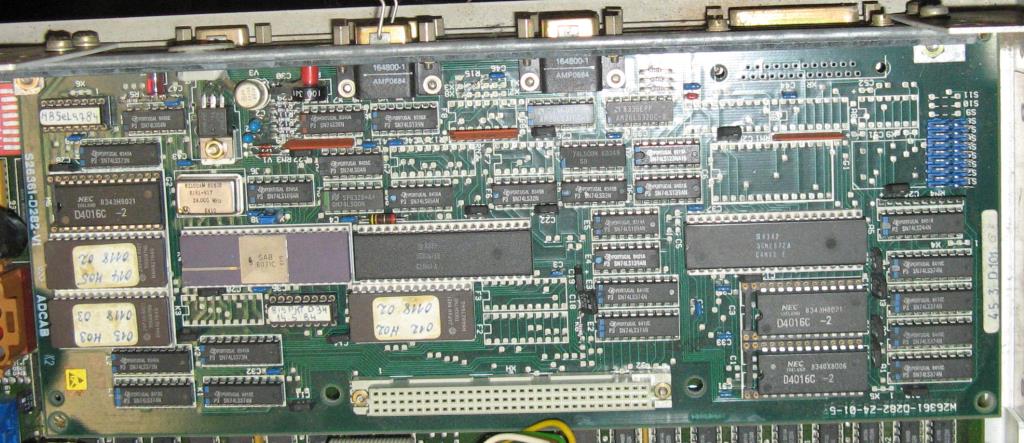
The graphics-card has more differences (mine is W26361-D310-Z4-03-5, this one is -D282-Z4-10-5. The ICs are placed differently, its design looks more cluttered and some ICs aren’t populated on the board at all.
Tips
If you got your SINIX running -maybe a previously installed version- and you cannot get root access here’s a hack to get root access (assuming you can login as guest w/o password (commonly named ‘gast’). It bases on a mistakenly set permission:
/usr/lib is writable for everybody
$ ls -ld /usr/lib drwxrwxrwx root /usr/lib
in there is a crontab file. Copy that to /tmp, delete the original and copy your version back to /usr/lib to make it yours:
Now you can edit ‘your crontab’ with an editor (ced) and add one line like this:
* * * * * /bin/chown gast /etc/passwd
So after one minute /etc/passwd is yours, too.
Now you can remove roots (or admins) password by changing
root:cHuykydasds: (or something like that)
to
root::
Voilá, this SINIX is yours 😉
Another thing you might need is to move data in/out. The only initial way to do this is a tool called ‘trados‘. This can read/write 360KB (only!) DOS floppies. At least a start…
Next steps
Finally, when revisiting this machine after quite some years in my basement, there are some tempting things to check out:
Can I replace the DTC 520B and use a SCSI drive directly?
As the SRAMs on the graphics board are sitting in bigger sockets – what will happen if I use bigger SRAMs? This might be answered when the emulation is working and we can fiddle with the video firmware to use more SRAM.
This is yet another months news roundup. Just in case you missed something 😉
First of all… My little shop opened. Yes, I decided to sell surplus directly on my page instead of going all the hassle and rev-share you have on ePay.
If I had to produce/order more parts than I needed, the rest will end up there. Mainly stuff related on the hardware you can read about on Geekdot. Need to figure out all those shipping details… so bear with me.
Helios had to move into the Software menu to gain more space in the menu-bar for the shop item.
..then, the Archive got two new sections.
Back in the days, when geekdot.com was hosted on my own iron at some hosting facility I was in desperate need of remotely manage my server. IPMI is a nice standard built into most real server hardware… but as cheap as I am, my server started as a recycled desktop and after some iterations ended in a 19″ rack case. Still no IPMI. The solution was the so-called RiloE (Remote Insight Light-Out Edition) from Compaq – later HP. While meant for usage in Compaq machines, it can easily tweaked to work in any PCI machine. My findings are available in the Archive now.
Back in 1995 I fell in love with the Apple Newton and created my first useful webpage for it. Until 1998 it was quite a destination for Newton fanatics around the world. This page too got its own place in the Archive now.
(small) new hardware project You might have read my lengthy rant article about the Inmos C004 32-way linkswitch. Because I like to have a niftier Transputer network on my IMSB012 but don’t like the price you have to pay using a C004 I created two small replacement PCBs.
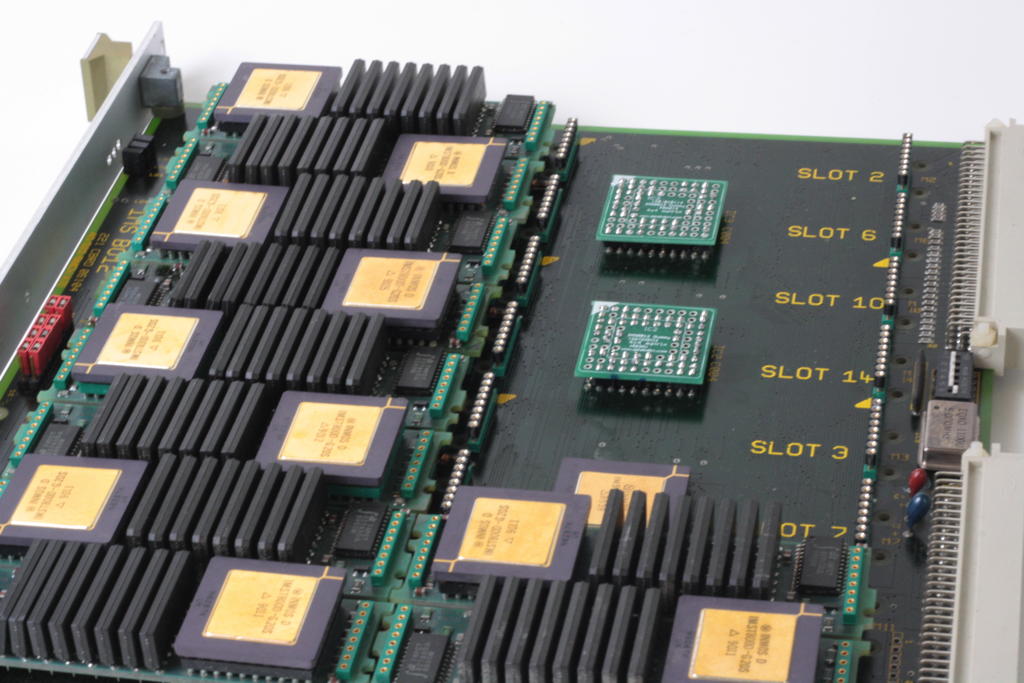
The IMSB012 is my favorite TRAM carrier board. Room for max. 16 (size-1) TRAMs and plenty of external connectors. The perfect platform to build a successor of the ‘Tower of Power’.
Like with all TRAM carriers having more than 8 slots, it was a good decision to put at least one C004 link-switch onto the board.
While that’s generally a good feature, you (and me) might not need the option to reconfigure your Transputer network several times a week… And if you’re completely sure how you like your network it would be better to set if once and for all without the signal delay penalty you have to pay using one or even two C004s.
So in my case, I’m perfectly fine with the 4×4 matrix mentioned in the B012 manual (and also used as an example in my C004 post). So instead of using the clumsy MMS tool and having an extra link used into the T212, I planned tp remove the T212 and the two C004s and replace them with two dummies. Pretty much the same way like Parsytec did it with their x’plorer.
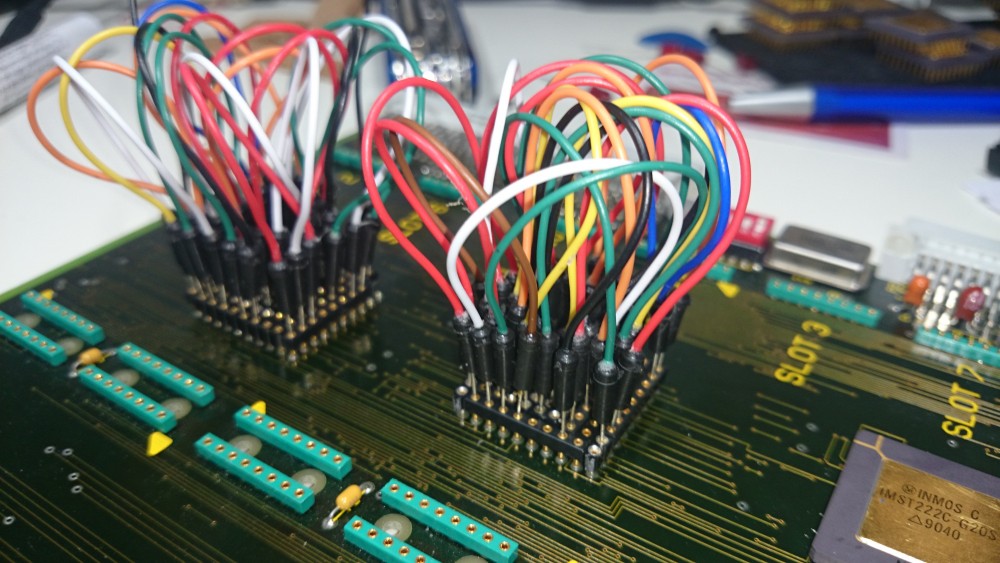
First I had to chew myself through the B012 schematic to understand the connection of each TRAM slot into the C004s. After that it was time for some intense cable plugging:
If you plan to do so, please be aware that the socket holes are too thin for a normal (0.63mm?) jumper cable. You might ruin your socket if you use force to plug them in!
I created a interpose socket by using single row pin header sockets which itself had thin enough pins to fit into the original B012 socket.
After some corrections, the buzzing-through of all 16 slots went fine and the schematics went to the PCB house (I have some PCBs left, ask for a quote if you need some).
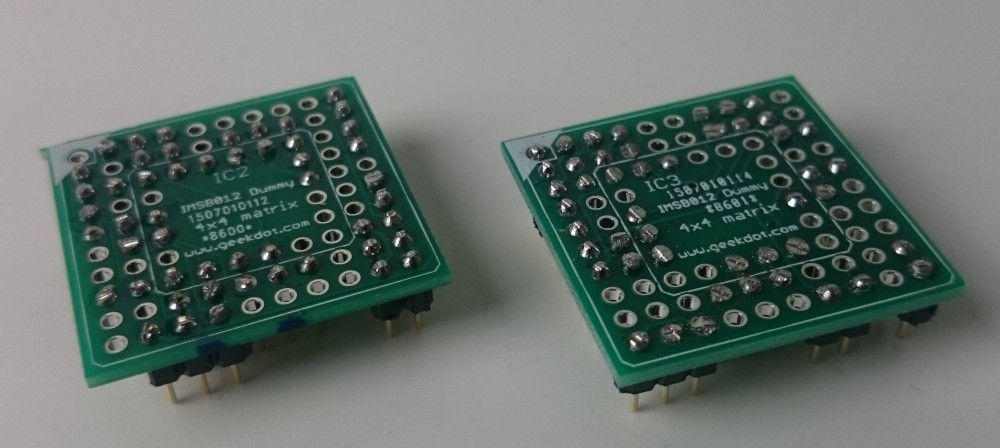
And this is how the C004 replacement PCBs look when completed:
Again, to solder in the pins, you’ll need really thin ones. Thinner than 0.5mm that is. Also, you don’t need to populate all 84 pins, I only use 51 per dummy (bridging some gaps).
Additionally, I strongly advise to isolate each dummy’s top with some kind of tape to avoid (electrical) contact to the TRAM placed above it. This is how they look seated on the B012 underneath slot 6 and 14 – the T212 under slot 7 not yet removed:
This is my very first (presentable) Webpage from 1995. To keep the original style and navigation, I’ve put it into an iframe…[which might not work if you’re surfing this page using https].
Because it was “optimized” for 640×480 back then, that’s what it looks like now 😉 And because I had a total of 1MB (yes, one megabyte) webspace in those days, everything was squeezed down to the minimum, which explains the small and grainy images. Still, in the hey-days of Newton “Newton Secrets – Secret Newtons” got quite an amount of traffic.
I just found the original photos -on paper, you know- and will scan them again in a better resolution… if I find the extra time.
A bit of historical background
In about 1994 I totally fell for the Apple Newton. Yeah, one of those early adopter moments… again. After drooling over an Newton 100 at CeBit for two days I bought my 120 the very next year and proudly carried the nearly 500 grams with me every day.
I dived into the NTK (Newton Tool Kit) and learned Newton Script to write my own Programs (“App” wasn’t a proper word yet).
Fate stroke, when I went to San Francisco in 1997 for a year taking the chance to work as an intern at a Web/PM-Agency. The 2nd day I figured out that my bosses , Tony Espinoza and James Joaquin were original Newton Team members, been in charge for the Dev tools etc. Because they just left Apple (the were in deep s**t back then) I was probably the only Apple/Newton fan between hard-core PalmPilot users 😉
Still I got a signed copy of “Defying Gravity” and a quick look into his closet full of prototypes 😮 This is where the pictures on my page came from.
We also visited #1 Infinite Loop (Mind the old [soon new again] logo) now and then…
Here’s a quick list of pages which got updates recently:
The new design and relaunch of GeekDot is more or less completed. I hope I found all dead links – if you stumble across onw, please tell me.
The i860 software page got an APX860 paragraph incl. APX860 binaries for download. It’s a start, maybe it grows into a post of its own. If you have any extra infos about APX860 it’s very welcome!
Added a nice presentation of the Hauppauge 4860 (at the very end of the post) concept from Hotchips Conference 1990.
Found a nice prototype HTRAM picture which I added to my HTRAM post.