Category Archives: pcsystems

Kerberos

Kerberos is the machine I’ve specifically built for hosting all 3 DSM860 cards I own.
The name was chosen because the hell-hound Kerberos (Latin ‘Cerberus’, Greek ‘Κέρβερος’) is mostly depicted with three heads and the Greek myths offer innumerable possibilities for a nice g[r]eek name space 😉

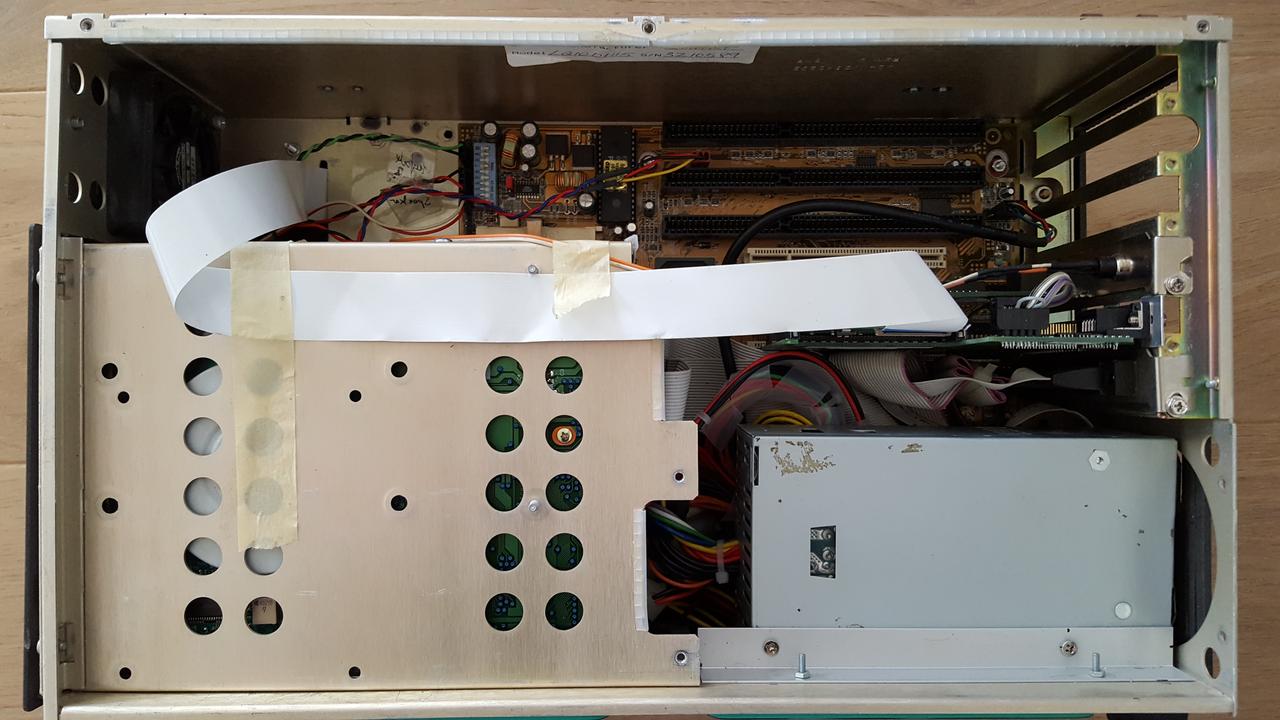
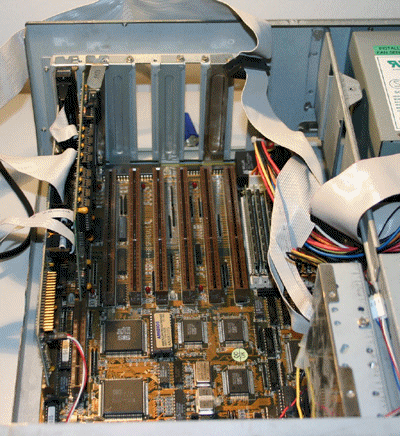
The quest for the right motherboard was not easy. It should be small, still featuring as many EISA slots as possible. In the end it became a Gigabyte GA-486SA having some quite unique features for its time:

  • 8 EISA slots
  • 2 of them also having Vesa-Local-Bus connectors
  • A Weitek 4167 Socket
  • 8 SIMM slots

Because it was clear I will use-up 6 slots just for the 3 DSM860 cards (being sandwiched boards) I wanted to fill the remaining 2 slots as clever as possible.
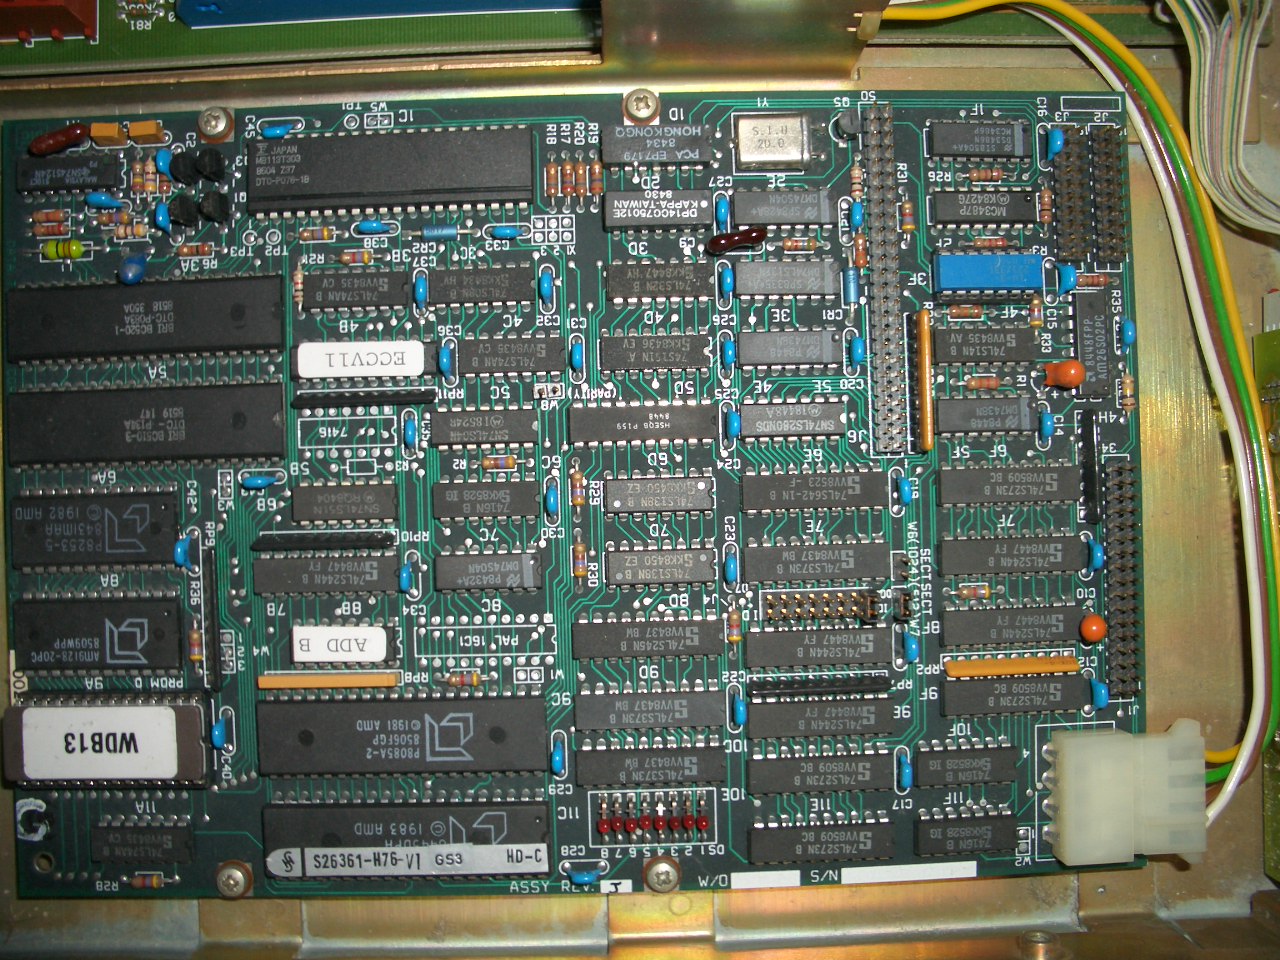
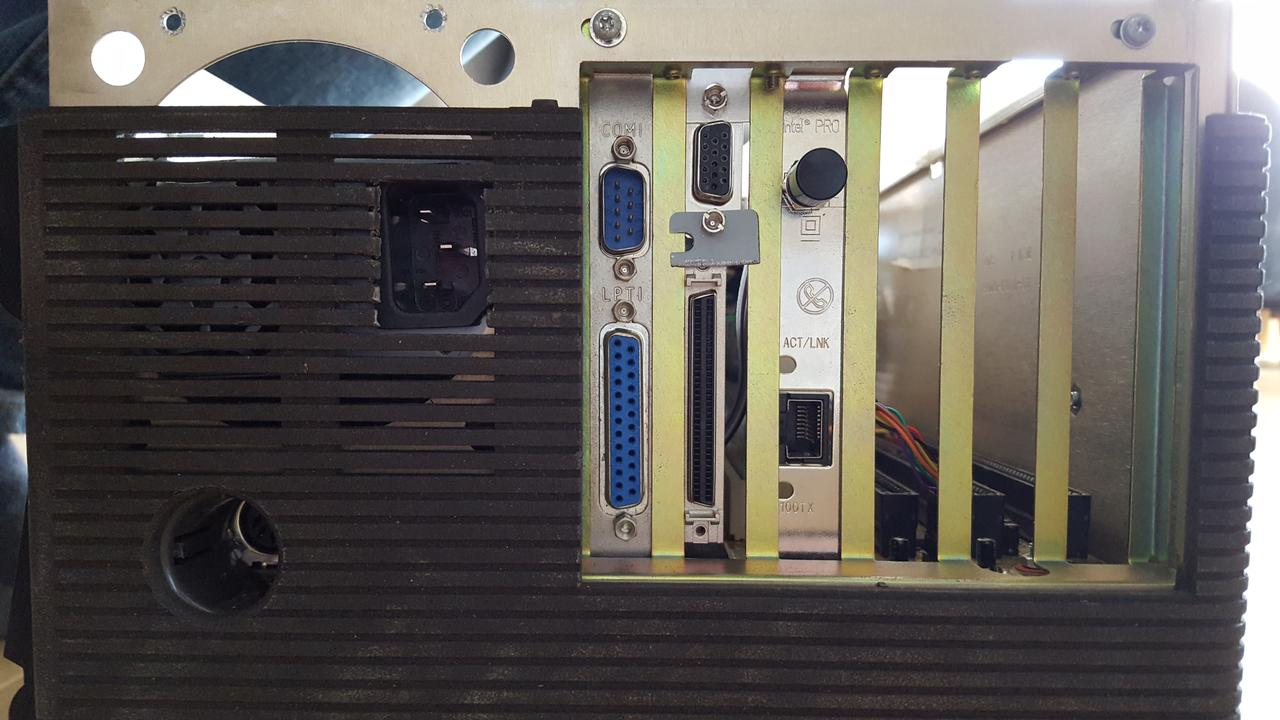
After another year (!) of searching I was able to get my greedy little hands onto a Western Digital ‘Ports’o’Call‘ Vesa-Local card. This is a rare do-it-all card saving lots of slots, specifically:

  • WD90c33 VGA (1-2MB) connected to the VL-Bus (fast!)
  • Appian Local Bus IDE controller (also quite fast)
  • Floppy controller
  • 2S/1P peripheral controller

In a sentence: Everything a basic system needs to work! The remaining slot was planned for a NIC making the system complete.
Because I was expecting quite some heat coming from the three i860 I’ve opted for a desktop case so that the heat can easily dissipate through the open casing – also I was prepared for lots of plugging and unplugging of cards, jumpers etc. which is much easier with a desktop case.

Golden Rule #1 of hardware fiddling: One step after the other!

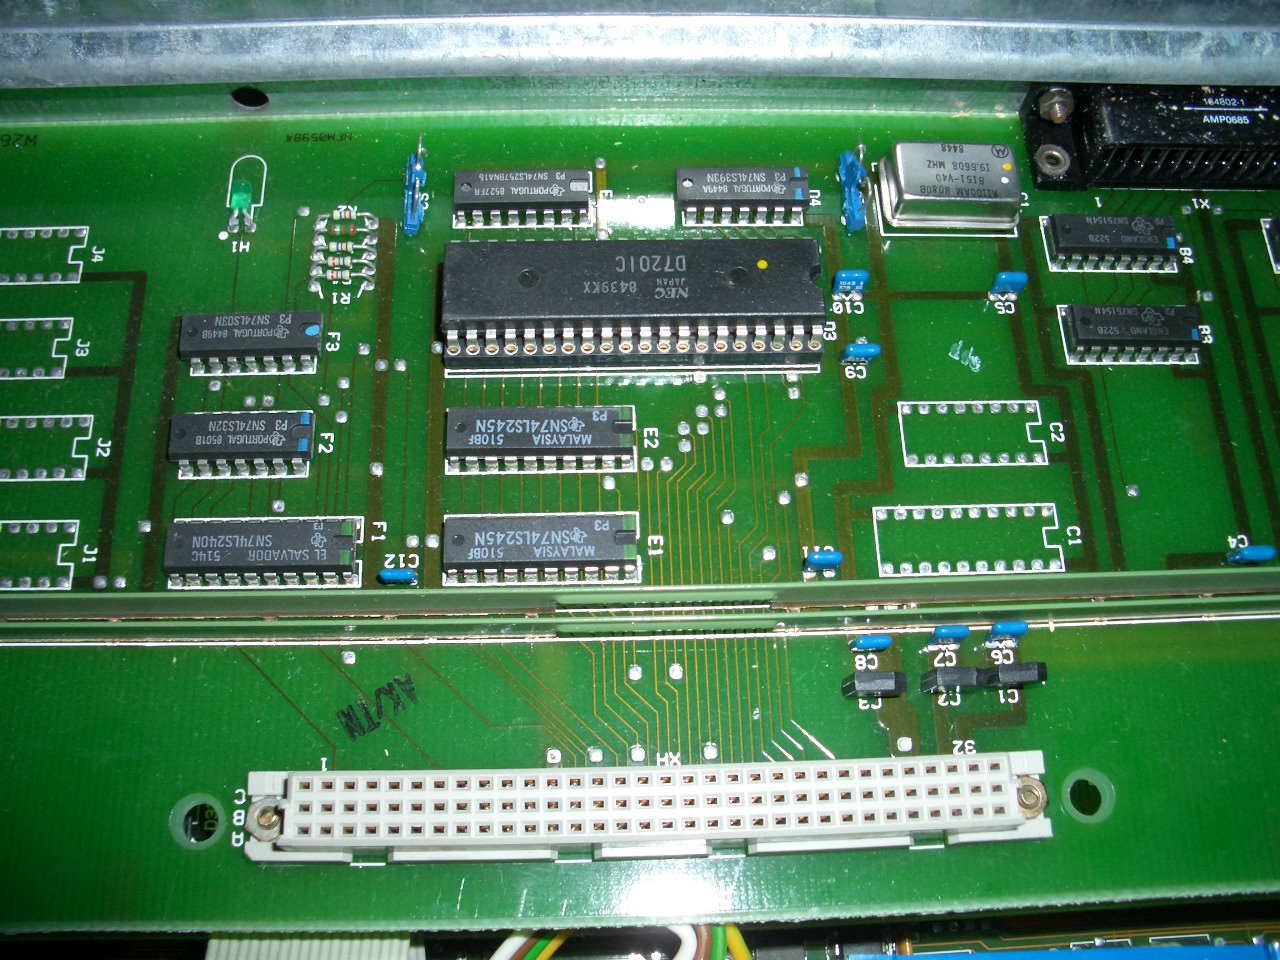
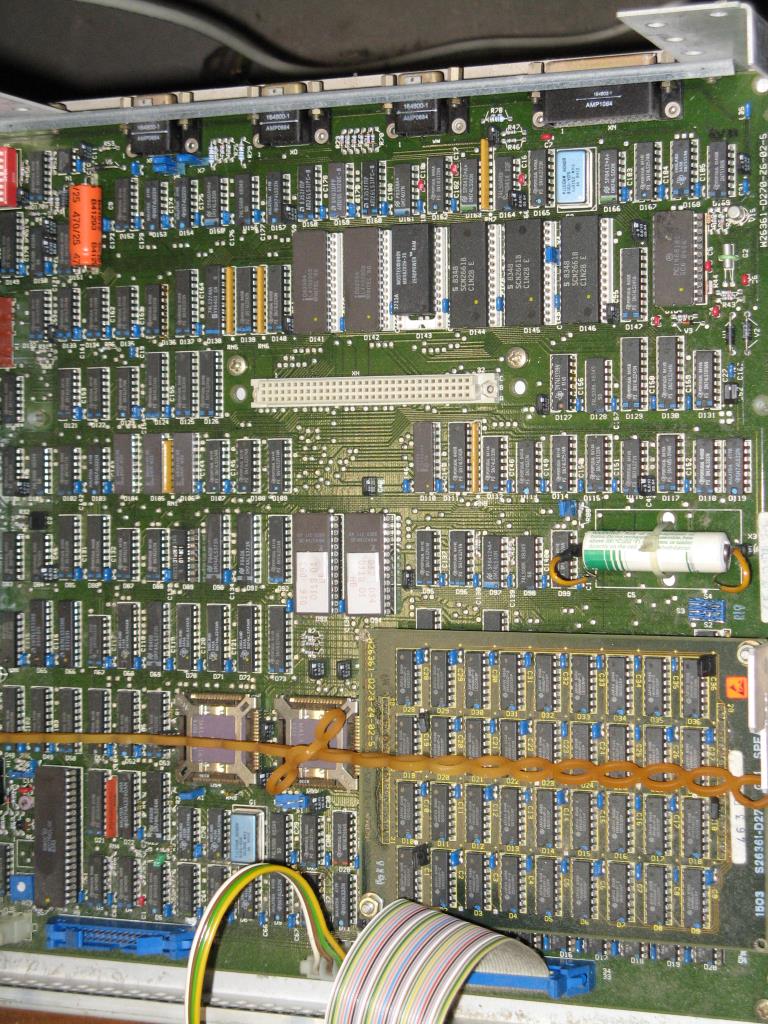
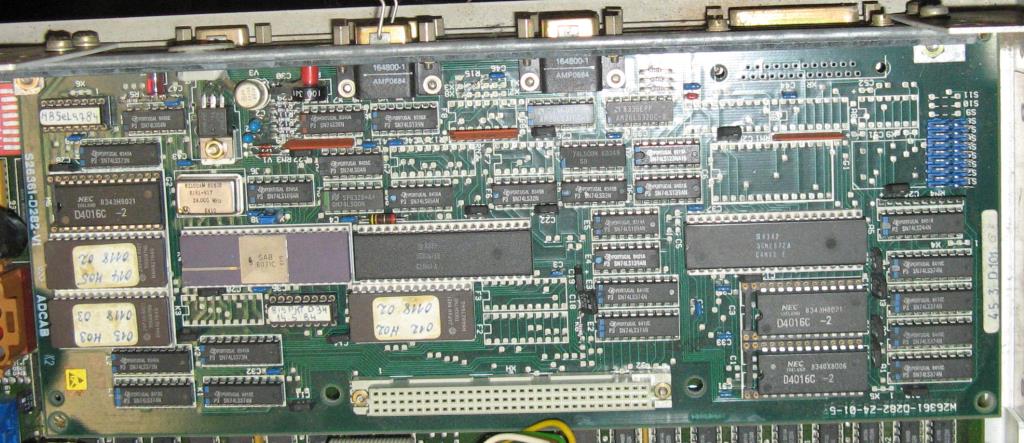
So before filling the system up to its rim, I started with just one DSM860. It quickly became clear that there was no way in using the ports’o’call’s WD90c31 as the server running on the DSMs does only support certain VGA cards (if you like to have graphic output), namely some very obsolete, non-standard Genoa cards…and in its latest version: Good old ET4000!

So the nice ports’o’call had to make place for a standard multi-IO controller and the 2nd slot was used for an ET4000. That setup worked quite nicely!
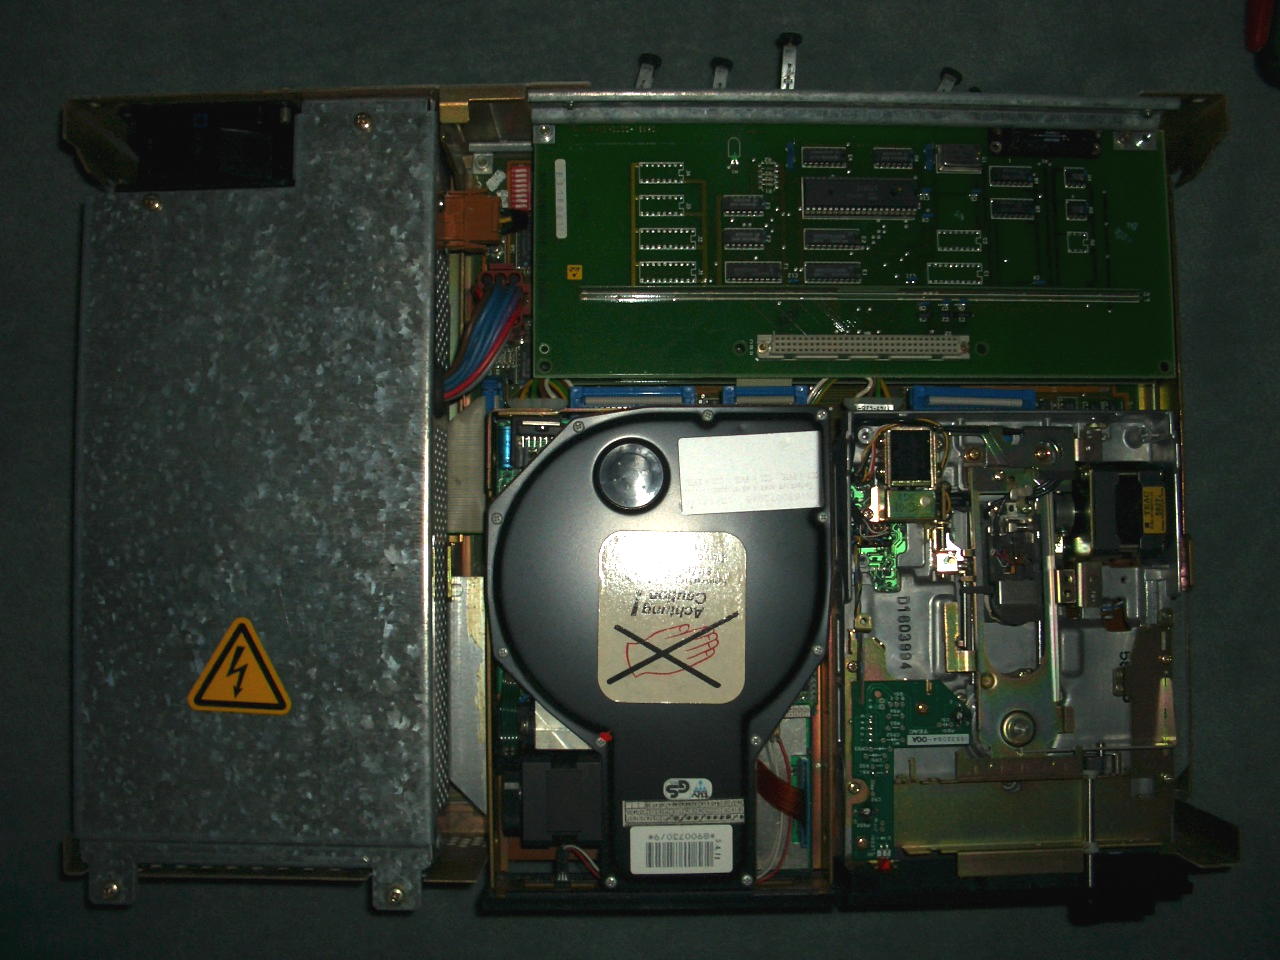
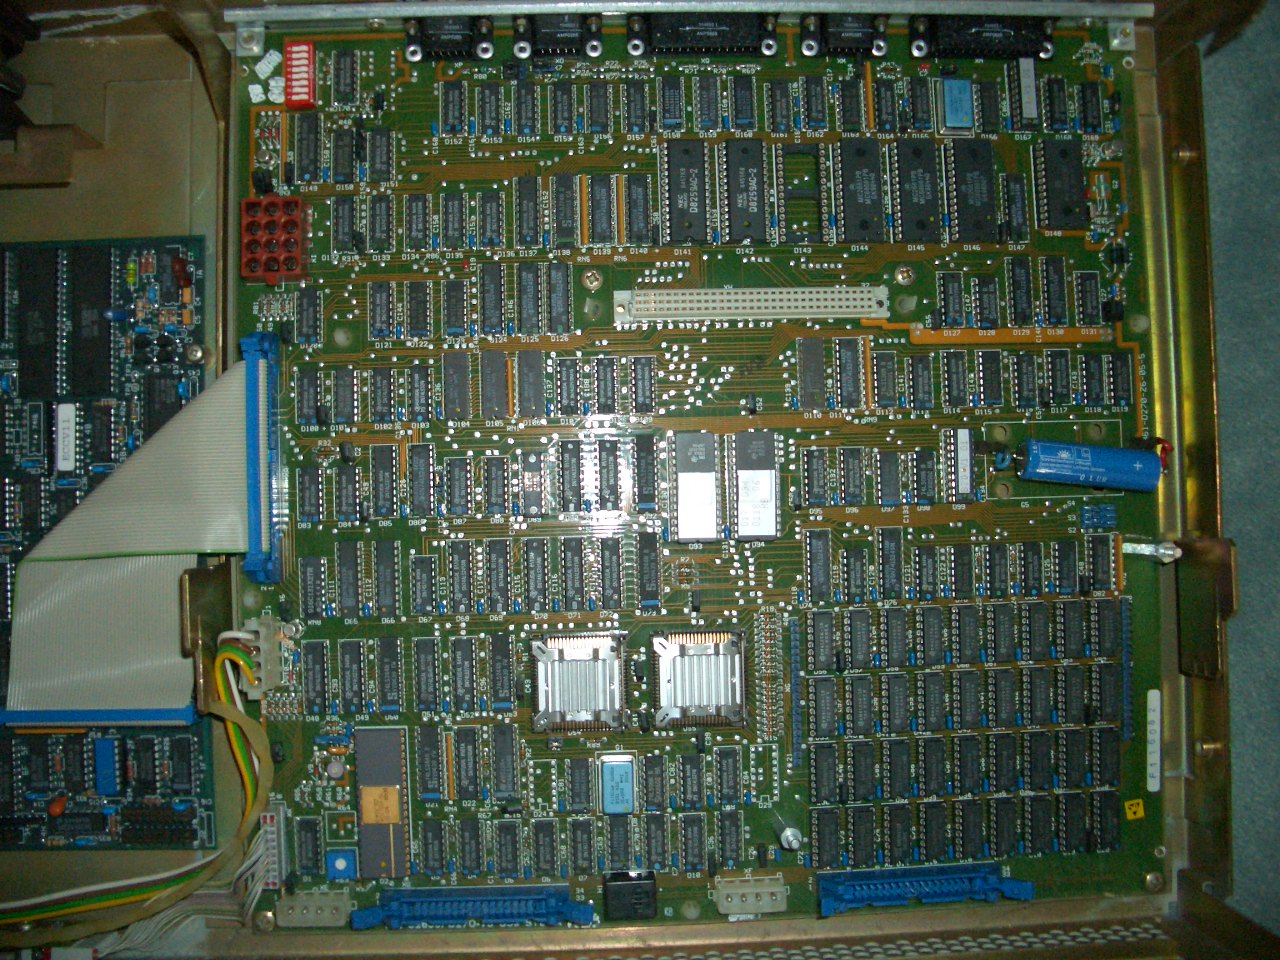
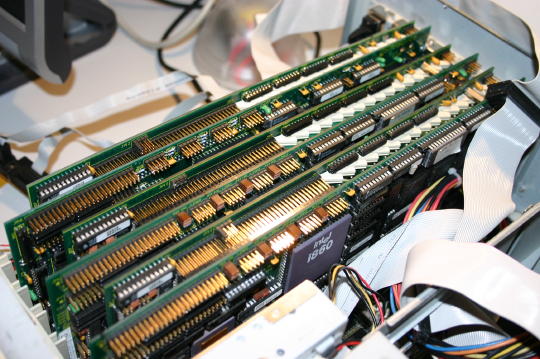
After the last DSM860/32 board was fixed, I was ready to “stuff that turkey”.

One card after the other went into the slots – that’s what I call a crowded house:

Animation1

As the animation above is not the highest quality (file size!), here are some more shots…

All seats taken, sorry:

fullhouse

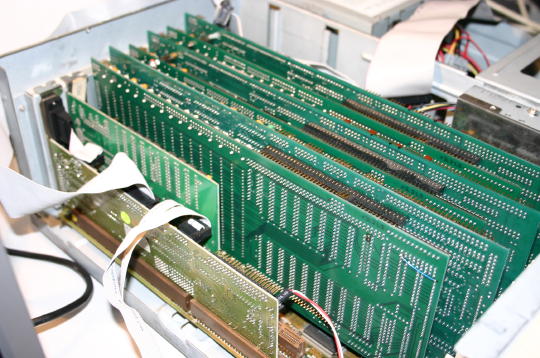
The money-shot 😉 Indeed… in 1991 you would have payed 48.000 German Marks (~US$ 24k) for the DSM860’s alone… plus a 486DX/2 system with a whopping 32MB of RAM (~9500 Marks = ~US$ 4750). So that’s a total of $US 28.750 or the average income/year (1991) in the US.

moneyshot

Finally some of Kerberos facts:

  • 3 x i860/40MHz each 8MB RAM (= 180-240 ‘marketing-MFLOPS’ / 360 ‘marketing-MIPS’)
  • Handcoded code using LINDA SMP techniques can realistically reach ~80 MFLOPS on this system, that’s about the speed of a Cray-1 or … a Pentium Pro 200 :-/
  • 1 x 486/DX2-66, 32 MB RAM (~3.5 MFLOPS)
  • Complete system (w/o display) draws 140W when running full steam ahead. Which is about the same a recent (’09) Intel Core2/Core i7 or AMD Phenom needs @ 3.2GHz – just the CPU though!

Siemens PC-X

The Siemens PC-X  is an oddball from the very early days of the PC/XT world. And as you might have seen yourself browsing this page, I have a soft spot for the oddballs… ok, now for the facts:

It is based on the original “PC-D” design. Actually besides the ROM, the (optional) MMU, a slightly different graphics card and a hard drive as standard they’re the same… BUT the “X” came with SINIX,  Siemens’ XENIX based flavor of UNIX. That’s somewhat impressive when you check out the rather limited specs:

  • 8MHz i80186 CPU
  • 1MB RAM
  • 10-20MB hard drive (depending on drive used)
  •  640x350x1 bit Black on white display – that was very high-rez back then
Even Konrad Zuse had a PC-D 😉

Yes, the PC-X/D were one of the few machines using the 80186 instead of the “industry standard” 8088/8086.
That move seemed to be advanced but it was a step backwards actually, because all those machines were more or less incompatible to the available, ever-growing MS-DOS software library.
For the “X” model, it was even worse. Running SINIX you more or less totally depended on Siemens for getting Software. There was their own office suite and you could buy MS Word/Multiplan/Chart and dBase II from them. Well, pretty ok to run a multitasking( !) office system  in 1984. Here’s a video showing a Siemens PC-X booting into SINIX:


Because nearly everything was non-standard in this beast (graphics, expansion bus etc), its career didn’t take long. I love the keyboard, though. It looks very 80’s and is another example of German over-engineering: You can run over it with your car, it’ll still works – like an IBM Type M.

This is what you see as soon you opened the 0.8mm thick steel case – left 3rd the huge power-supply, front drive case, back the mezzanine bus:

PCX_1stlook

Remove the drive-cage (Left: BASF 6188 10MB MFM hard drive and right: TEAC FD-55FV floppy) and you’ll see the GPIB/RS232 expansion card – very simple NEC D7210 design – the external connector is marked “DFÜ” (German acronym for “Datenfernübertragung”, i.e. Modem and stuff) :

PCX_Serial

Next in the “stack” is the graphics card which also controls the keyboard. It seems to be different from the one used in the PC-D version. Left side a 8031 and a SCB2673 (Video attributes controller), 2 EPROMs (D39/40) and a 2k SRAM.
Right side, a SCN2672 (Programmable Video Timing Controller) with its own 8K EPROM (D12) and 4k of SRAM:

PCX_GraKa

Having removed that expansion board you have the full view of the main board – Bottom right the RAM, left the CPU, a WD2791 Floppy controller and of course the 80186 CPU and a C8207-8 memory controller (which I falsely identified as MMU) next to it:

PCX_Mainboard

If you also remove the power supply, you will find another odd thing (also a bit visible at the left edge of the above picture): A SCSI-to-MFM converter board, the “DTC 520B“. So SIEMENS decided it’s better to fit an MFM hard disk and this converter than using the on-board SCSI bus an provide an (expensive) SCSI drive. Mhhh…

PCX_SCSI2MFM

The reason to finally write this post is that I was asked for an image of SINIX and of the PC-X’s ROM to get the whole thing emulated in MESS.
So here are the ROM images of what I have. Maybe I’ll be able to add some more floppy images… stay tuned.

Other versions

While browsing the web, I came about another version of the mainboard and graphics-card. According to their model numbers and their design, they seem to be predecessors of my boards.

Here’s the mainboard. While mine has model W26361-D270-Z6-05-36, this one is marked -D270-Z6-02-05.
Many ICs are featuring a ceramic case. The RAM seems to be put on a separate PCB

PCX_AltMainbo_W26361

The graphics-card has more differences (mine is W26361-D310-Z4-03-5, this one is -D282-Z4-10-5. The ICs are placed differently, its design looks more cluttered and some ICs aren’t populated on the board at all.

PCX_AltGraKa_D282

Tips

If you got your SINIX running -maybe a previously installed version- and you cannot get root access here’s a hack to get root access  (assuming you can login as guest w/o password (commonly named ‘gast’).  It bases on a mistakenly set permission:

/usr/lib is writable for everybody

$ ls -ld /usr/lib 
drwxrwxrwx root /usr/lib

in there is a crontab file. Copy that to /tmp, delete the original and copy your version back to /usr/lib to make it yours:

$ cp /usr/lib/crontab /tmp
$ rm /usr/lib/crontab
$ cp /tmp/crontab /usr/lib

Now you can edit ‘your crontab’ with an editor (ced) and add one line like this:

* * * * * /bin/chown gast /etc/passwd

So after one minute /etc/passwd is yours, too.
Now you can remove roots (or admins) password by changing

root:cHuykydasds: (or something like that)

to

root::

Voilá, this SINIX is yours 😉

Another thing you might need is to move data in/out. The only initial way to do this is a tool called ‘trados‘. This can read/write 360KB (only!) DOS floppies. At least a start…

Next steps

Finally, when revisiting this machine after quite some years in my basement, there are some tempting things to check out:

  • Can I replace the DTC 520B and use a SCSI drive directly?
  • As the SRAMs on the graphics board are sitting in bigger sockets – what will happen if I use bigger SRAMs? This might be answered when the emulation is working and we can fiddle with the video firmware to use more SRAM.

Henkelmann

May I introduce you to Henkelmann – a heavily modded Dolch PAC 486 “portable computer”.
‘Henkelmann’ is post-war German miner jargon for a lunch pail – today it is still often used for “anything big with a handle”… and for todays MacBook Air standards the Dolch is quite big. Back in 1998 is was a 32-bit power house…

In 2008 I wanted a system with full-size ISA slots (mind Transputer or i860 cards) but a bit speedier than a 25MHz 80486, more flexible and silent (as with some others of my systems) I had to change some bits and pieces. Well, in the end nearly everything was modified. In short:

  • Swapped the tiny 10″ 640×480 for an 12″ 800×600 display
  • …which required a new display controller – PCI only
  • …which required a new motherboard
  • …which made larger IDE drives, CD-ROM and USB possible
  • …which required internal space and connectors
  • all of which required proper cooling or something more power efficient.

Before I go into details, let’s have a quick glimpse: From the front, it still looks pretty original (besides the glossy screen):

The screen

Well, from the moment I’ve opened the ‘box’ by removing the keyboard from the front it became clear that I have to change the small 10″ display which was just OK with its 640×480 resolution to be used with DOS but using Windows was out of question. The original system used an ISA graphics card to control the TFT display – these cards are mostly dedicated to a specific kind of display. So both had to go… and I was able to find a new combo at ePay. Being more modern, the new controller card was a PCI card. But that was totally fine as I was going to change the main-board anyways.

As the new screen was somewhat higher than the old one I had to do some sawing and cutting – so most of the side-panels were removed and luckily the hight perfectly fits between the upper and lower outer-edge, so just about 5mm of the very thick plastic had to be cut out there. The cut edges turned white, so I had to do some (bad) paint job, too. It’s not as bad looking in real than it looks in these pictures:

Bottom edge:

One downside is the fact, that the cables and electronics of the display made it necessary to mount it upside-down – technically that’s no issue as there’s a solder-jumper on the graphics-card to make it flipping the picture. The bad thing is, that the display has an optimized view-angle for just the other way round  🙁 So looking from top at a steep angle the picture looks inverted – from a frontal view there’s no difference, though.

Mainboard

As I wanted the best of both worlds, I needed a baby-AT format for being able to re-use the original case openings (AT-keyboard plug!) but also having as many ‘modern features’ as possible, e.g. PCI, IDE, USB, etc.
Luckily I’ve found the DFI K6BV3+/66 which is a Supersocket-7 board in Baby-AT format… how cool is that?!

Because it’s a Super-Socket 7 board I hunted for the best CPU available for that socket, the AMD K6-III+, a real beast for its time – which I planned to underclock to 266MHz, because I wanted to cool it passively. Well not completely… while the K6-III has a low heatsink on his top, there’s no room left for a fan on top of that.
So there’s a small fan on one side of the case (top left corner in the picture below), sucking air in and blowing it over the heat-sink towards the optional ISA cards… not 100% optimal but worked so far.

As the K6BV3+ has just an ATC power-connector a new and preferably smaller power supply had to be found. For that, I had to create a custom mounting using an aluminum angle profile (lower right in the picture below).

The power-button went into the NIC back-panel and a new cutout for the power cable was needed:

Peripherals and Drives

There are just 2 half-height, 5¼” drive slots in the case available. So careful planning was taken to serve every vintage computing need and this is the rather squeezed result:

  • 5¼” & 3½” floppy-drive combo in slot-1 (Yellow & red arrow)
  • Slot-in DVD drive (blue)
  • 2.5″ Harddrive (beneath the DVD, green arrow)
  • 2x USB an 1 PS/2 connector (purple & orange)

Conclusion

All that effort gave me a portable, well, “luggageable” PC which can read and write most media you need for vintage computing. It’s rather fast, nearly silent and most importantly features 2 full-size ISA slots and a shared PCI-slot for more recent stuff.