This is my first ever project I did for one of my favorite computers, the ATARI Mega-ST. Like told in one of my blog posts, the ATARI ST was my 2nd greatest love ❤ (after the C64) and being part of a very cool company back in the days I only have fond and happy memories of it.
After all the years of fiddling with nearly every machine on the market, it’s like coming home by just looking at its system font or hearing it’s specific bell-sound (even the ever-annoying key-click sound it makes by default).
And now it’s time to do something cool with it… adding, what I’ve missed back then: Color and -of course- Transputers 😉
TLDR;Ok, so you’re in a hurry or suffer from severe ADHD? This is a graphics card for the ATARI Mega ST internal bus including a Transputer interface. Got it. More details please… NB: This card is now superseded by the ATW800/2 |
Say hello to the STG[A]TW!
What’s that about the strange naming?! Well, this card is a hybrid of a classic STGA ISA graphics-card adapter and a Transputer interface for the Mega-ST bus.
Mega-ST, high-res graphics and Transputers? Mhh, does this ring a bell? Yes, component-wise this is exactly the configuration of an ATARI ATW800, the famous and rare ATARI Transputer Workstation (for which I designed a Farmcard, just in case you own an ATW).
So adding the two, it’s an STGA-ATW or STG[A]TW for short… and it looks like this:
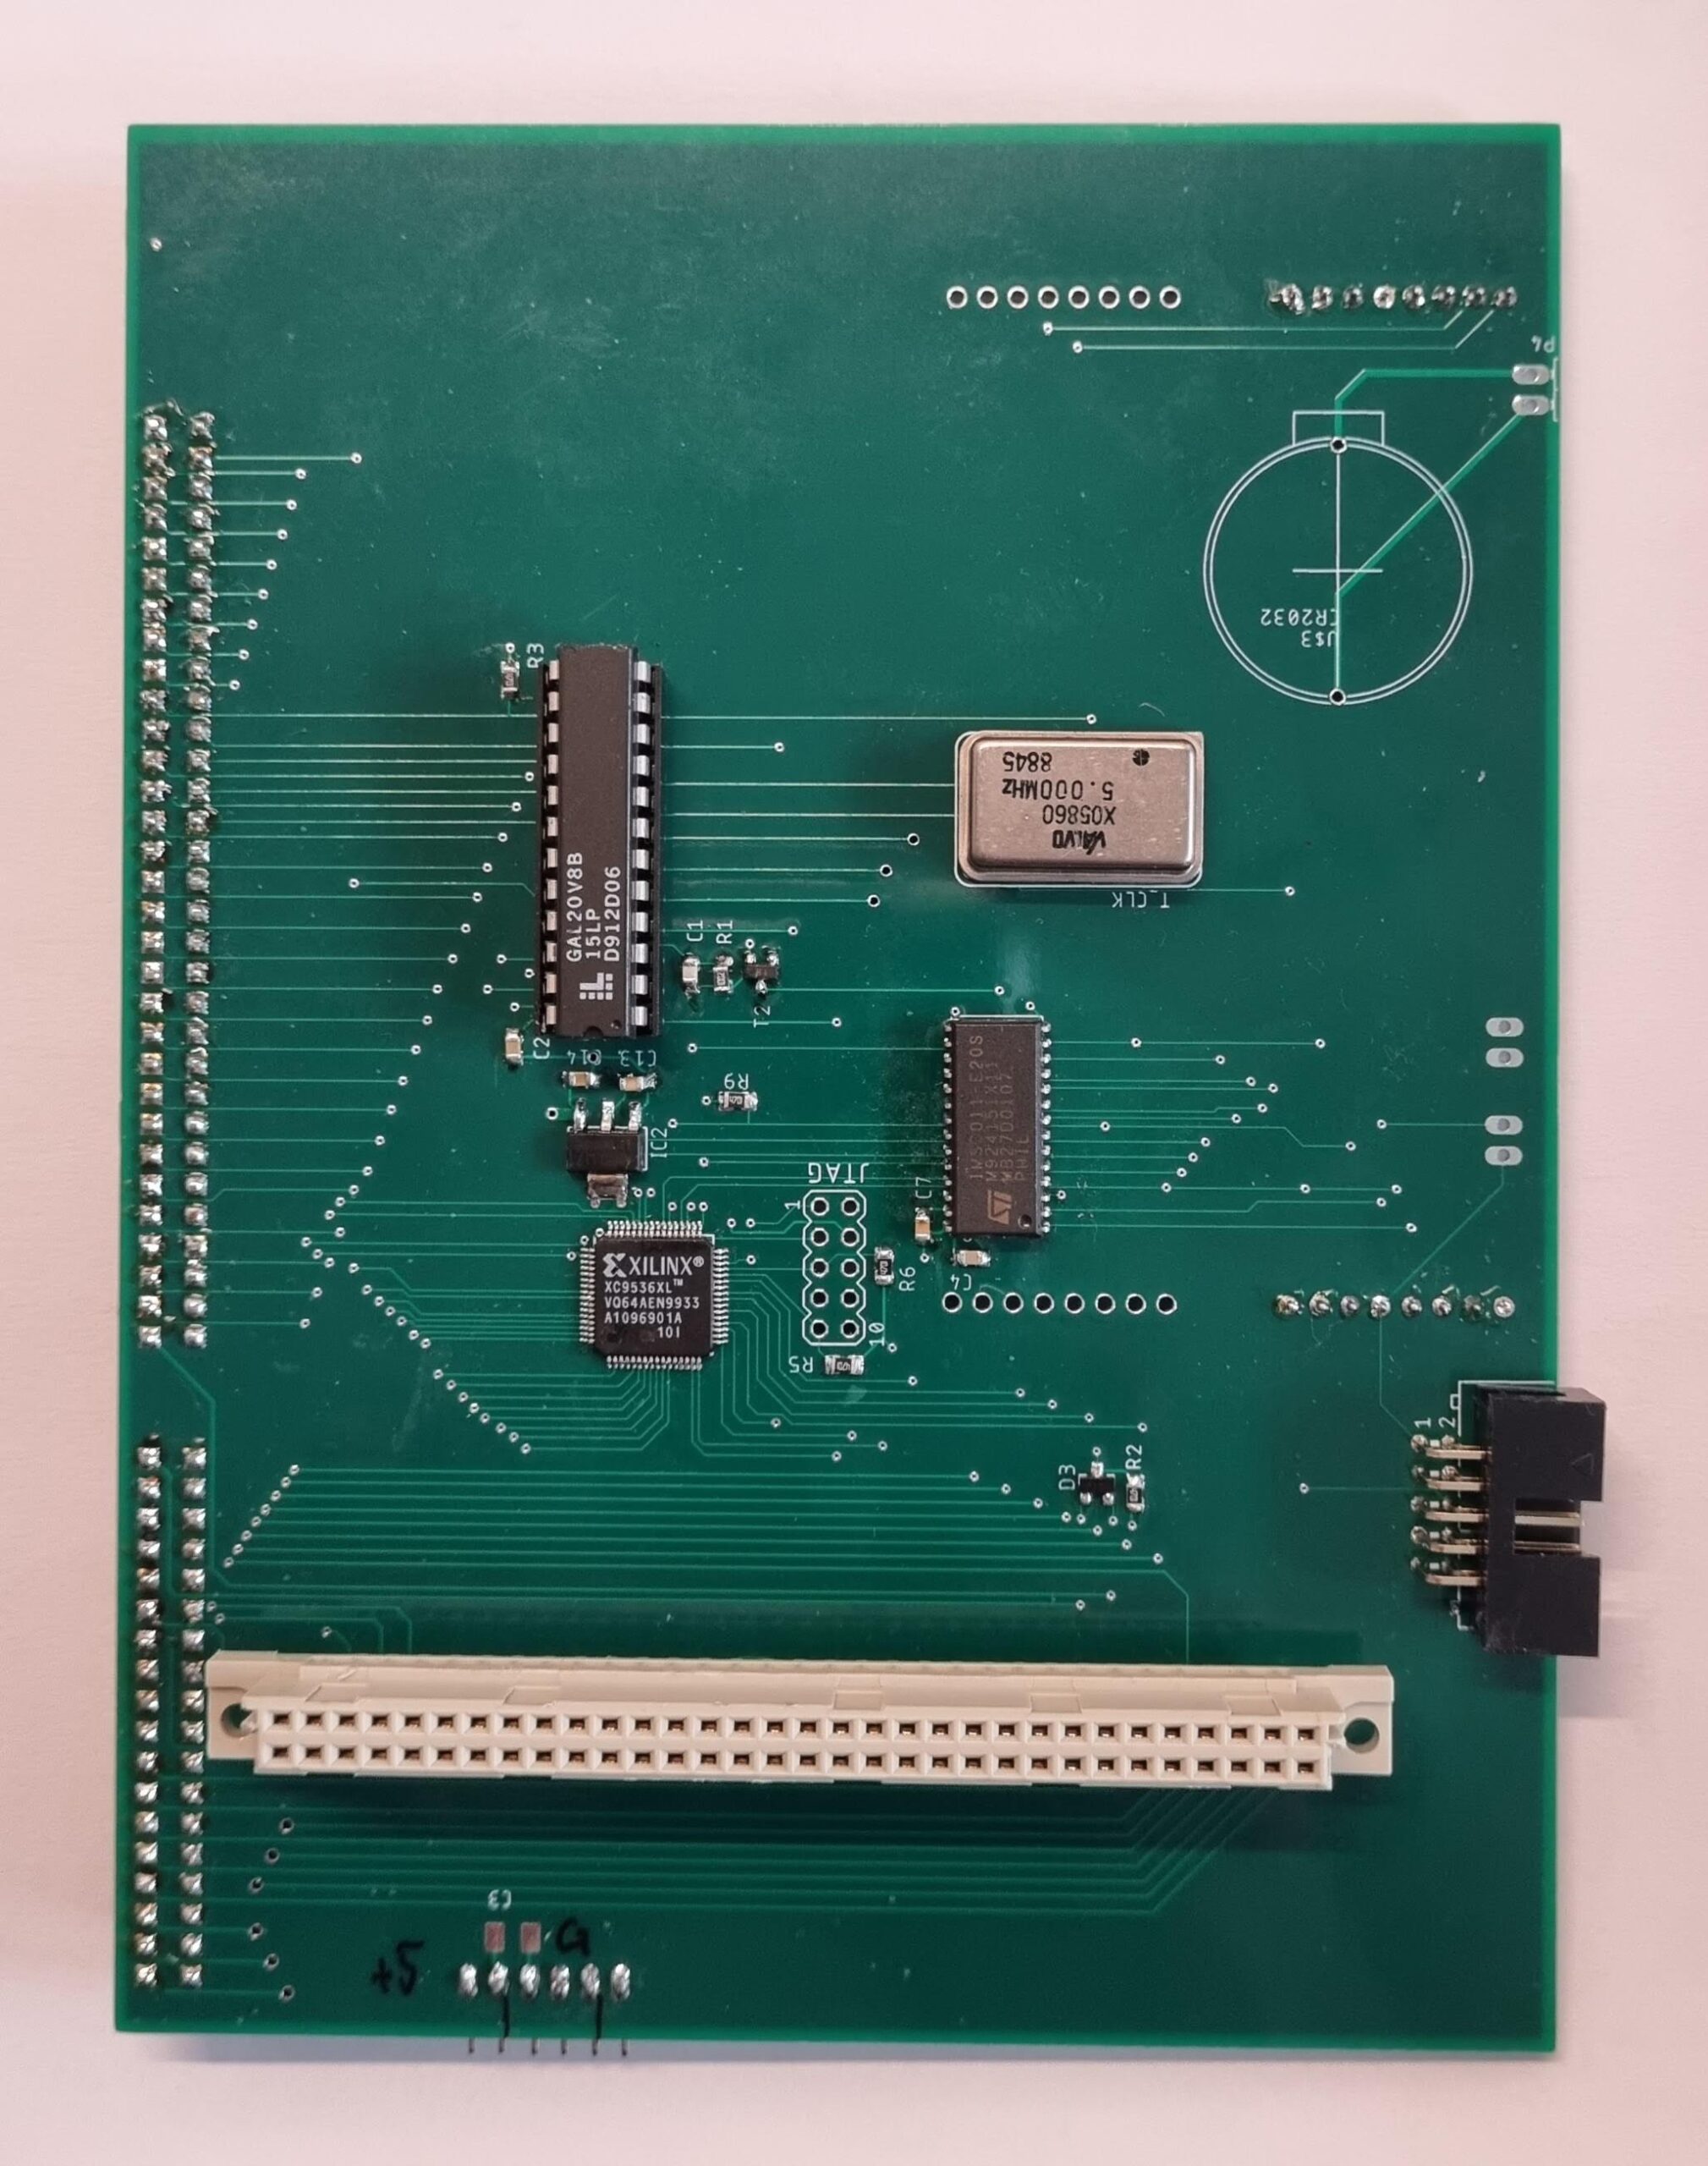
Looking at the top you’ll spot the 90° angled ISA Slot at the right edge, giving (selected) ET4000 graphic cards a home.
To the left there are two Transputer TRAM slots making it possible to use two size-1 or a single size-2 TRAM.
Obviously, an ISA card and the TRAMs would collide, so you have to choose… or you’re a lucky owner of a low-profile ET4000. Then you could use your VGA card plus one TRAM like this:

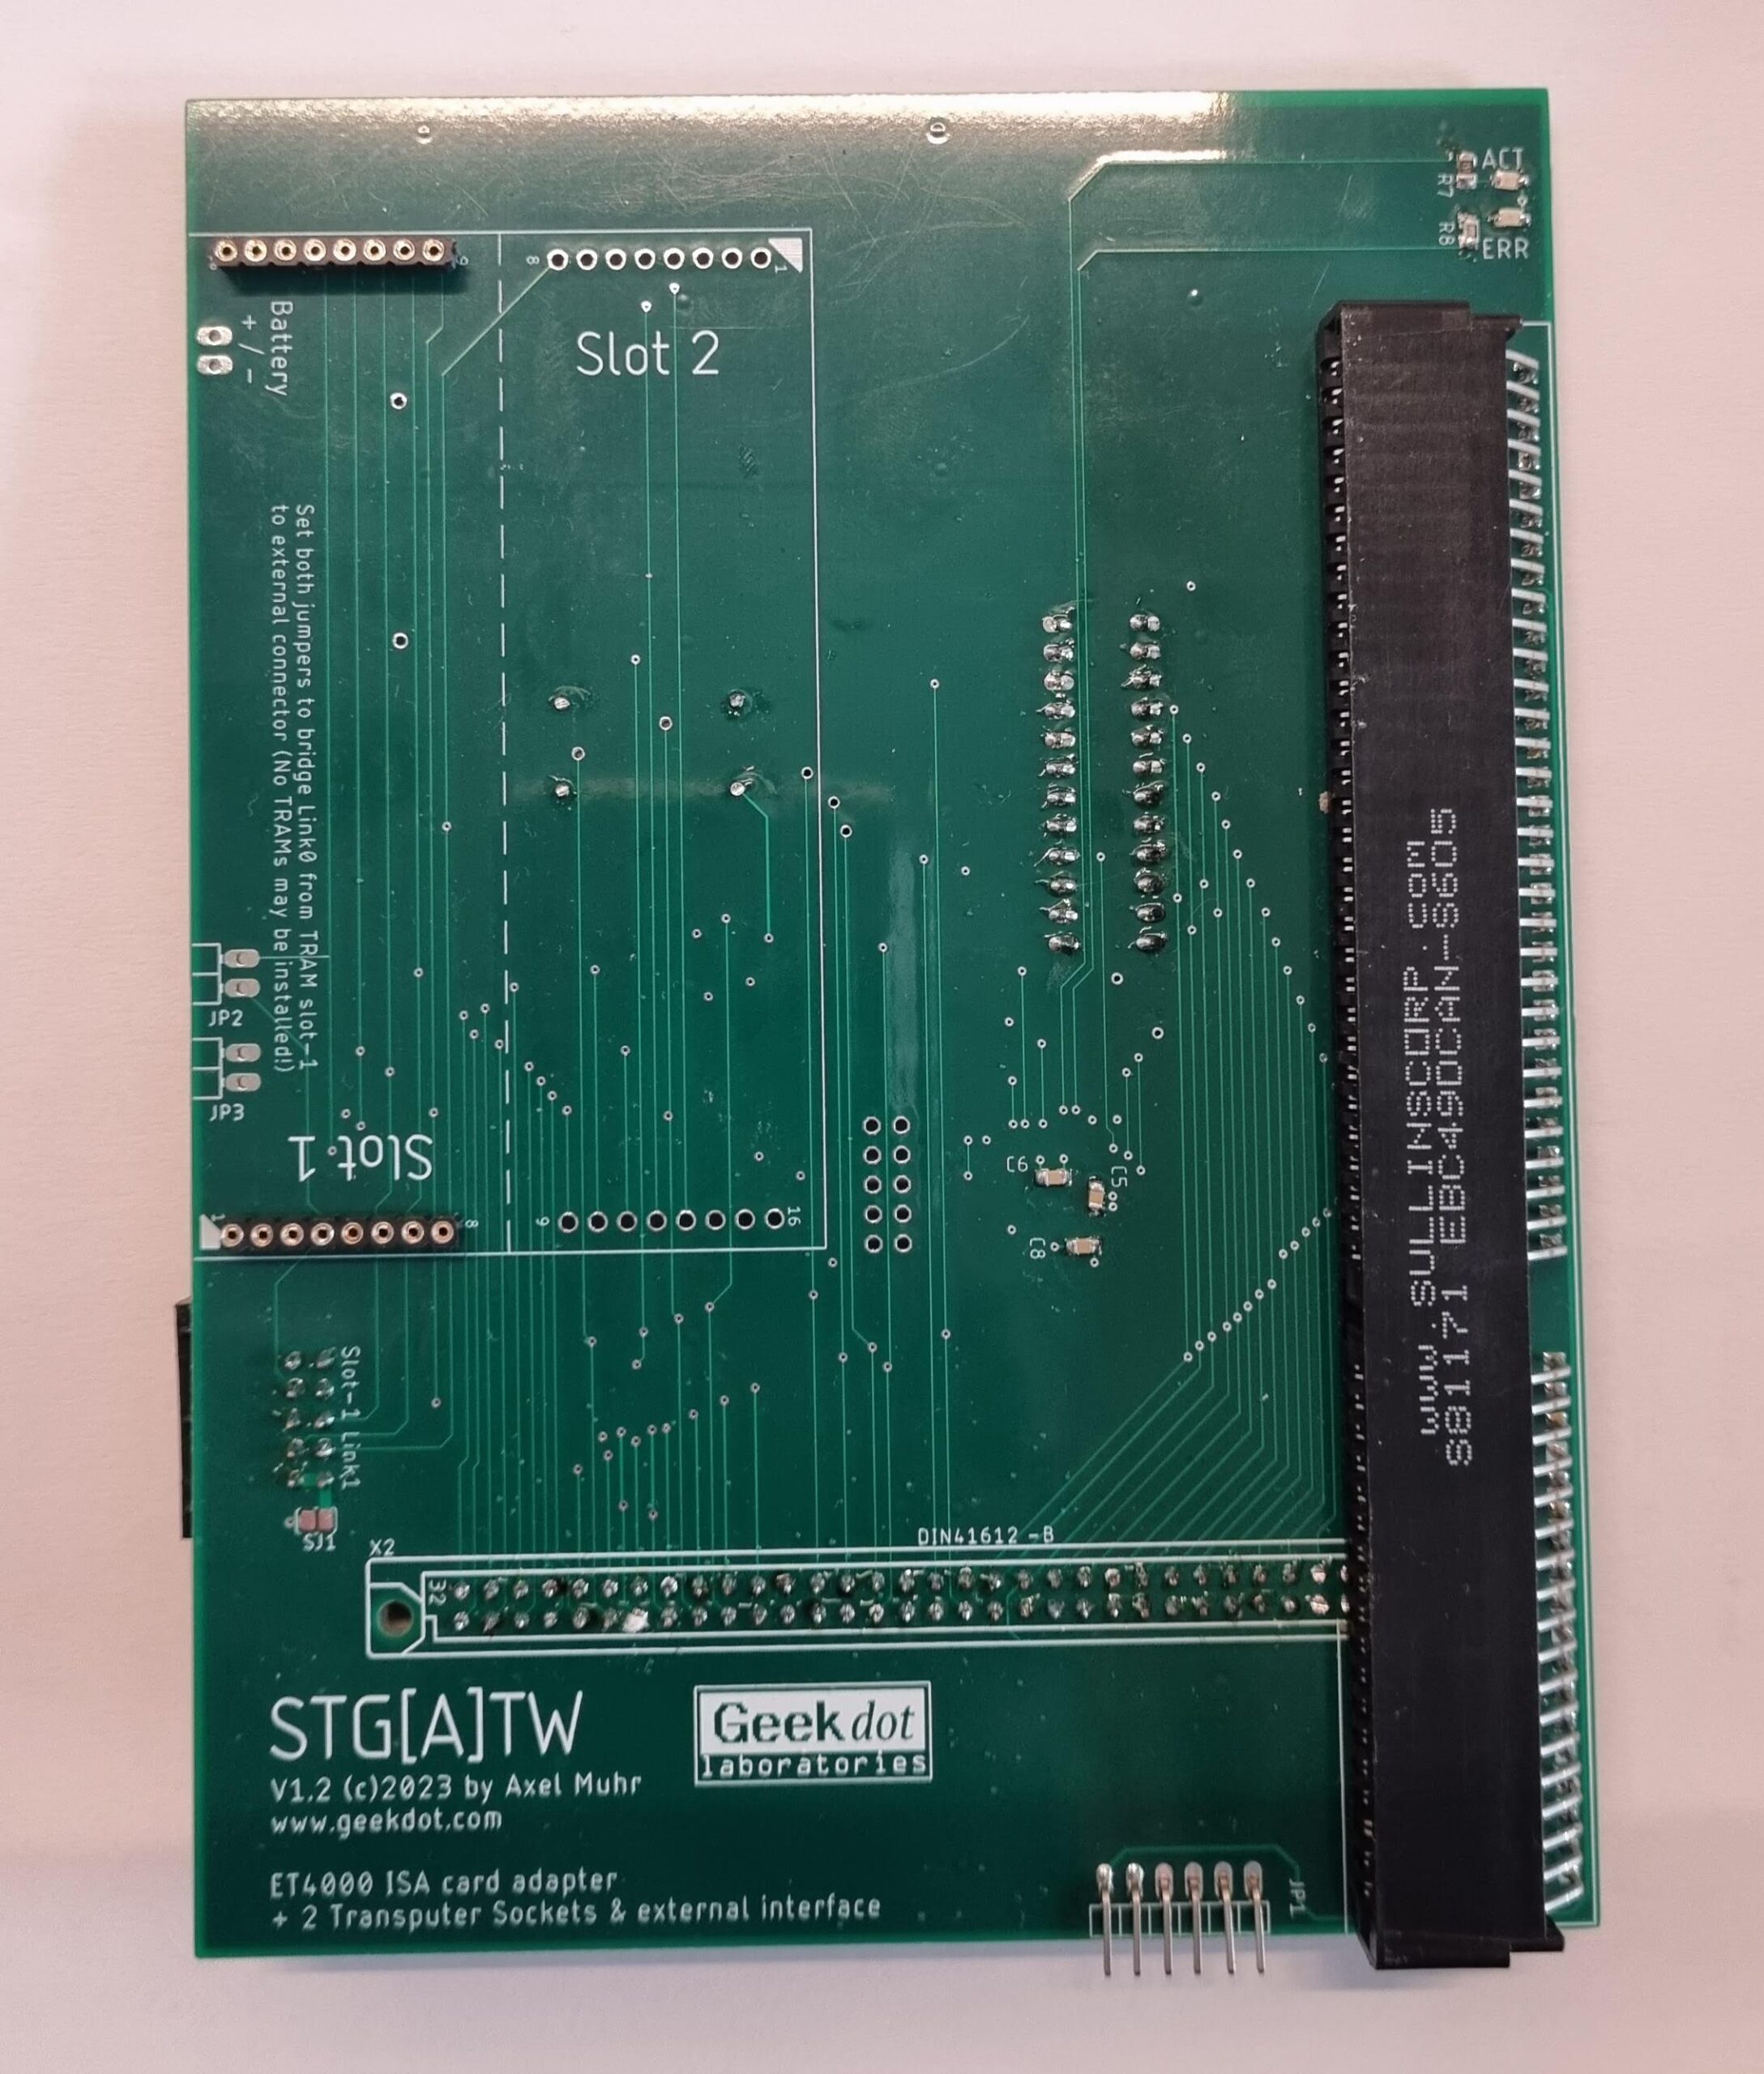
But even if your ET4000 card is covering the whole STG[A]TW don’t despair! Looking at the backside you can spot the external Transputer link connector (on the right edge):
Using this you can connect to e.g. an external Transputer(-farm) of any size… for example something like my 64 CPU Final Cube 🔥
Looking further around the backside you can spot a preparation for a CR2032 coin-shape battery holder. That is meant to replace the two AA batteries used in the original case-lid because depending on the TRAMs used, it might be necessary to remove the battery compartment (yes, you’d need to cut it out 😰) .
Talking about power… at the bottom you can see the external power connector which supply is mandatory – you need to connect at least 5V and ground, optionally 12V if your ET4000 needs that.
That said, I highly recommend to make sure your Mega ST’s PSU is powerful enough – best would be to replace it by e.g. a Maxwell RD-50A.
Why?!
I knew you’d ask. Well in case you haven’t noticed yet, I’m a total Transputer nut. It’s a fabulous, genius CPU and design. The more you dig into it, the more you’ll love it.
Back then I adored the ATW800 and always wanted to own one. But it was insanely expensive and -to be honest – wasn’t a real member auf the ST/TT-family anyhow.
This is because the Mega-ST1 inside the ATW was mainly used as a bootup machine for the Transputer and after that was up and running, everything the ST did was file- and user-I/O (Mouse, Keyboard, RS232).
In my humble opinion, the STG[A]TW is (somewhat) the way how ATARI should have done it back then. Instead of creating an ‘island solution’ they should have used the existing install-base and offer an expansion to it. Plug in the missing parts (graphics & Transputer) and keep the TOS/GEM eco-system in charge.
Users could keep running their applications and use the extra ‘ooomph’ to speed them up. Think of all the accelerators Apple Macintosh users had available to speed up PhotoShop filters or have it do the heavy number crunching of science applications etc.
Even all data has to travel over the bus to the Transputer and back, this is still faster than the 8MHz 68000.
Given that in 1990 about 350 ATW800 were produced and sold at 5000-7000 GBP which equaled to about 13700 DM or 8000$ (that’s about 11400 GBP, 13700 EUR or the same in US$ today),
I bet the number of a “ATW for the poor” would have been much higher.
So, again, why? Well to have Mandelbrot fractals calculated fast and in colo(u)r, of course!
Fast means ~60sec, even using slow GEM routines. Using the same algorithm and iteration depth, the ST’s 8MHz 68000 took nearly 3 hours to calculate the same fractal.
Here’s a quick peek how ‘fast’ looks like:
Evolution – a quick excursion
If you’re into hardware development you might wonder why there’s a very vintage GAL and a semi-vintage CPLD used in this design.
Here’s my explanation and shameful justification 😉
From the very simple and basic design of the STGA I took the usual nerdy feature-creep road to hell 🙄
My initial design naturally included the GALs logic into one big CPLD. And having all address-lines available on this, that design also included (on top of the ISA and Transputer interface) a 68882 FPU, an IDE interface and a ROM decoder… everything worked fine BUT all ‘modern’ ET4000 cards didn’t.
I stared at logic-analyzer traces for weeks and weeks and compared them to the original STGA they were absolutely identical. But whatever I did, I wasn’t able to get ET4k cards with a Rev. TC6100AF chip working.
In the end I decided to keep the STGA part as-is, including the external AND-ing of /LDS & /UDS and inverting of /DTACK and put the Transputer handing into a smaller (and cheaper) CPLD.
Thus the FPU, IDE and ROM decoding was off the table and to be honest, there are other solutions which do that job better anyhow.
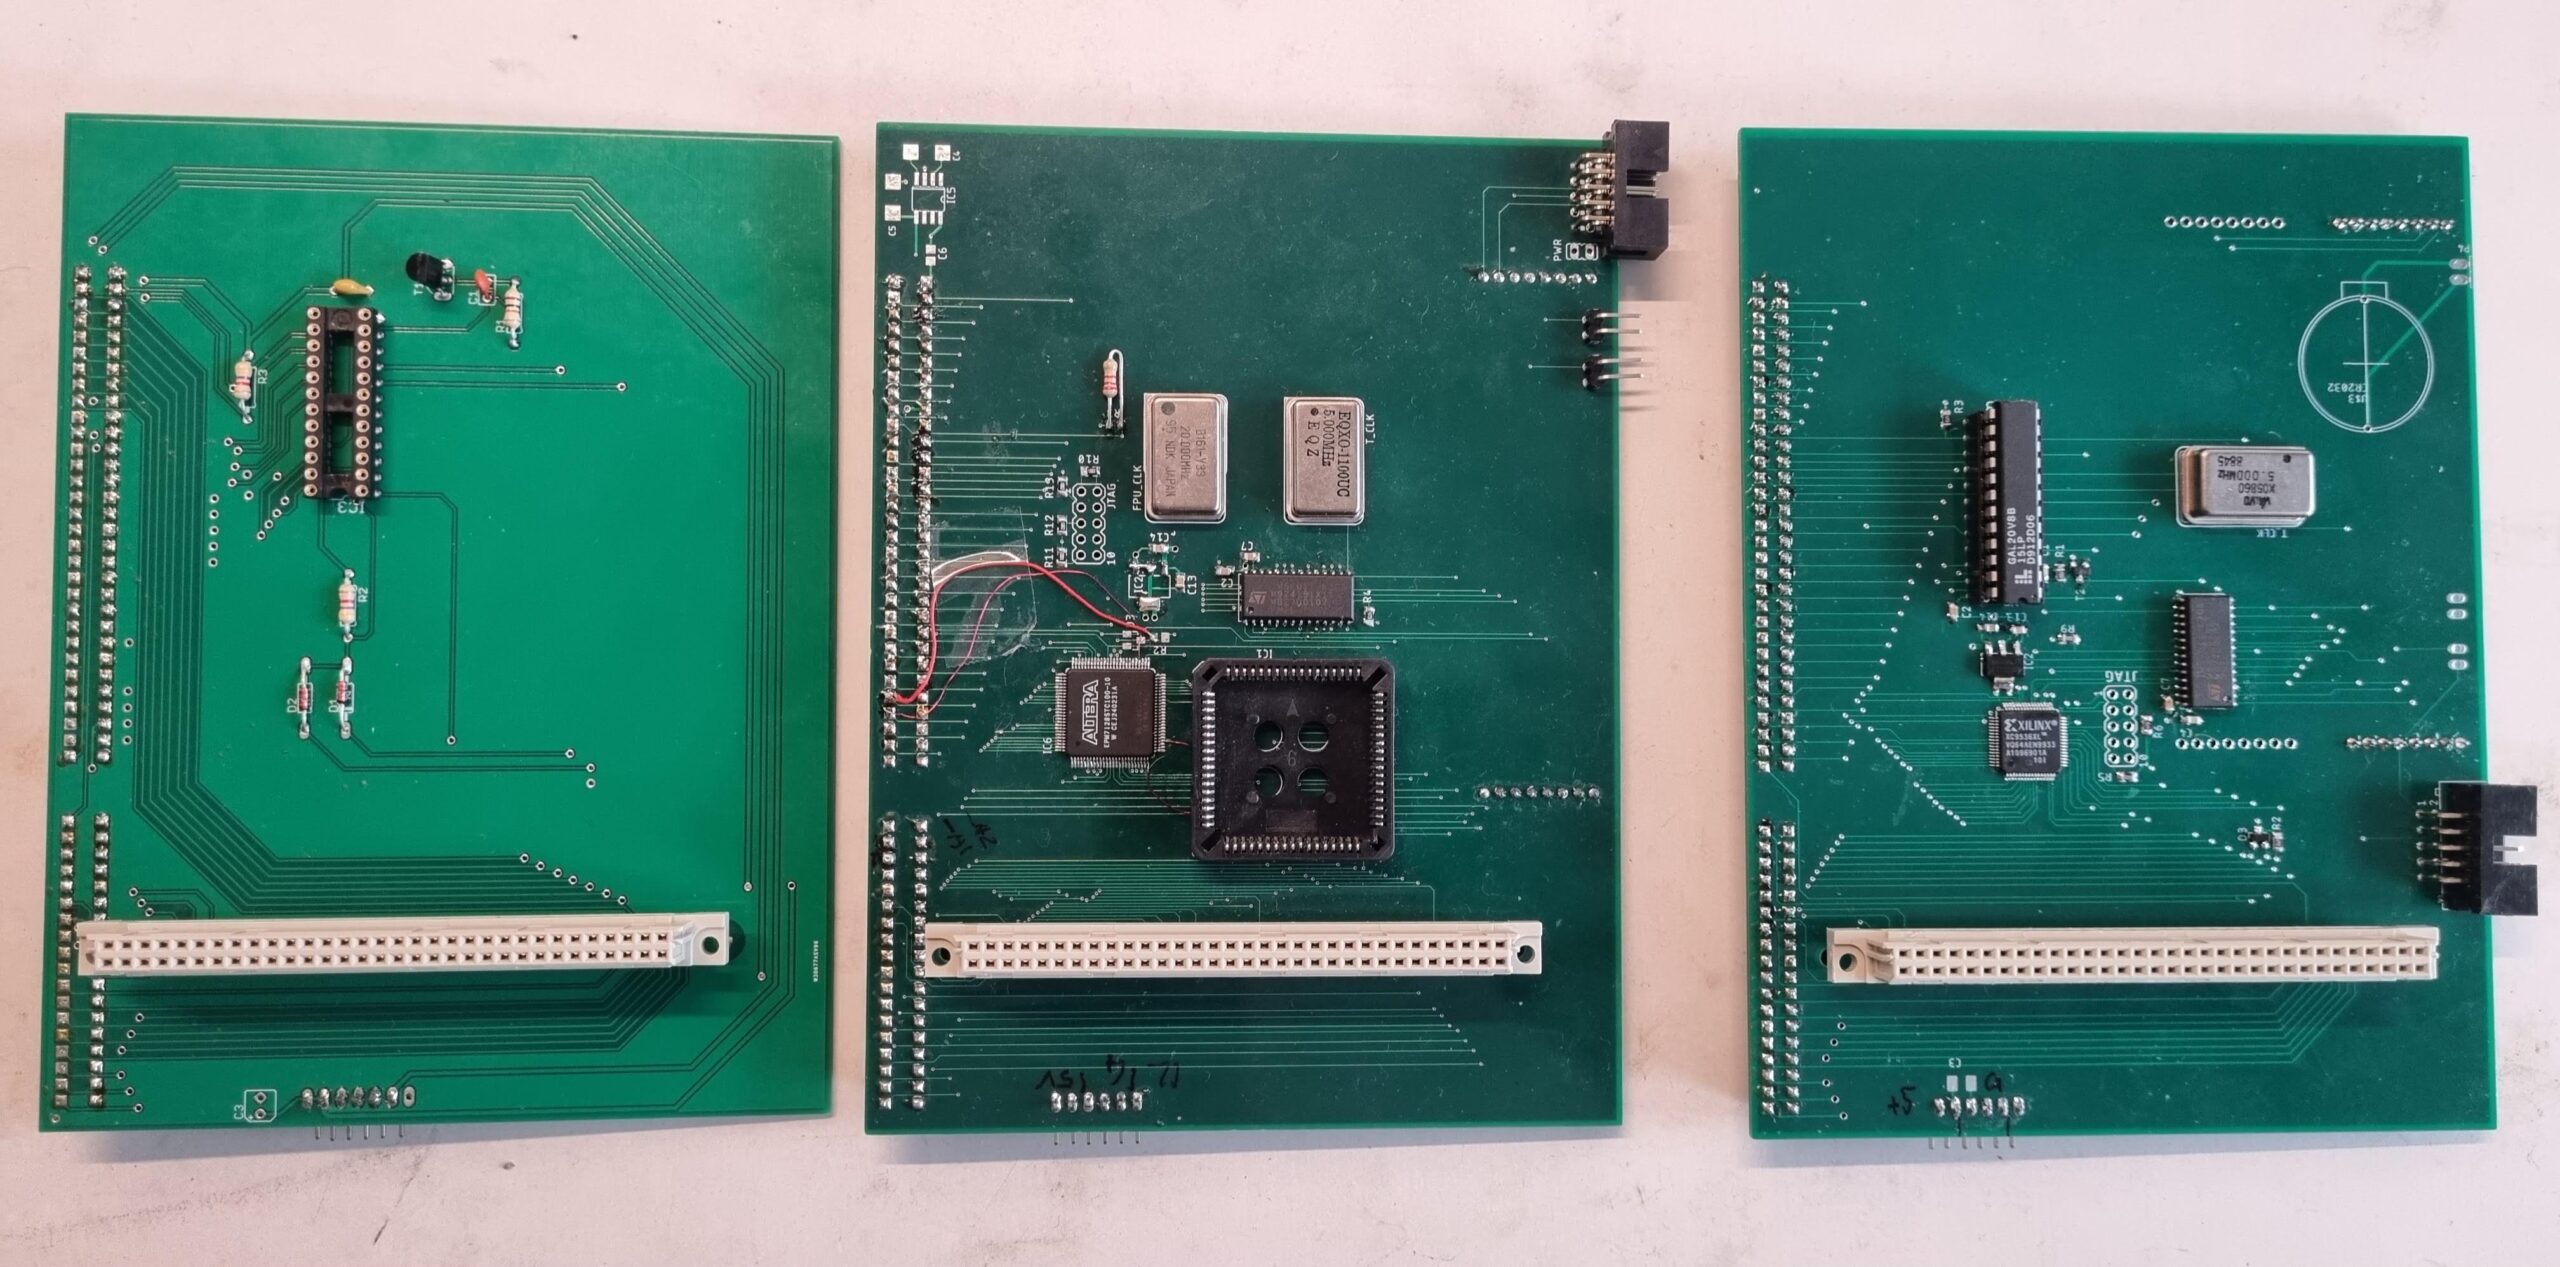 From left to right: STGA, the Über-STGA and the final STG[A]TW
So there you have it: Colorful high-res GEM combined with the mighty Transputer power… but I understand, that those low-profile ET4k cards are getting rarer and rarer and not everybody has an external Transputer farm to connect to.
So I made another card or better a so-called CPU relocator…
The TRAM-Relocator
Most (Mega) ST users out there already have one or more expansions to their system, mostly plugging into or onto the CPU creating a ‘stack’ of PCBs.
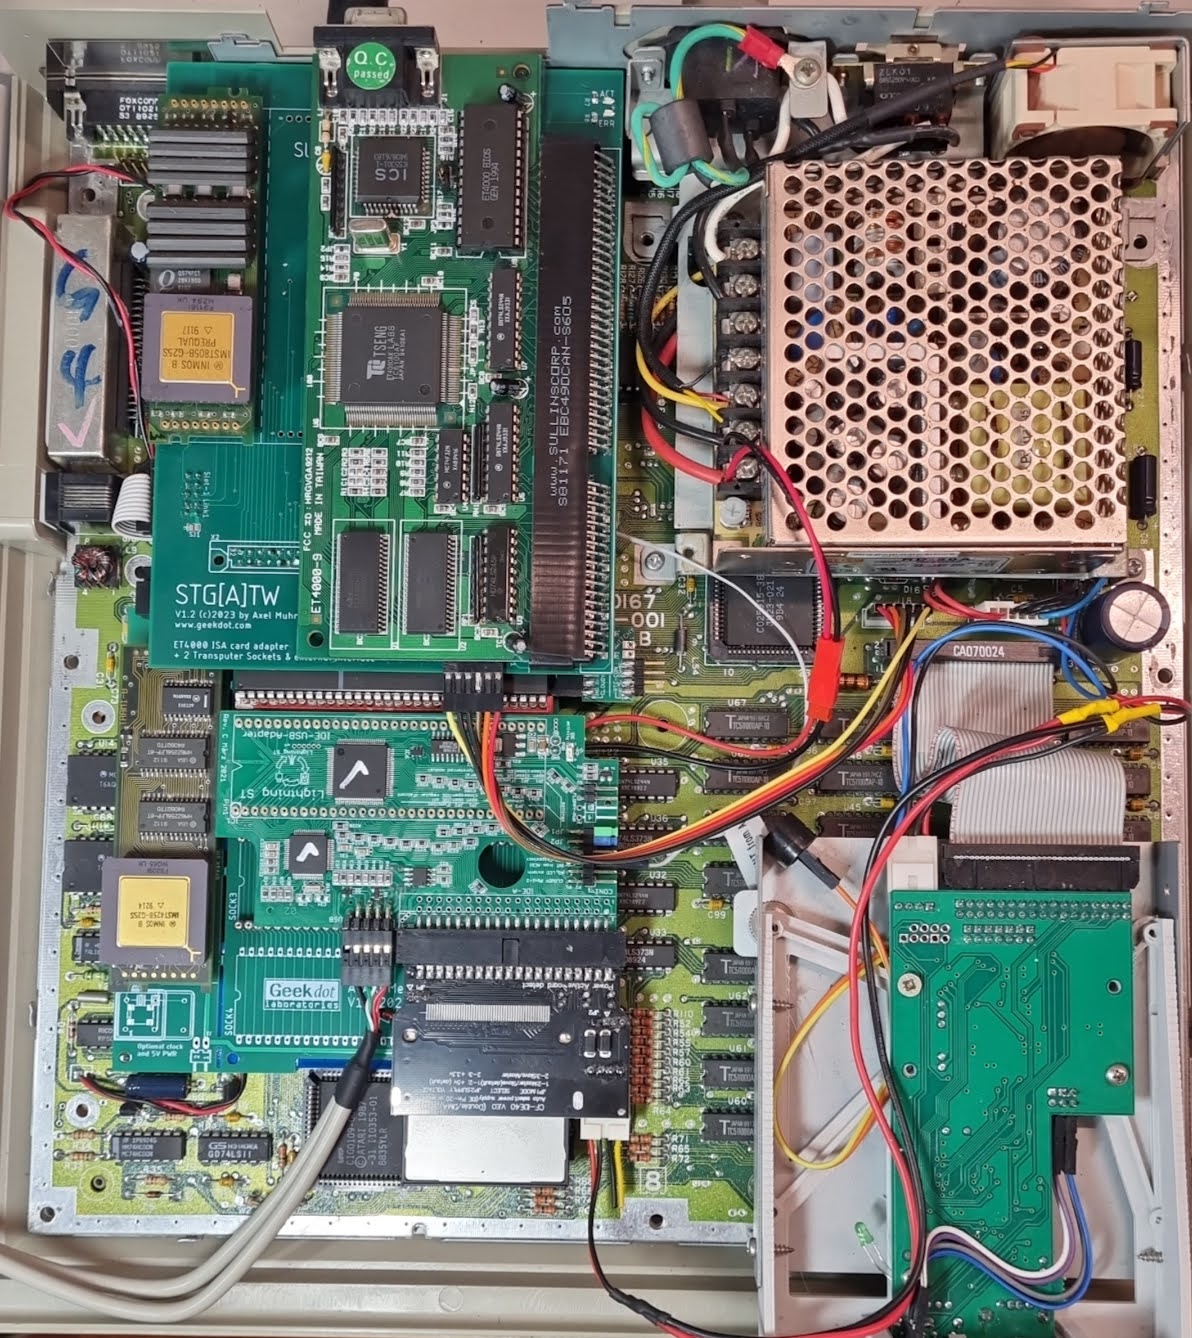
Because the STGA (as well as the STG[A]TW) overlaps over the Mega STs CPU socket you might want relocate the CPU a bit away from the Mega-Bus socket. Simple relocators simply move it a bit towards the front of the case. But that still results in having a stack of multiple extensions. For example here’s a Storm ST (Alt-RAM) on top of a Cloudy (4x ROM) plugged into a Lightning ST (IDE & USB):
 This can get tricky in some crowded Mega ST cases…
I really liked the ‘Bus I/O port design’ of the Exxos’ STF Remake Project having multiple sockets next to each other.
And if you have your original TOS ROMs removed (and replaced by e.g. a Cloudy) there’s actually some space to roll out 4 of them having the Relocator sitting flush on the Mega-ST mainboard (make sure the backside of the Relocator is completely isolated!):
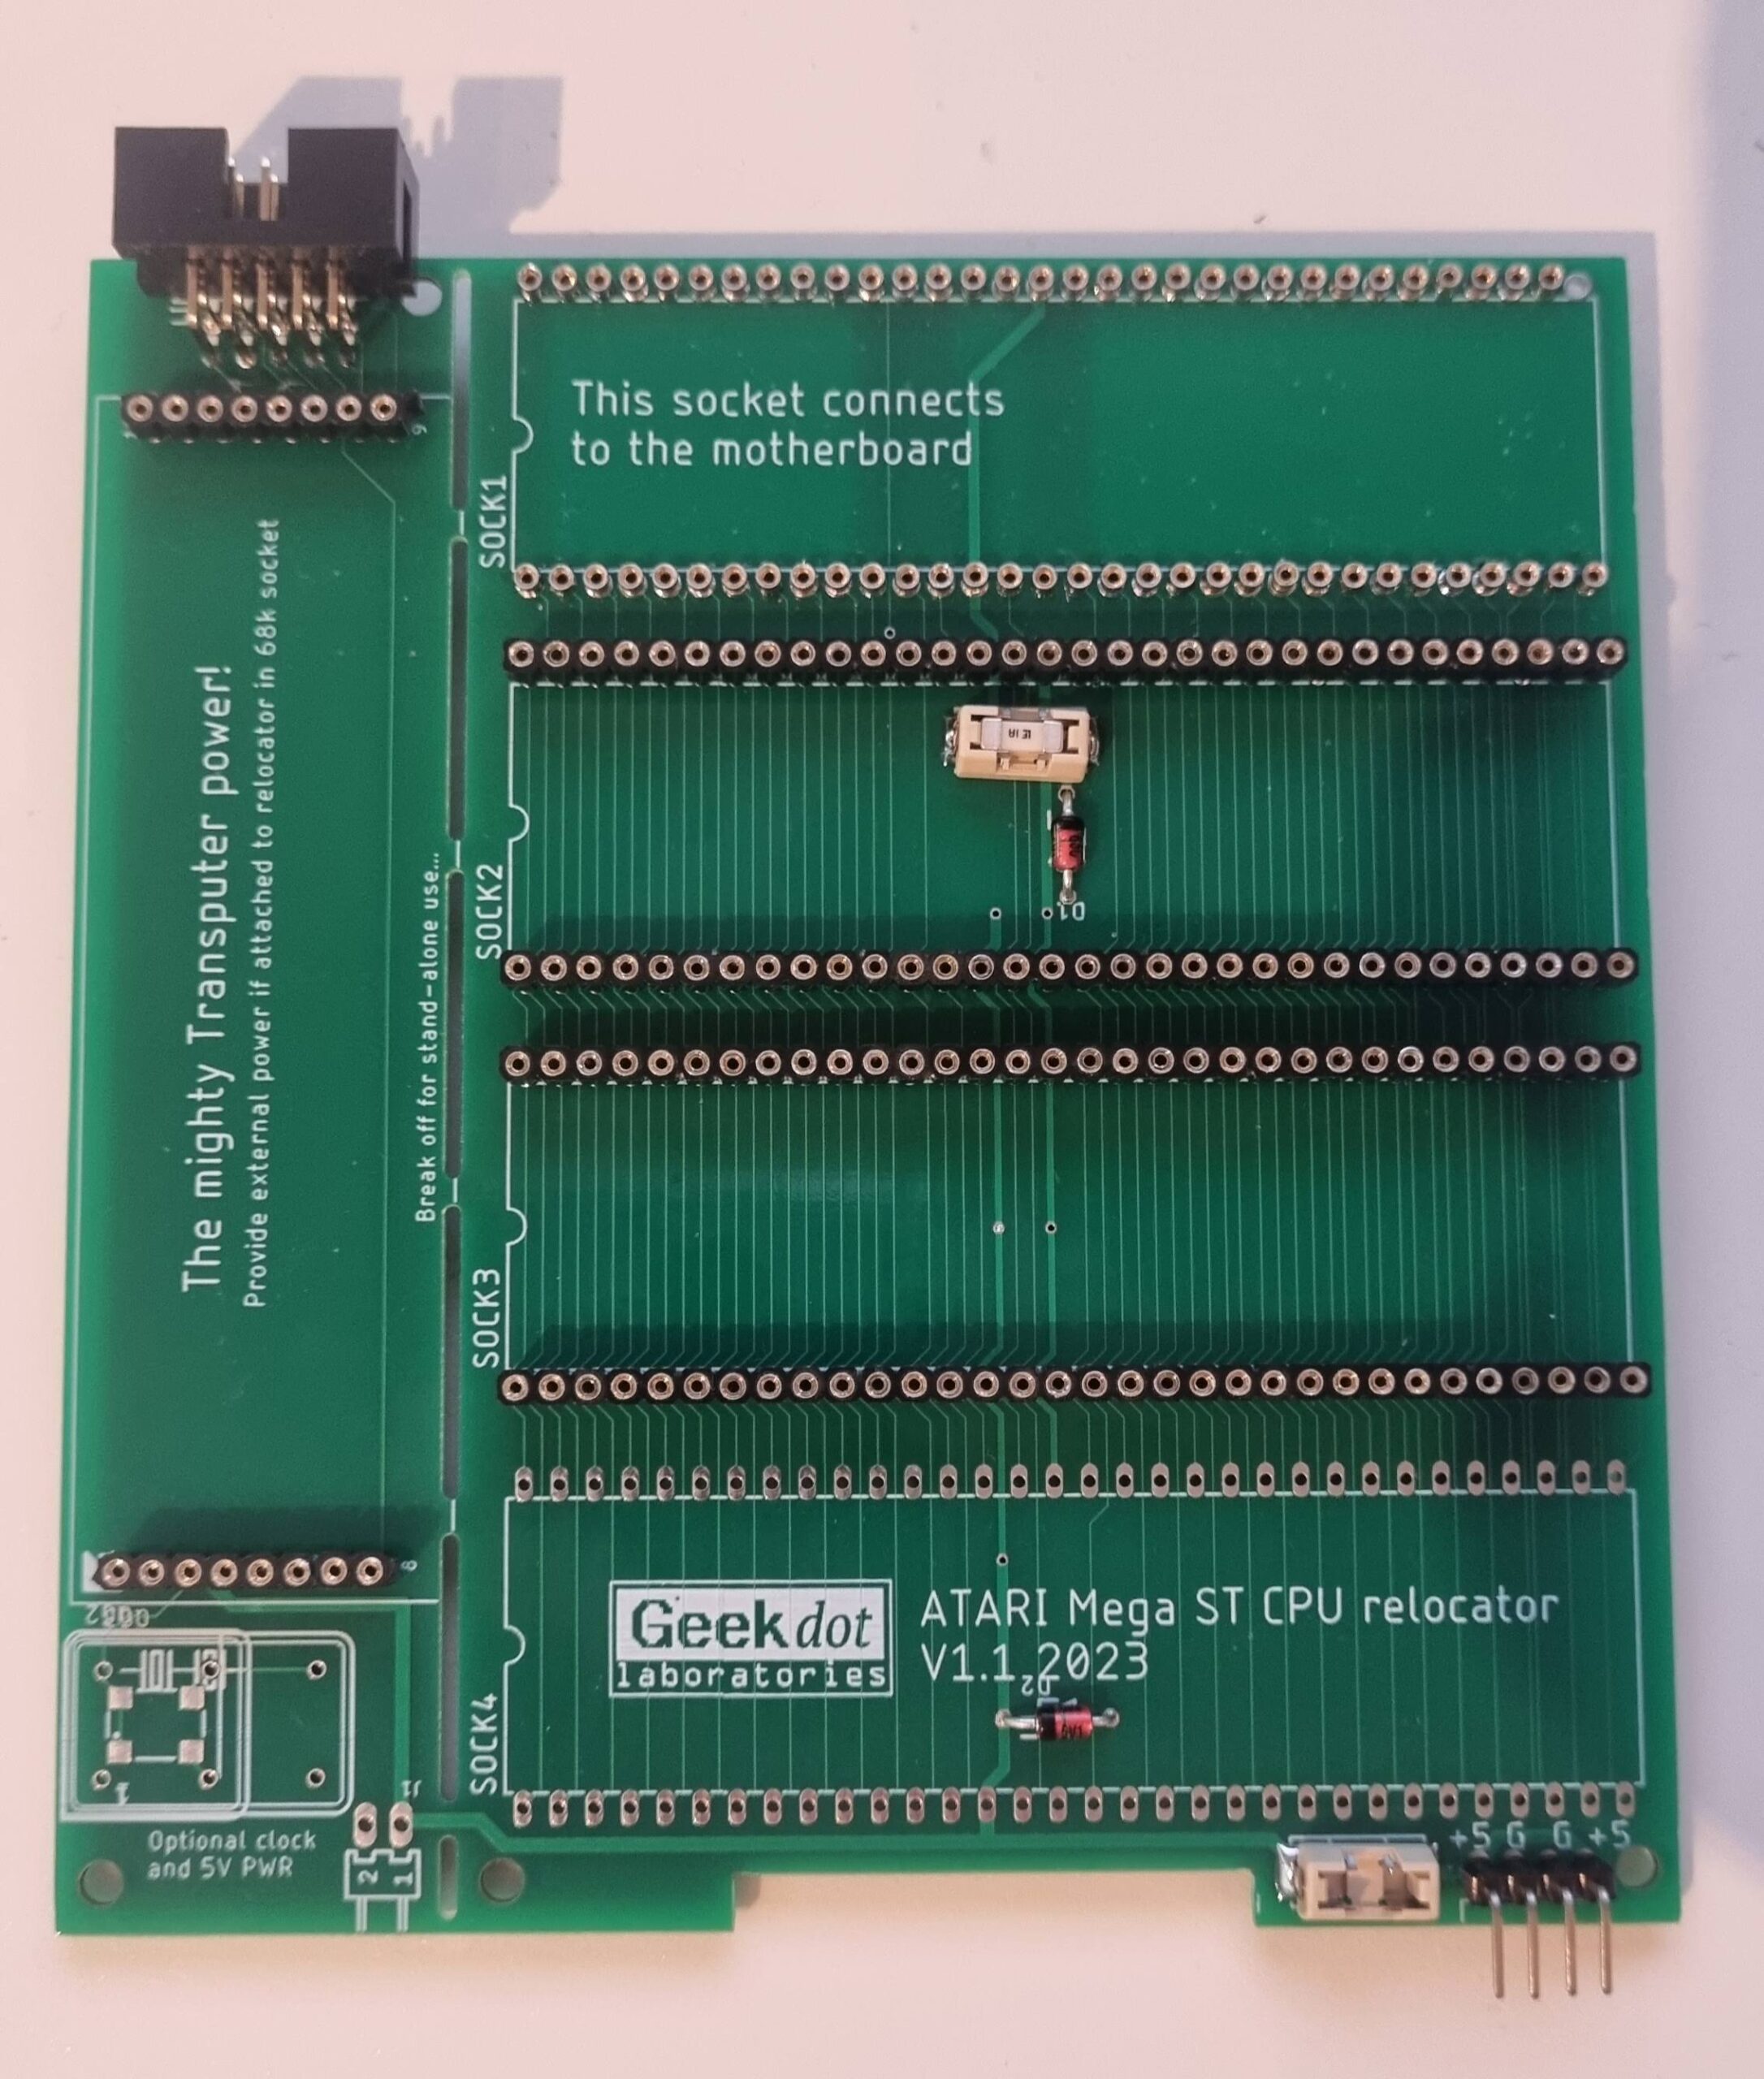
4 Sockets and a cool TRAM socket 😁
Like clearly written on the PCB, SOCK1 goes into the (to-be-retrofitted) CPU Socket and using ‘hollow pins’, it can take a CPU itself.
SOCK2-4 are available to extensions of your choice – all 3 of them are protected against power-surges by a fuse and a diode.
This design decision has been made due to my own painful experience loosing everything which had been plugged into the CPU socket… and the Blitter 😥
In the lower right corner are pins for an additional external power connector, also protected. That might be necessary depending what you’re plugging into those sockets.
Finally, the left edge is a Transputer TRAM socket which can be connected to the STG[A]TW by a 10pin flat-cable providing link signals and a 5MHz clock signal.
That way, you can use the STG[A]TW with an internal Transputer even your ET4000 card is big as a baking-tray.
It is highly recommended to use external power when doing so. The poor 68000 power-pins won’t be enough for it.
If needed, the whole TRAM part can be snapped-off from the Relocator to, uhm, relocate the TRAM elsewhere in- or outside the case or use it stand-alone. For that matter itself features an optional connector for power as well as a place to solder a required 5MHz oscillator and 2 mounting holes.
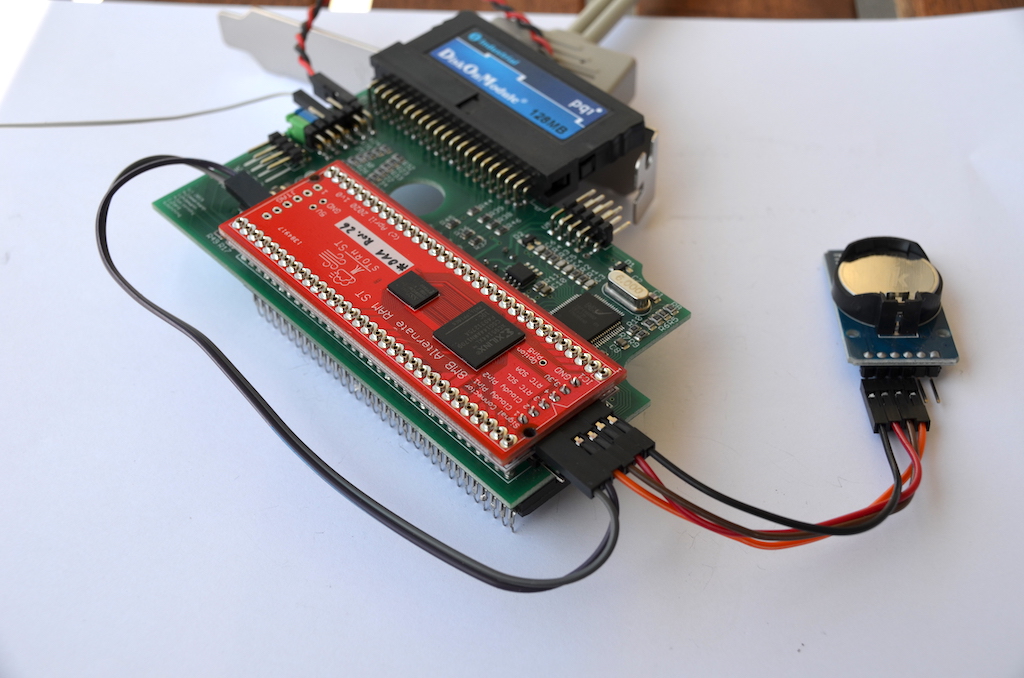
With everything in place, your “ATW800 for the poor” could look like this:
What you see here is the STG[A]TW plugged in, giving home to a low-profile ET4000 and a Size-1 TRAM.
The Relocator was plugged into the CPU socket and in its 1st slot the Cloudy-Storm and the 68000 sitting on top of it, took seat.
Slot 2 of the Relocator is taken by a Lightning-ST… and last but not least, a second TRAM was put onto the Relocator (you can spot the grey flat-cable connecting it to the STG[A]TW.
Want one?
All this sounds so cool that you want to own a STG[A]TW?
Well, first check out this list:
- There’s next to no GEM user software for it yet
👉 but we’re working on it and there’s a pretty good system support in place already – and Helios is running already! 🥳
An extra post on that iscurrently in the worksavailable here. - Do you have an ET4000 card of which you know it’s working with the NOVA drivers?
👉 I am not able to support you in getting your specific card working – there are just too many models and permutations of possible TOS/GEM/Driver installations. See this atari-forum.com thread to get an idea… - Do you own a TRAM?
👉 I might provide you with one at extra cost, mail me. - Do you have time to wait?
I’m manually building these boards and it’s a lot of work (0.5pich SMD, lots of trough-hole pins to cut and file down etc.)
If that’s 4 times “Yes” I can build & sell you one of the 6 which I have left for 100€ (plus shipping)… yes, that’s hefty but the quite large PCB is 4 layers (for stable power-distribution), just the ISA slot connector is 10€ already, Mega Bus 5€, GAL, CPLD etc.etc…. plus, as said, it takes quite some time to build & test them.
Drop me a mail on the bottom of that page if interested…
SOLD OUT… sorry 😥
As for the CPU-relocator, I’m selling un-populated PCBs for 8€ (Or get the gerbers here and have yours made at your favorite PCB manufacturer).
I’m not building them because the CPU ‘socket’ (SOCK1) is made of 64 single pins which you have to pry/get out of precision pin-headers.

That’s a tedious work you most likely want to do once… but not many times.
All that said – If you weren’t able to get a STG[A]TW, don’t despair.
I consider this as my stepping stone and learning platform for something cooler to come 😎.
Because I don’t like vapor-ware and hot-air-talking, I’ll tell you more when it’s a) done and b) working.