Welcome to the TIGA basics page! The fist post in my little TIGA chapter.
You probably came here because you just got (or plan to buy) a cool, shiny TIGA card and like put it to some use. Or you’ve read about it and found out, that the Web is pretty thin on that matter… Anyway, you came to the right place!
Let’s check some points fist…
Hardware
Well, if you have a card already, great, you’re set.
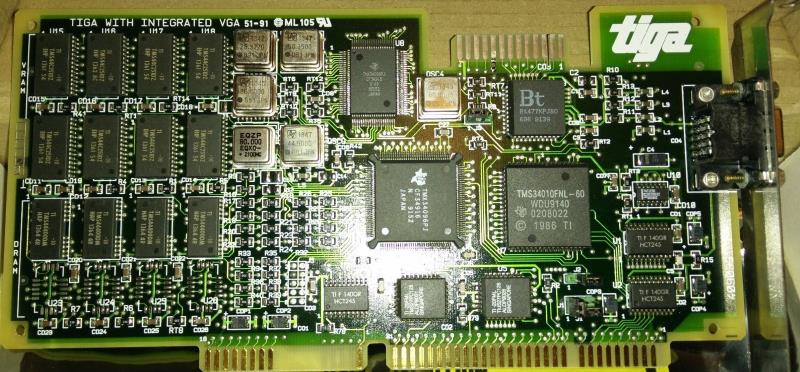
There were/are different versions around. The early cards used the first implementation of the graphics controller called TMS34010 which was clocked up to 60MHz (amazingly high!). For example TIs very own “TIGA Star”:
Later models used the advanced TMS34020 which started at 33MHz up to a max of 40 but had faster instruction cycle times, a faster memory interface and a twice as big instruction cache (512 bytes. Yes, bytes). Additionally the ‘020 supports the rare TM34082 floating point co-processor (actually even more than one) to speed up 3D calculation. I’m not aware of a Tool using that…
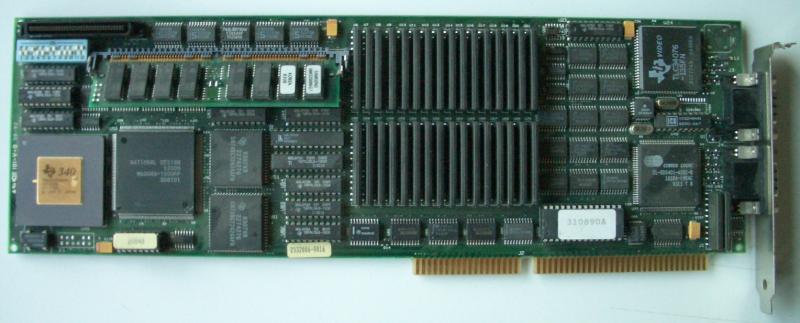
One of the first ‘020 cards was probably the Diamond from TI, which even features a socket for the FPU:

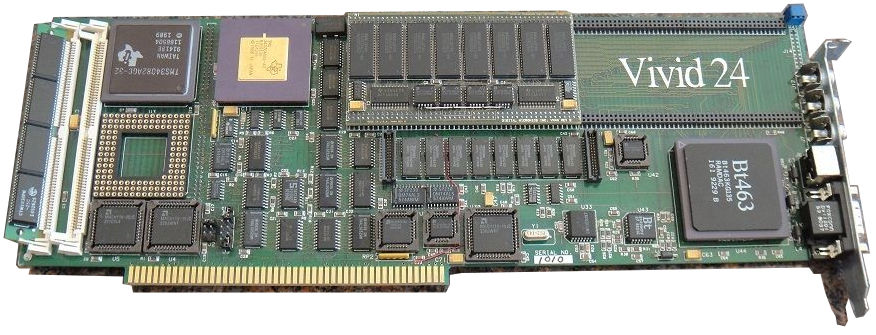
My weapon of choice is the mighty Miro TIGER:
Every TMS340 has its own RAM to run “programs” in. Depending on the model this starts at 1MB and can sometimes expanded up to 17MB. Better cards used SIMM to do this, but there were some models which used proprietary RAM modules which are nearly impossible to come by these days.
Next the TMS340 needs VRAM, the memory holding the graphics itself. Again, depending on the model, this might vary from 1 to 4MB resulting in different max resolutions. IMHO just 1MB doesn’t do a TIGA card justice. That is just enough for 640×480 in 24bit…
Finally, as TIGA was not a standard CGA/EGA/VGA replacement, you’ll need some way of displaying the DOS text/graphics output. TIGA was always meant as an additional display mostly using a 2nd high-resolution screen, so TIGA cards either run in parallel to an existing VGA card or it also features a (mostly simple) VGA controller for this.
Very sophisticated cards like the above miroTIGER gave many options for this. It features a small VGA part (a Cirrus Logic CL-GD540 and 256K of DRAM) to make a 2nd card unnecessary or could disable that to use a 2nd card of your choice for a two-screen-solution or offered to loop-though the signal of an existing VGA card and automatically switch between them for a single-screen-setup.
Recommendation
So if you consider buying a TIGA card, go for a TMS34020 with SIMM sockets. It should have at least 1MB RAM and 2MB of VRAM. A SPEA Graphiti FGA is a good example for this minimum config.
While DRAM isn’t that important, the more VRAM you have, the better. Having a VGA controller on board might be desirable if you’re tight on slots – but to my knowledge the best VGA controller ever used on-board was an ET4000. So it’s more or less a matter of taste.
Software
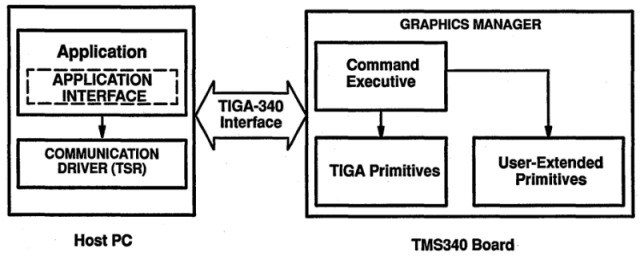
Actually this is the more important point on your list. While yes, TIGA is a standard, it contains certain proprietary parts, called the CD, GM and EXTPRIMS you’ll need to get your card going. The reason for this is the driver which is more a layer model looking like this (listed bottom-up):
| Application using TIGA (e.g. AutoCAD) |
| application specific extensions (also *.ALM/*.RLM file) |
| extended primitives (EXTPRIMS.RLM/*.ALM) |
| Graphics Manager (e.g. tigagm.out) |
| Communication Driver (tigacd.exe) |
The 3 yellow(ish) levels are card-dependent, so without them, you’re lost and your shiny TIGA card just makes a nice paperweight.
The lowest level is the Communications Driver, or CD for short, is 100% hardware dependent – It is always supplied by the cards manufacturer and, well, handles the low-level communication and resides in the PC (upper-)memory.
Above that sits the Graphics Manager (GM)- this is the “real thing™”, the core or kernel of TIGA – which is the firsts thing being loaded into the cards own DRAM.
On top of the Graphics Manager sits another layer belonging to the package provided by the card manufacturer and loaded into the cards RAM, the Extended Primitives Library called EXTPRIMS.RLM in 99% of all cases. This contains all the drawing routines for primitives e.g. boxes, circles but also printing text etc. The file extension ‘RLM’ stands for relocatable load modules while ALM means absolute load modules. RLM’s are loaded and linked at run time, ALM’s are linked in advance for a fixed configuration and later at run time just loaded onto the TIGA card.
Here’s another illustration to show the layer model separated by memory regions:
With these 3 layers loaded, your TIGA card is ready to rock and awaiting commands from your application. Let’s take AutoCAD as an example – it’s probably the best example anyway as TIGA was mainly used for CAD.
It will not only load the TIGA driver but probably also some extensions provided by your cards manufacturer. So for example the miroTIGER came with a 3D-Viewer called “MulitVIEW”, ELSA provided a tool called ELSAVIEW with their Gemini cards etc.. All those tools loaded some extra code into the cards RAM (that’s the light blue layer).
All the extension tools I saw up to now didn’t require more than 200KB RAM. The TIGA core itself is at ~100KB, so for most basic stuff 1MB might suffice at first – but of course some of those tools need extra RAM for holding data so my assumption is that 2MB are a good bet to start with.
Caveats
All that said, be aware that were two main versions of the TIGA kernel – V1.x and V2.x which have slight differences in programming. Again, it depends on the model of your card which TIGA version is supported. As far as I know, V2.x (2.2 being the latest) requires a TMS34020.
ALM’s were a unique feature of TIGA V1.1 and should no longer be used with TIGA V2.0. Generally, V1.x programs do not run (properly) on a V2.x CD/GM combo.
Setup
First, most likely there might be something to setup on your card. DIP switches for example or jumpers. At least you need to know/set the base-IO address of your card. Lucky are those who have a manual 😉
Next, as this is DOS-land, there are some things to set-up in your config files. As usual with DOS, you have to set an environment variable in your AUTOEXEC.BAT:
SET TIGA=-mC:\TIGA -lC:\TIGA -i0x60
PATH=%PATH%;C:\TIGA
This defines the path(es) to your TIGA modules and libraries as well as the base-IO address, at which your card is communicating. This has to be adjusted to your hardware setting.
Also the base-path to your TIGA files needs to be in the system path.
Then you load your CD and (optionally) GM:
lh C:\TIGA\TIGACD.EXElhC:\TIGA\TIGALNK.EXE -LX
The 1st line is clear – if your config allows, you can load the CD into upper-memory. With the 2nd line you can pre-load the GM into the cards RAM and the -LX parameter makes sure it eXecutes right after that. This step is optional, as well programmed TIGA programs check for the GM and if it’s not loaded, they’ll take care of that.
That’s about it. Yay, your TIGA system is up and running 😀 and you’re ready for some action.
The next post shows how to program your TIGA card and do some graphics…