
One day the power-supply of my beloved Quadra went “bzzzzzt-poof” (sparks flying, smoke rising).
First I was desperate… try to find a Quadra 950 power-supply these days. And if you find one, it’ll cost you the same you’d pay for a complete system… and then you’re still not sure, if it won’t go poof very soon, too.
Then I thought: Hey, why don’t replace the whole thing by something more modern, much cheaper and smaller?!
It’s already been proven with other Mac systems that using a standard PC power-supply (PSU for short) is feasible, so why should a Quadra 950 power-supply be much different?
As there are some descriptions out there – mainly for those “10-pin connectors” (Mac IIcx, vx or PMac family) I thought it might be helpful to have a step-by-step how-to with lots of photos…
|
We’re interuppting this transmission for a stern word of warning: Working on/in power supplies is dangerous. I take no responsibility for any damages, injuries or fatal strokes! If you’re unsure if you can do this hack, just don’t do it! First (obviously), unplug the unit. Leave it unplugged for 15 minutes or so. In most PSUs there are bleeder resistors that will bleed down the stored voltages inside over time BUT THERE ARE NO GUARANTEES!! When you open the unit, understand that there are two hazards:
Either 1 or 2 can be deadly. If you die, it’s social darwinism. You have been warned. |
Dismantle
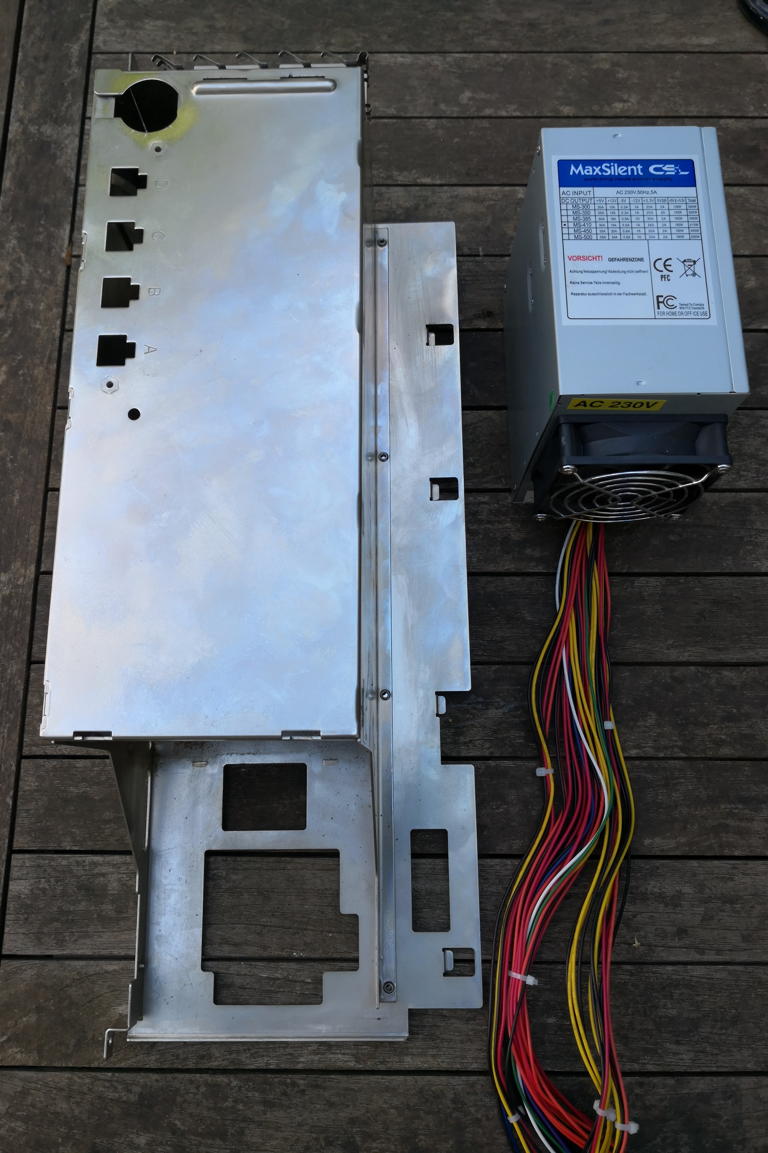
So for the initial try I pulled a cheap ATX power-supply out of my junk-pile (wife-speak for “basement”) and put it next to the original, humongous Supplyzilla created by Apple. Ok, that should fit in 😉
Opening Supplyzilla is another thing. About 10 screws, a cut in my finger and 30 mins of cursing later I found the reason why I wasn’t able to get the two case-parts apart: Don’t forget to unplug the fan cable :-/
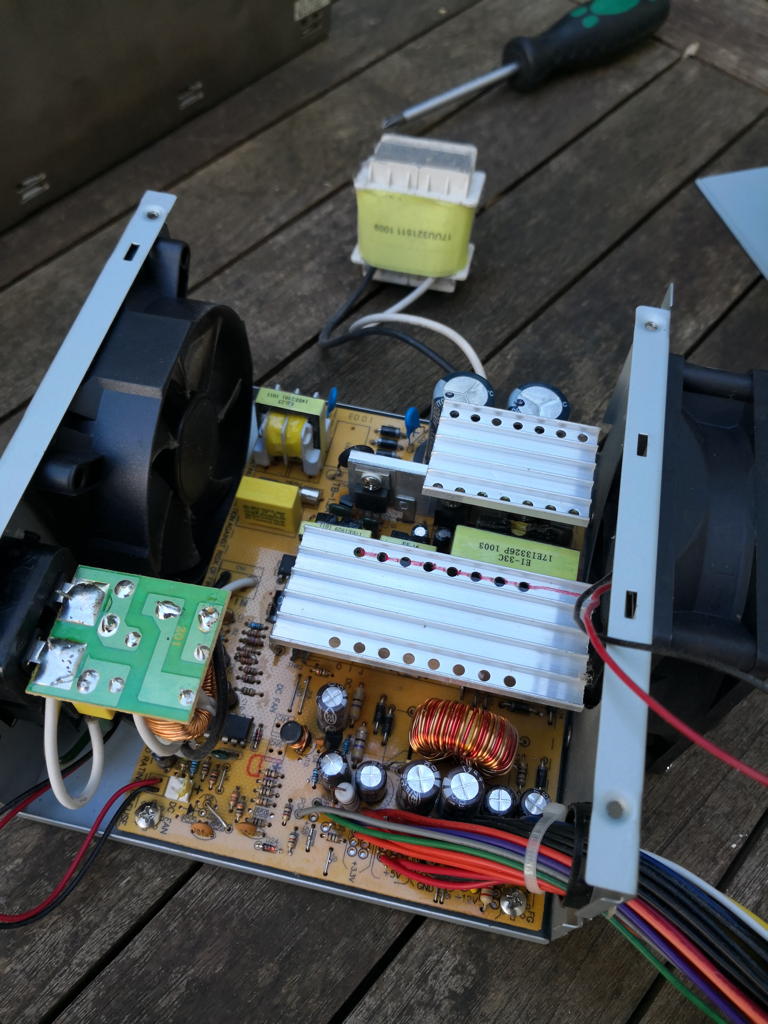
After this you can fold-open the case and have a good view onto huge capacitors, lots of dirt and 1990s tech…
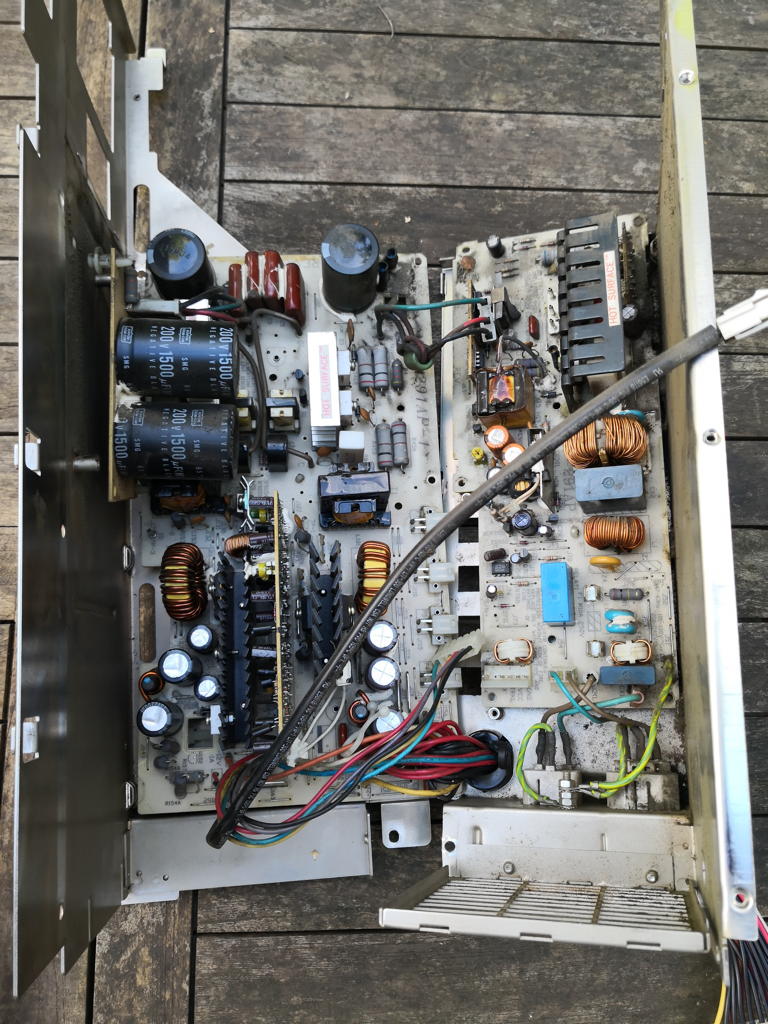
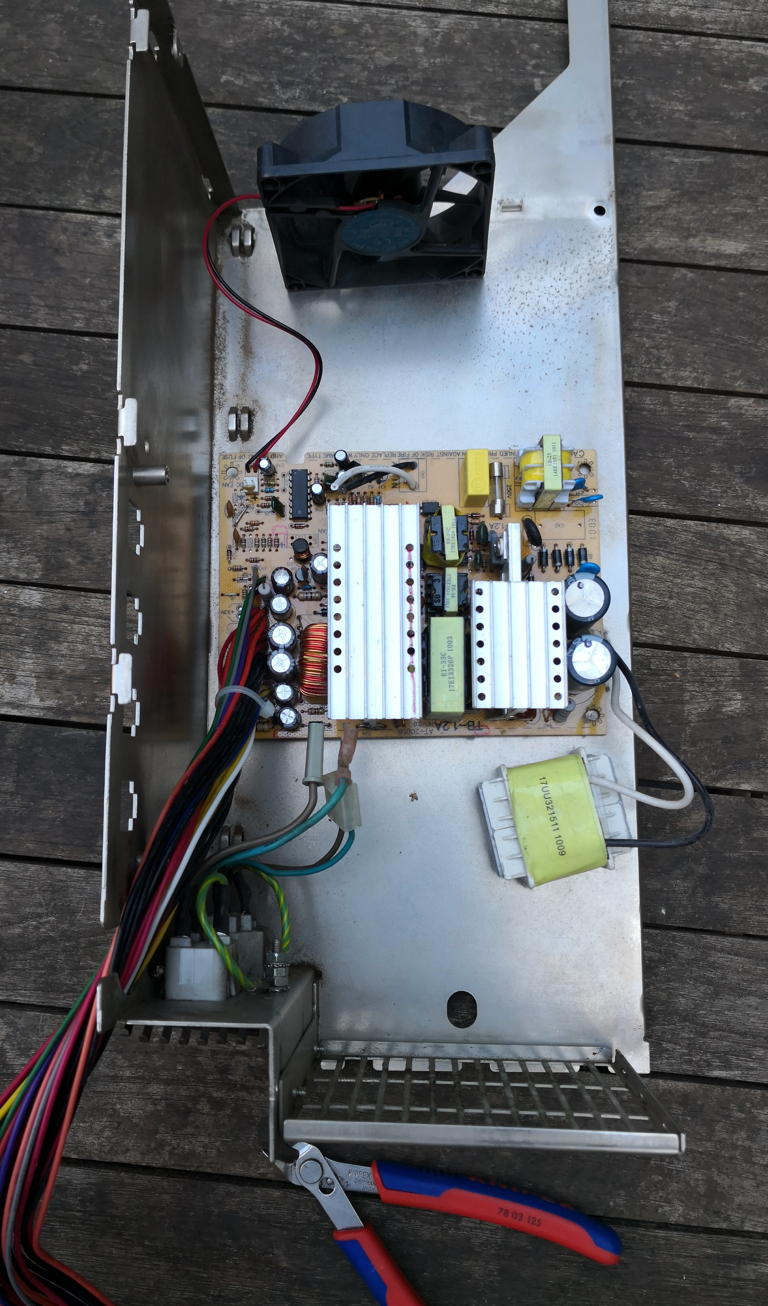
There are two PCBs each mounted to a side of the case. Unscrew and separate them – because mine was dead anyhow (and I wasn’t planning to repair it) separation was easy. Snip!
I wasn’t able to get the external cable-harness leading out of the case. So this was a 2nd snip-snap… I planned to use the original PC cables anyhow. You can reuse the original plug or use the one from the ATX PSU (if it’s a 24pin one).
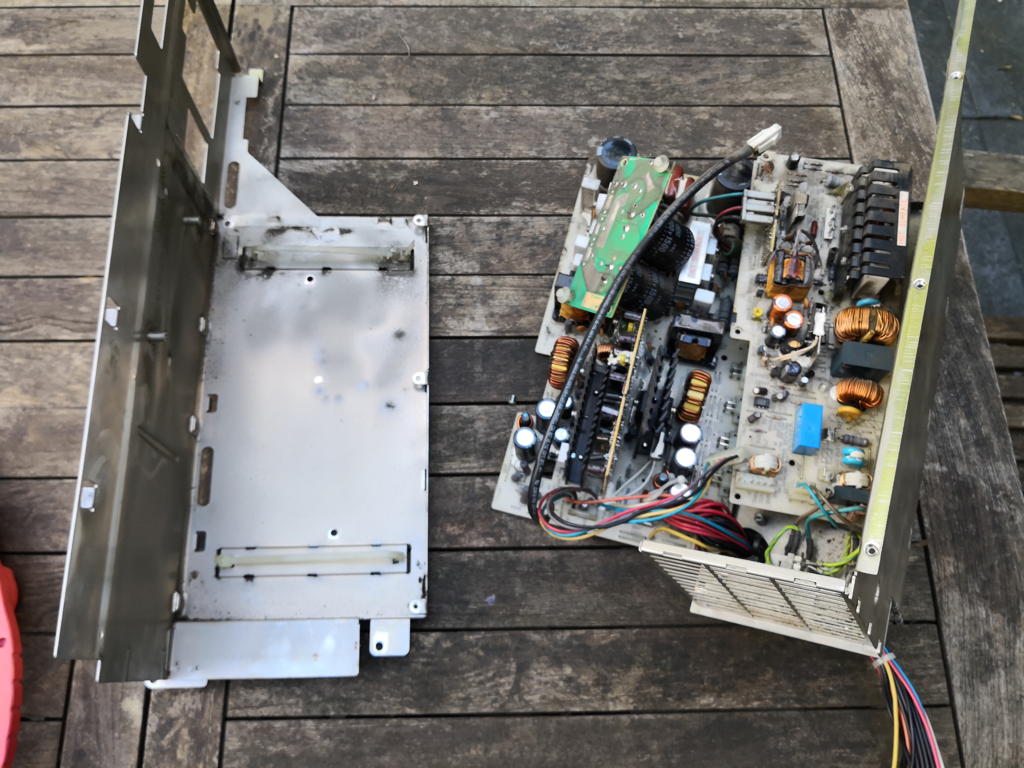
Here they are… rest in pieces 😛

Fitting room
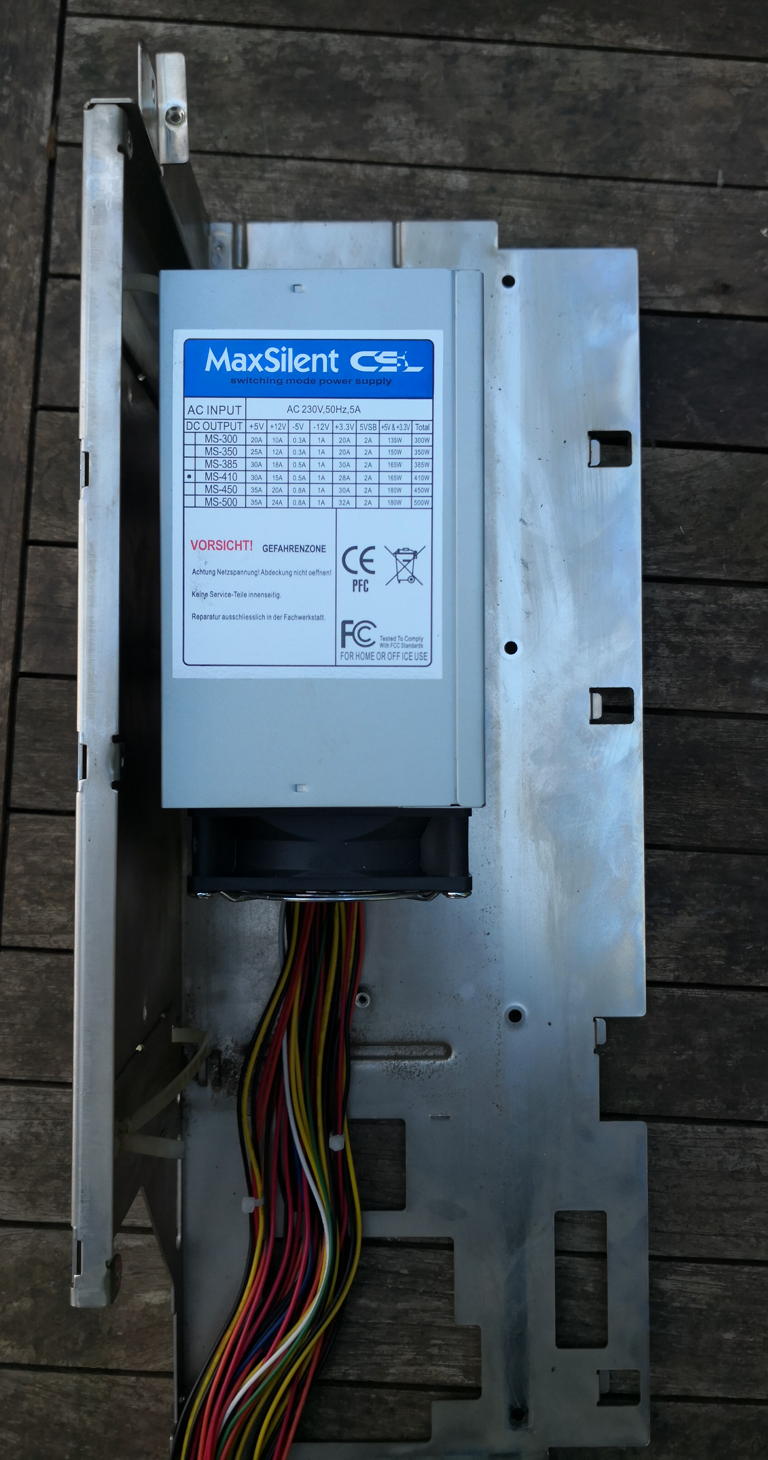
Next up: The first fitting… even still in its enclosure it would nearly fit two times.
BTW: I like the sticker saying in German “VORSICHT! GEFAHRENZONE!” (Caution, danger-zone!) That’s soooo 80’s Top-Gun 😀
Because we have to modify the ATX PSU, it had to be stripped down, too. Compared to Supplyzilla it’s pretty deserted in there…
Yes, it’s a cheapo one looking at the passive PFC and could have be designed much better, but for the 1st try it’s OK.
2nd fitting making sure all heatsinks are well placed into the airflow, cables close to outlets (the fan will be replaced by a big one, of course).
You will be assimilated…
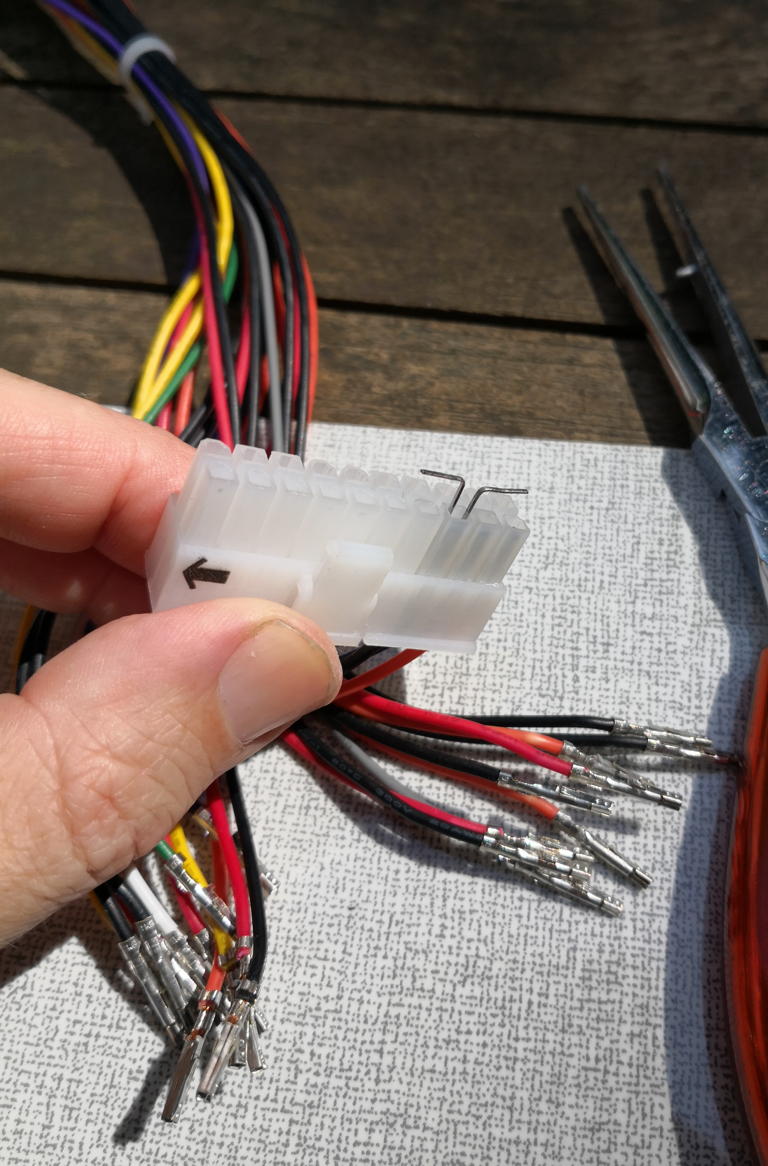
Next step was a meditational one. Loosening all 24 pins clamped into the ATX plug. I used the “cut staple method”. One to the left, one to the right, push them in, pull the cable… repeat.
Configuration of the Q950 plug will be described further down. I suggest to do this as one of the last steps. For now just tape all loosened pins together to save them from bending.
Having the preparations done, it was on to the workshop drilling some holes and cutting screw threads (optional but nicer than holes and nuts)…
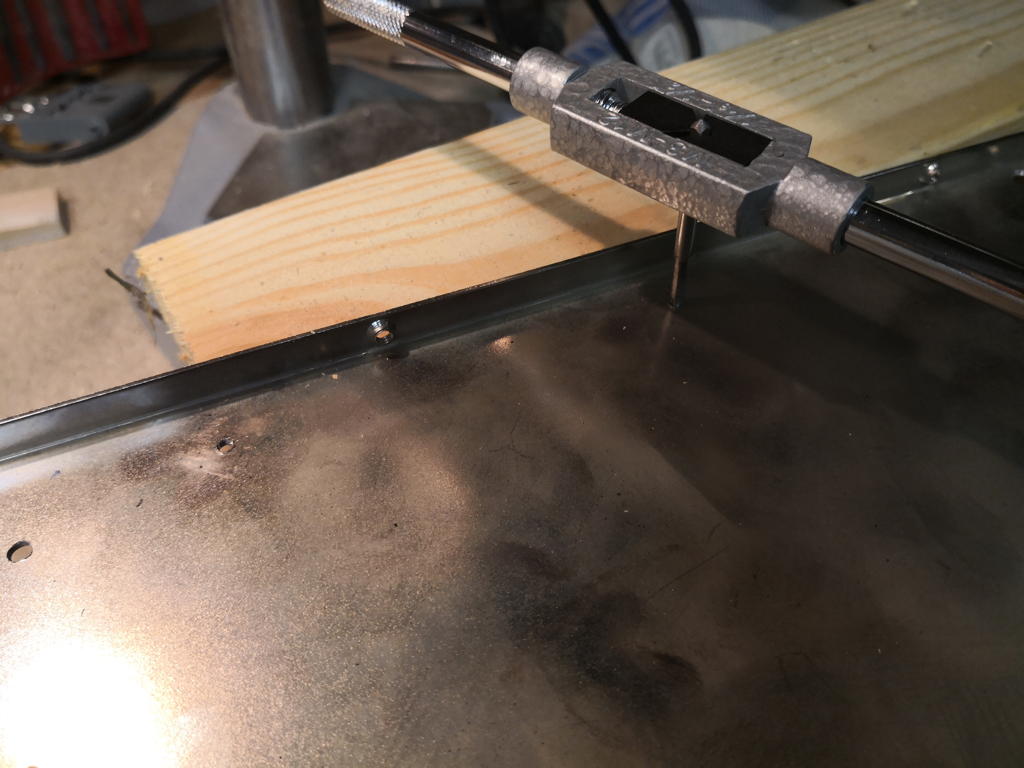
…to have a proper seating for the stand-offs. We don’t want the PCB touch the case, don’t we?
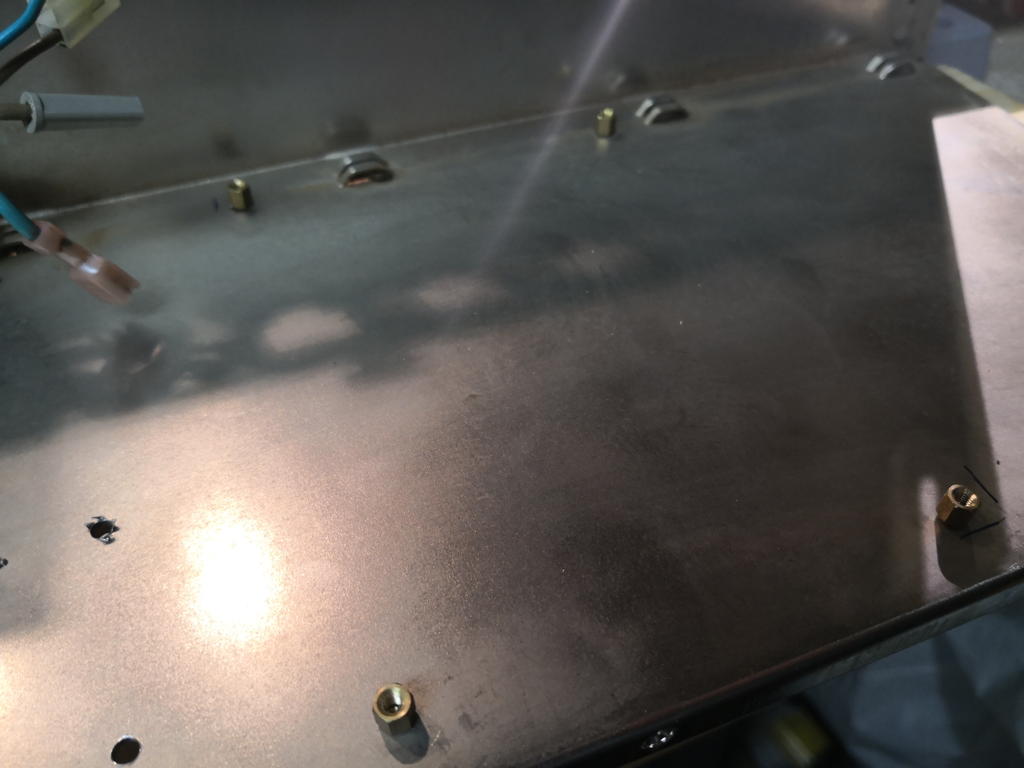
All fits nicely. The PFC screwed to the case like in its original habitat – ugly, but will do for now.
The noise filter was directly soldered to the power-out plug. Again ugly, unprofessional but OK for a try.

So the filter went into the case and unneeded cables like 3V, were shortended and kept inside the power-supply.
Connecting the dots
Now for the plug-configuration. All documentation I’ve found on the web were wrong – dead-wrong, even leading to drama…
So this is the correct pinout for Quadra 900/950’s:
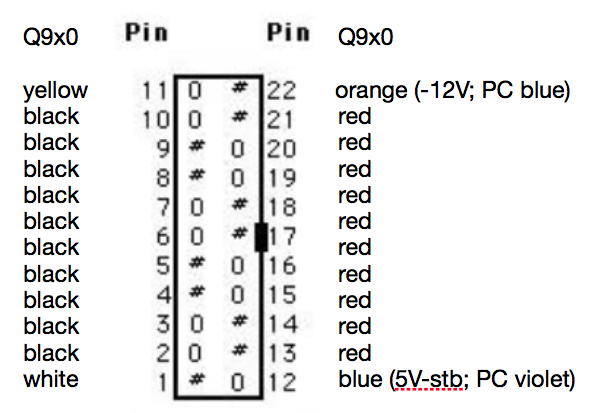
Having this, the mapping from the “Mac-plug” to your ATX-PSUs cables is pretty straightforward:
- Red (5 volts) stays red
- Black (Ground) stays black
- Yellow (+12V) also stays that way, too
- Orange (-12) is blue in your ATX-PSU
- Blue (5V standby) is the violet cable in ATX-PSUs
- White is mostly unused on ATX-PSUs – we will recycle that cable for PFW…
As for 5V/GND wires don’t worry if your ATX PSU doesn’t offer enough of them (10 each). Mine just had five 5V wires, so I populated every 2nd slot in the plug.
Killing me softly
Finally the ‘circuit’ for using the Quadras soft-power feature had to be implemented – a simple rocker-switch connecting the green (Pwr_on) wire to GND would do, but this is just so below the mighty Quadras grandeur.
I opted for the very simple, more reasonable solution using a NPN-resistor… even a 74LS04 is an overkill in this case. Just my 2ct, though.
This is the schematic, nothing spectacular:
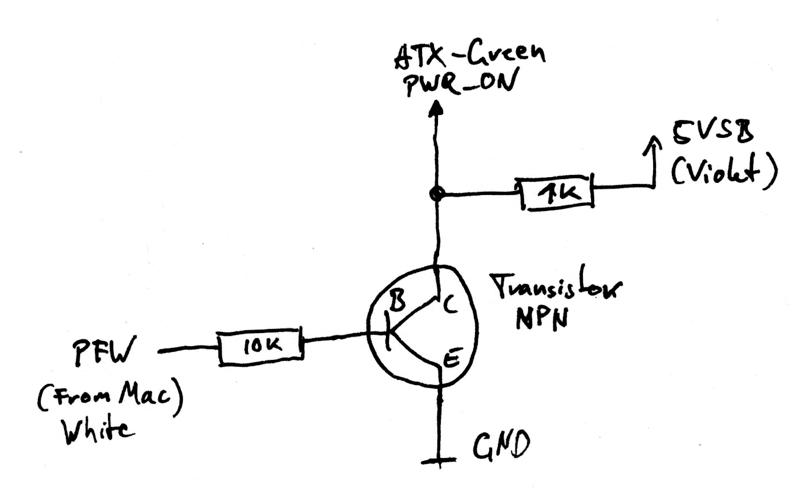
Yeah, the symbols for the resistors are European, that’s because… well, I am European 😉 As for the transistor use any NPN you can get easily. E.g. BC547 or BC549 (again, European numbering scheme, you’ll have to figure out JEDEC names if needed).
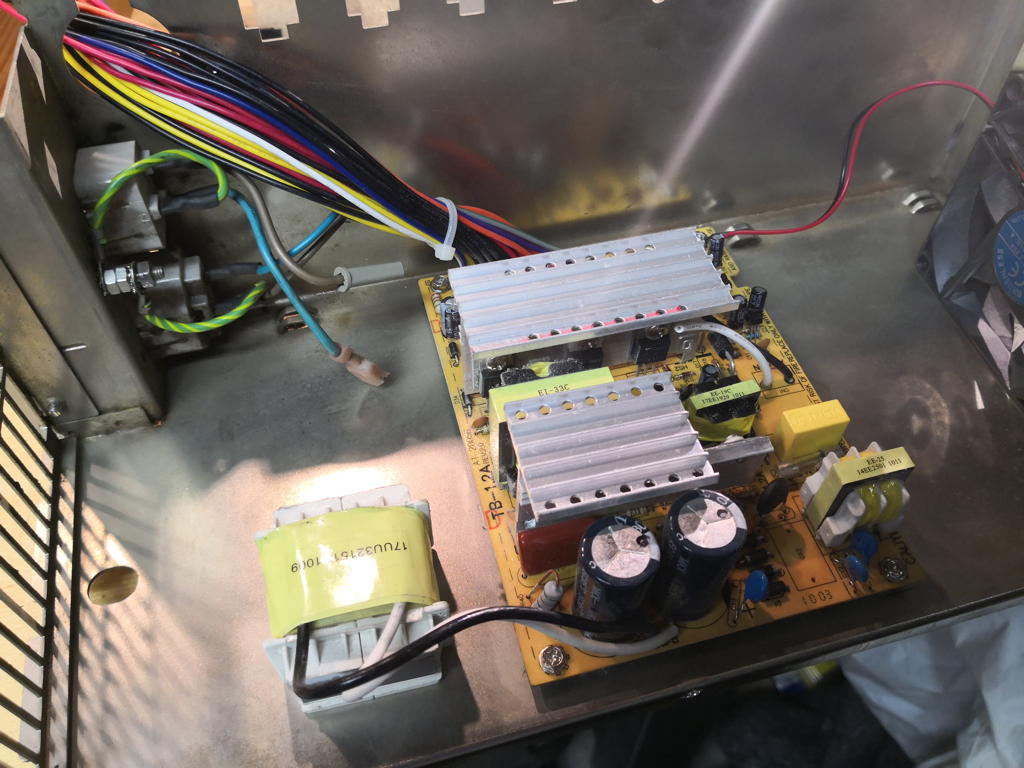
And here’s the PSU before its going to be closed and put back into my Q950.
Pink box: The soft-power ‘circuit’ (yeah, I was too lazy to create a PCB for a transistor and two resistors).
Green box: Unneeded cables been cut (3V, extra 12V, pwr_good).
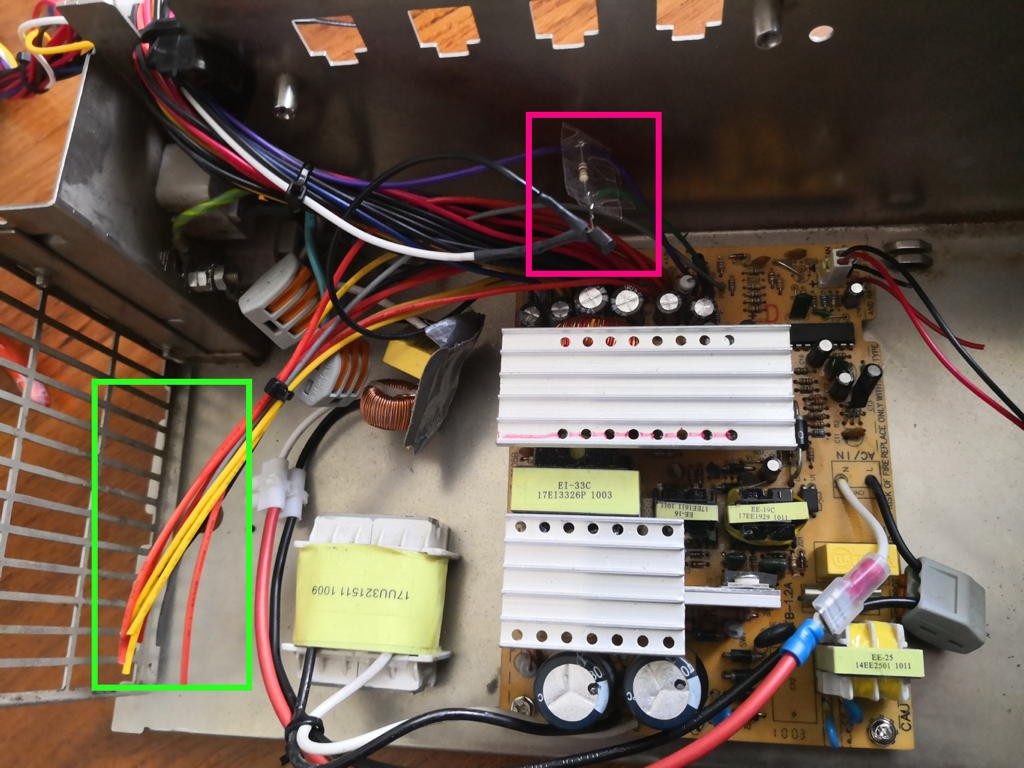
Everything else was routed outside (All 5V/GND, +12V, -12V, 5V_tickle and the white cable was cut and reused for PFW.
Hints: DON’T use the GND from fan-connectors! They might be modulated to control the fan speed and other wired things. Better use one of the e.g. unused 12V cable-pairs.
Check everything before closing the case – Again CAUTION!!! High voltage. You touch, you die!!
Woo-hoo! Lady Quadra works again!
Outlook
That was a cheap fix… about $5 in parts if you have to buy a used ATX PSU. To make things easier and look more professional I plan to design a small PCB which fits right where one of the original PSU PCBs sat, providing the 4 drive connectors (4-pin) so that you can keep using the original drive power-cables. Also I plan to add:
- the soft-power circuit
- a temperature fan speed controller
- (optional) internal 5¼” power-connectors for solder-free connection to the external 4pin connectors.